Prerequisites
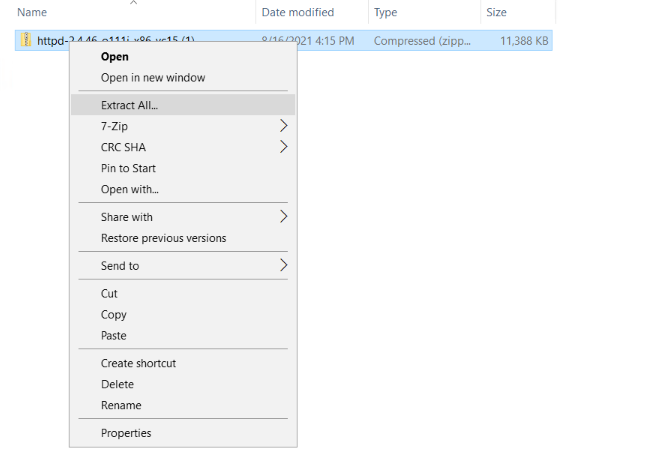
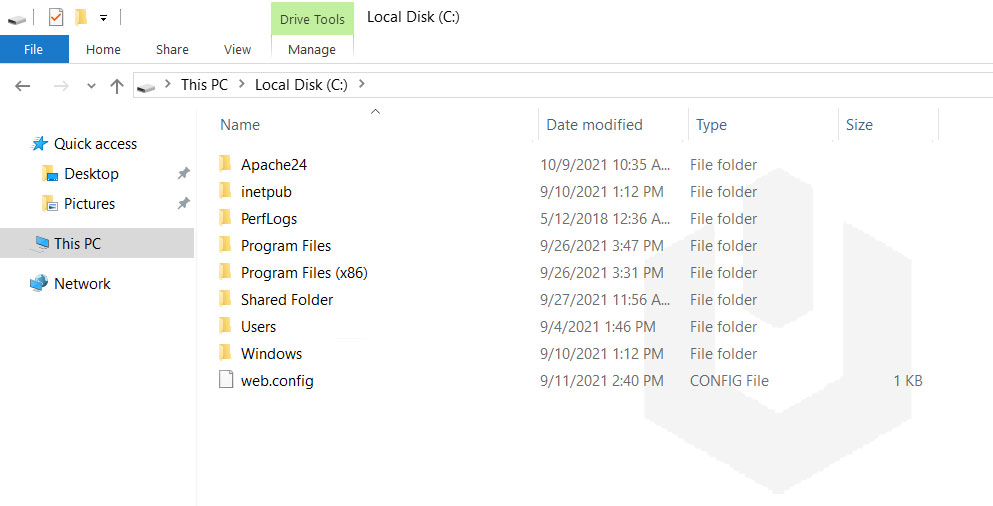
Visual C++ Installation: Before processing the installation of apache on the windows server, first, you need to install Visual C++ on the windows server. Learn: How to install Visual C++ on Windows Server? Apache Installer: Download the apache installer compressed file from the below link. Download: https://www.apachehaus.com/downloads/httpd-2.4.46-o111j-x86-vc15.zip Update Windows: We highly recommend updating windows to its latest version. Learn: How to Apply Windows Updates For Server 2012 R2, 2016?1. After downloading the Compressed Apache → Extract it using default or preffered extraction tool to C:\ Drive.
#ServerName www.example.com:80

ServerName localhost

# AllowOverride controls what directives may be placed in .htaccess files.

# It can be “All”, “None”, or any combination of the keywords:

#   AllowOverride FileInfo AuthConfig Limit

AllowOverride None

# AllowOverride controls what directives may be placed in .htaccess files.

# It can be “All”, “None”, or any combination of the keywords:

#   AllowOverride FileInfo AuthConfig Limit

AllowOverride All

#LoadModule rewrite_module modules/mod_rewrite.so

LoadModule rewrite_module modules/mod_rewrite.so
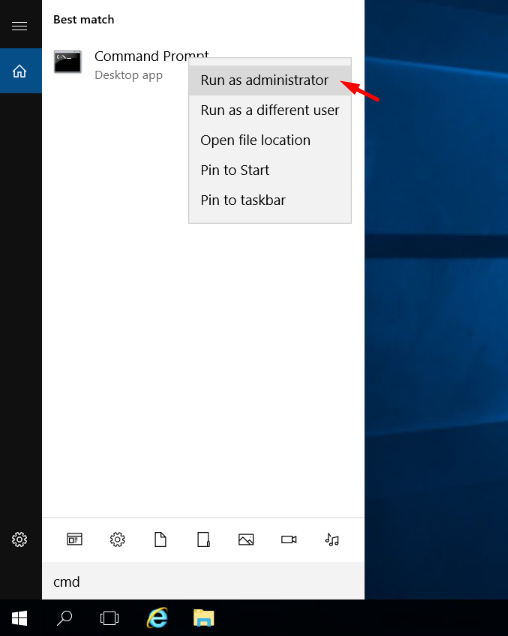
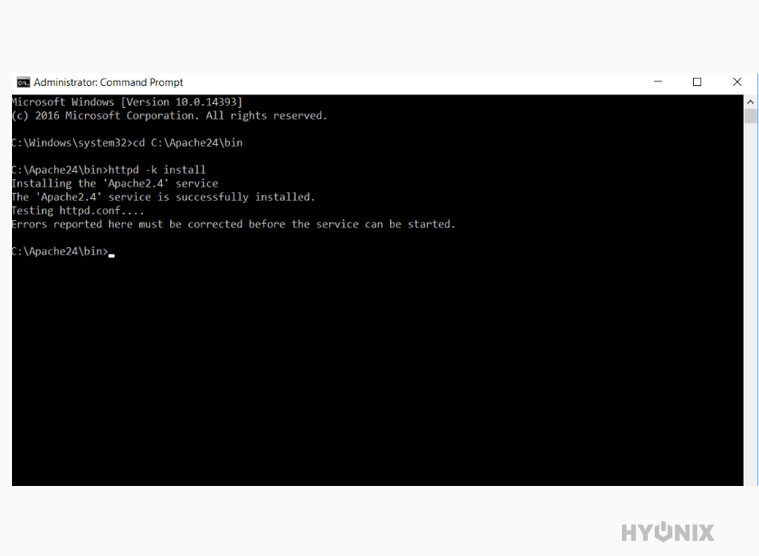
3. Now, open Command Prompt (CMD) as Administrator.
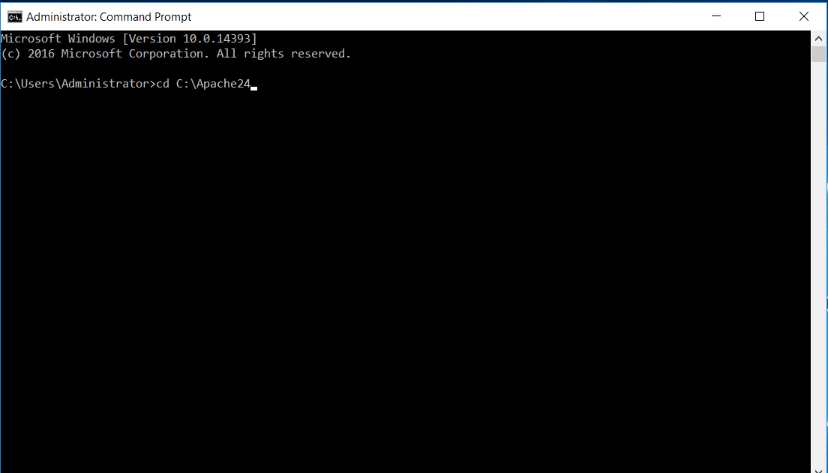
 4. Navigate to extracted Apache24 directory.
 4. Navigate to bin using cd bin.
 5. Run the program using command prompt httpd.exe -k install.
Allow Port In Firewall
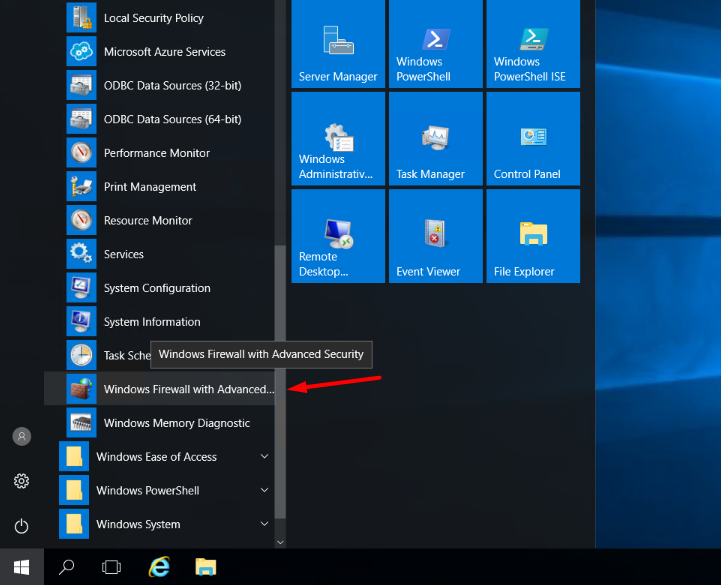
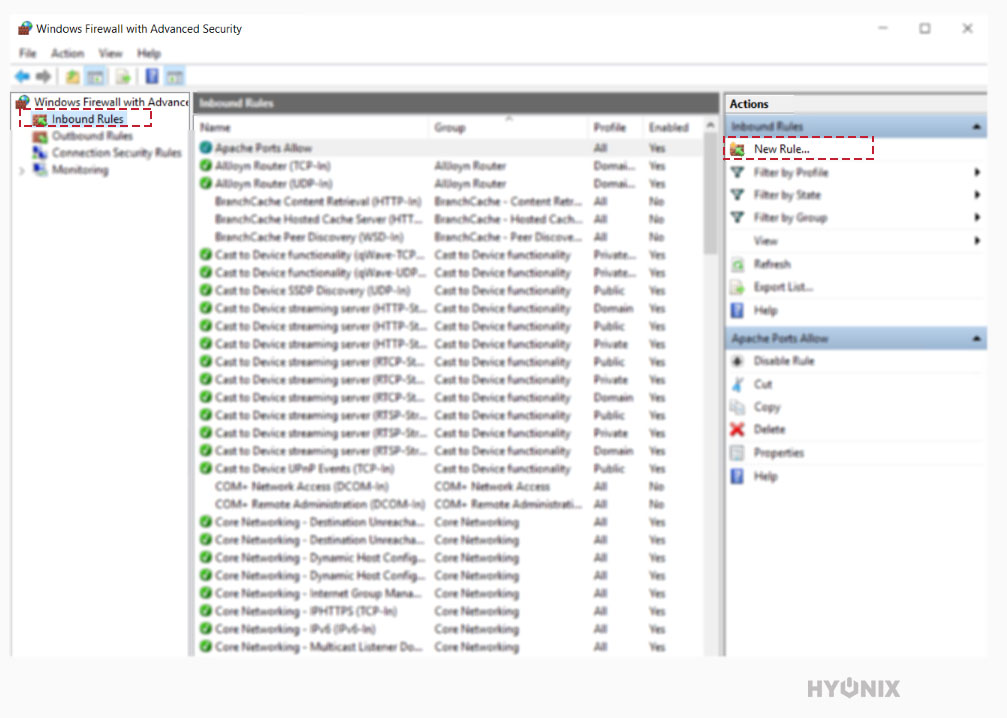
1. Log in to Windows Server → Start → Administrative Tools → Windows Firewall with Advanced Security.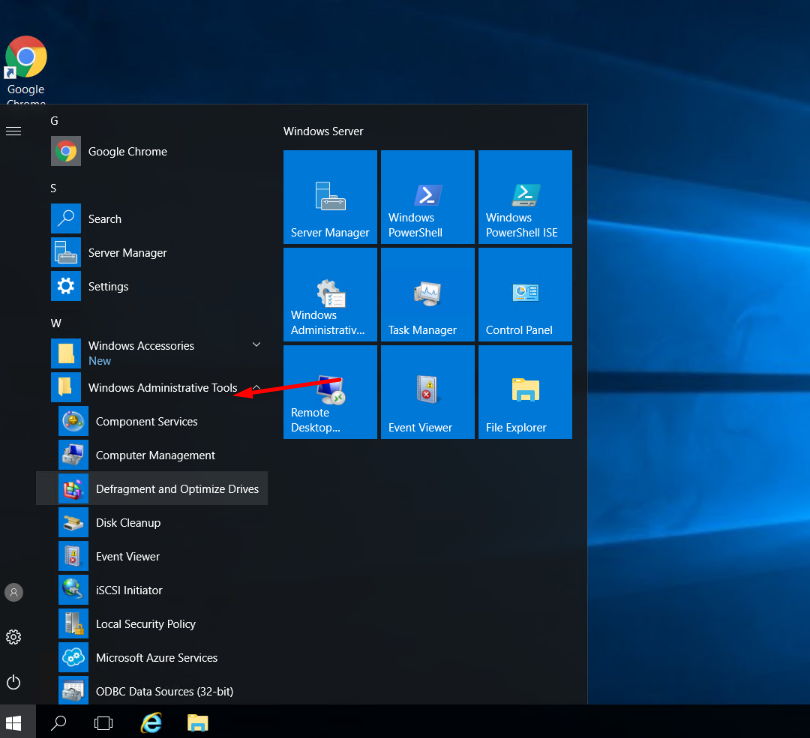
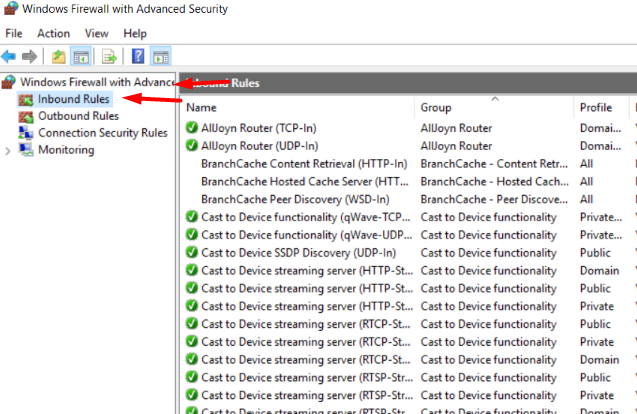
 2. Navigate to Windows Firewall with Advanced Security → Inbound Rules.
 3. To create new rule, Click on “New Rule“.
 4. Select TCP → In Specific Local Port, Enter: 80, 8080, 443 → Click on Next.
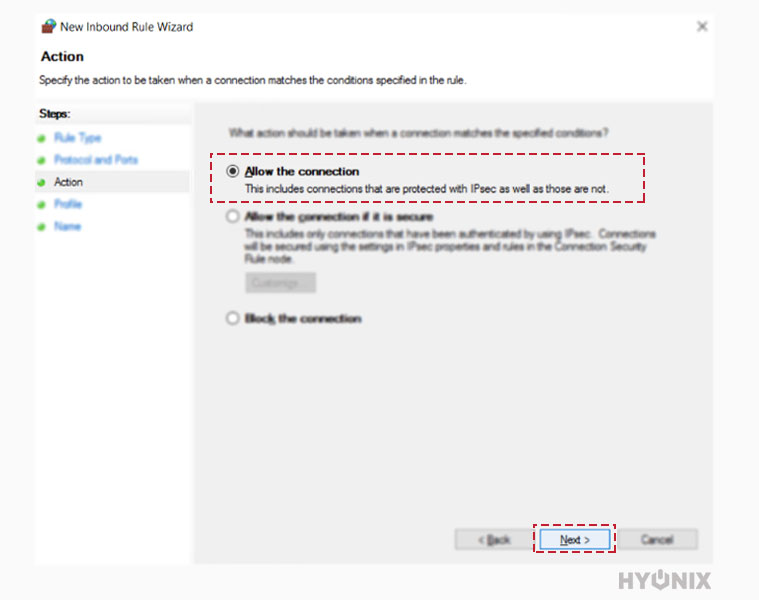
 5. In Action, select Allow Connections → Click on Next.
Allow the connection: This includes connections that are protected with IPsec as well as those that are not.
Allow the connection if it is secure: This includes only connections that have been authenticated by using IPsec. Connections will e secured using the settings in IPsec properties and rules in the Connection Security Rule node.
5. In Action, select Allow Connections → Click on Next.
Allow the connection: This includes connections that are protected with IPsec as well as those that are not.
Allow the connection if it is secure: This includes only connections that have been authenticated by using IPsec. Connections will e secured using the settings in IPsec properties and rules in the Connection Security Rule node.
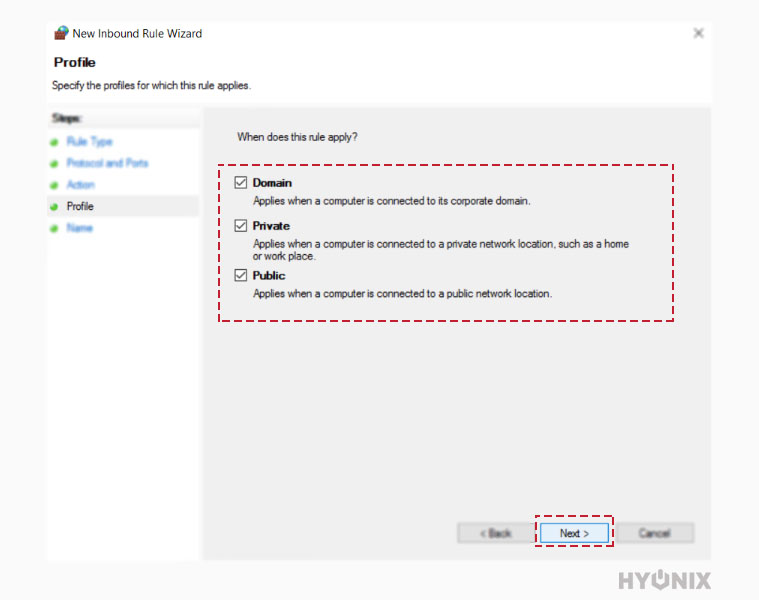
 6. In the Profile tab, you need to select the below options and click “Next“,
Domain: This applies to when the computer connected to the corporate domain.
Private: This applies to when the computer connected to the private network.
Public: This applies to when the computer connected to the public network.
6. In the Profile tab, you need to select the below options and click “Next“,
Domain: This applies to when the computer connected to the corporate domain.
Private: This applies to when the computer connected to the private network.
Public: This applies to when the computer connected to the public network.
 7. In the Name section, you need to specify Name for your Custom Rule → Finish.
