Companies and workgroups may need to share documents or files within one network. Windows includes a network-based File Sharing/Directory Sharing option in the Windows Servers Operating System to solve this problem. Only network-connected users can access shared folders. At the setup time, the administrator must assign specific permissions within the workgroup and secure the network with proper security practices. In this article, we will cover how to create and access shared folders in Windows server through computer management.
How to Create a Shared Folder (SMB)
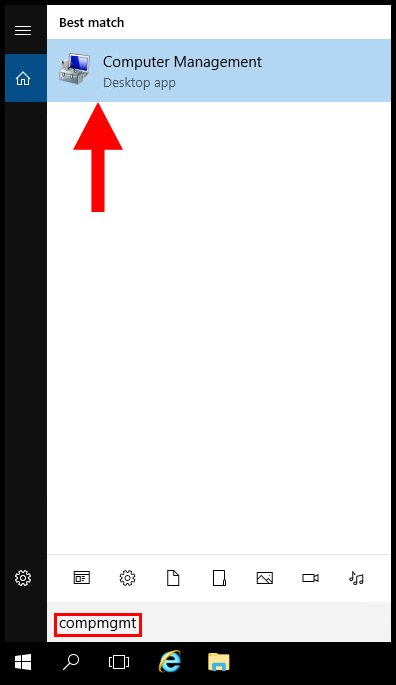
1. To start off, log in to your Windows server then search and open Computer Management.
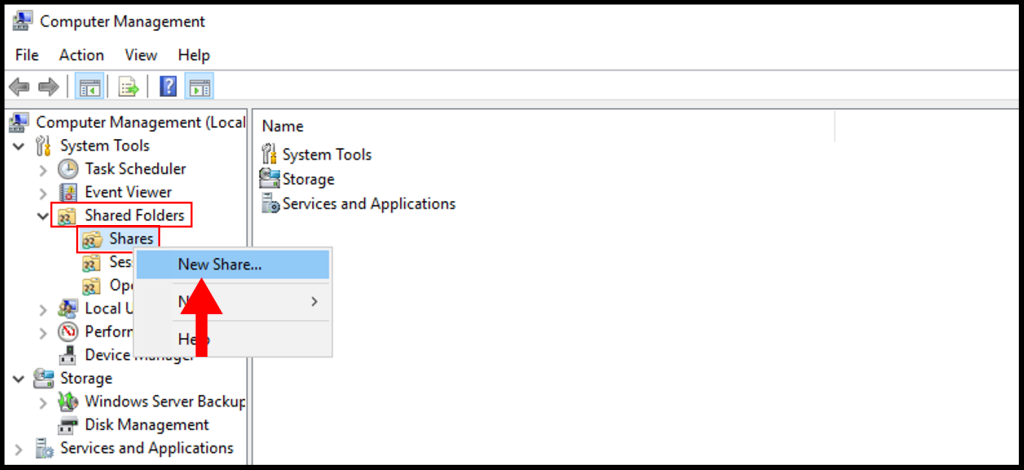
2. Once the Computer Management window is open, expand System Tools and Shared Tools, then right-click Shares and click New Share.
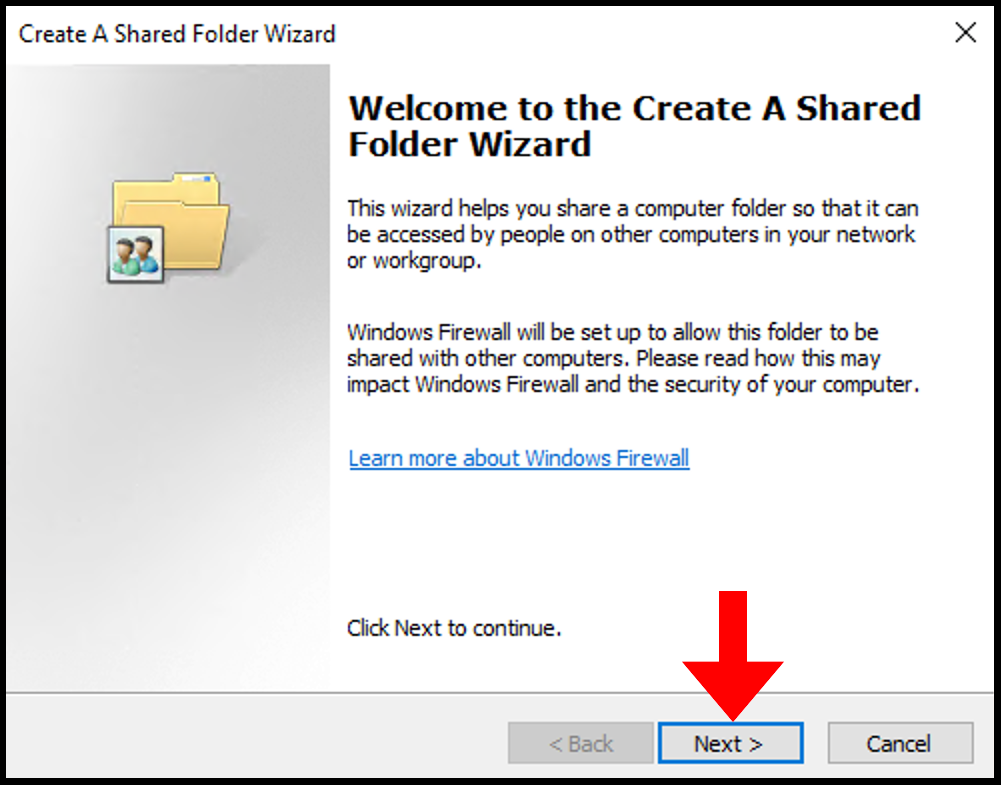
3. Next, the Create A Shared Folder Wizard window will open, and click Next to move forward.
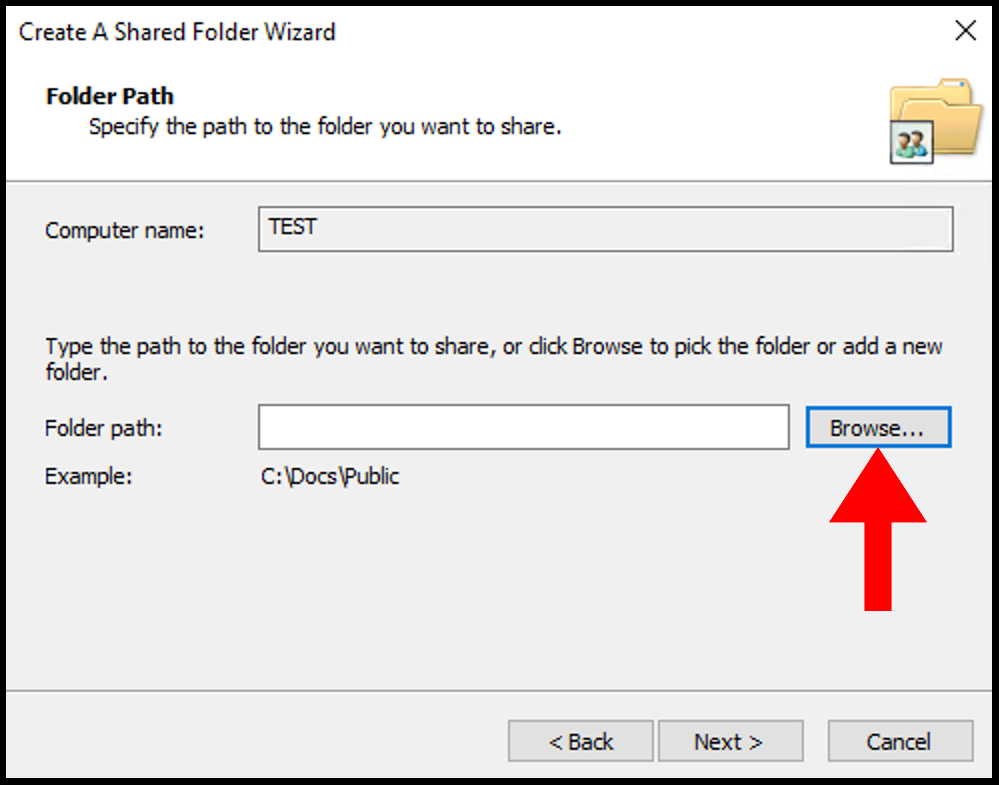
4. In this step, you can select a folder you’d like to share or create a new folder. You can do this by clicking Browse.
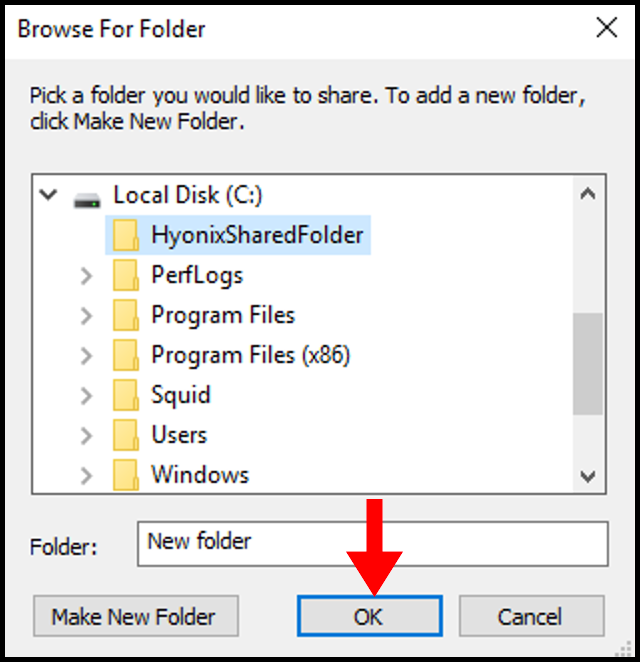
5. For the purposes of this guide, we will be creating a new folder in the Local Disk (C:) as seen below but you may select a folder to share. Click OK once you have selected or created a folder to share.
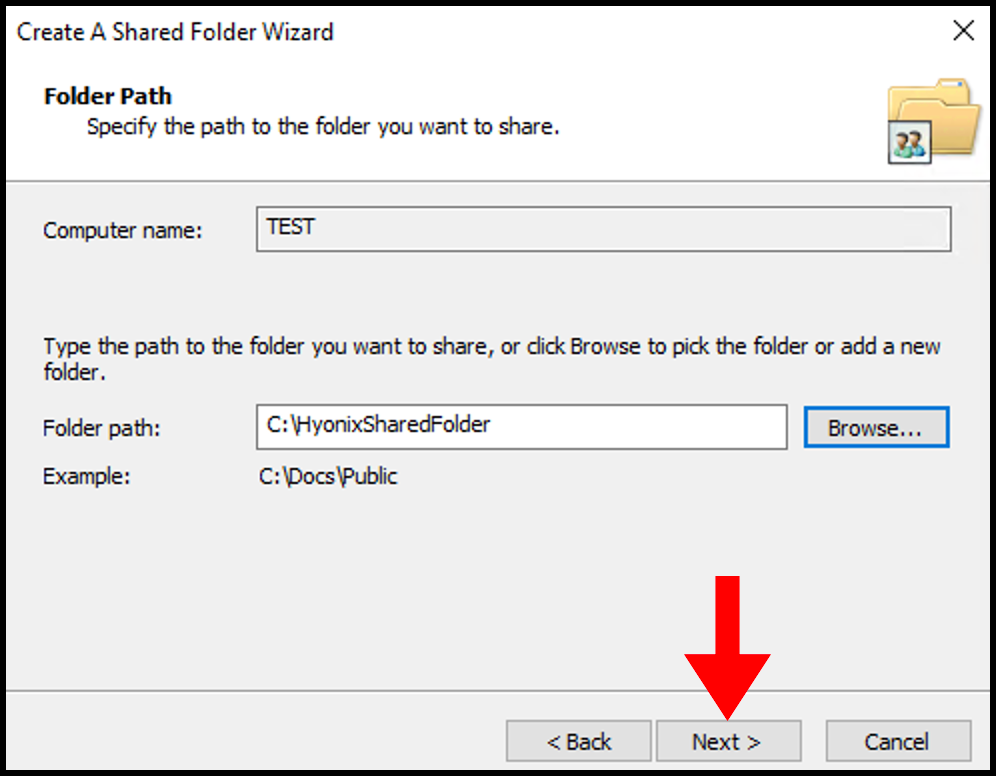
6. Once you are done selecting the folder, click Next
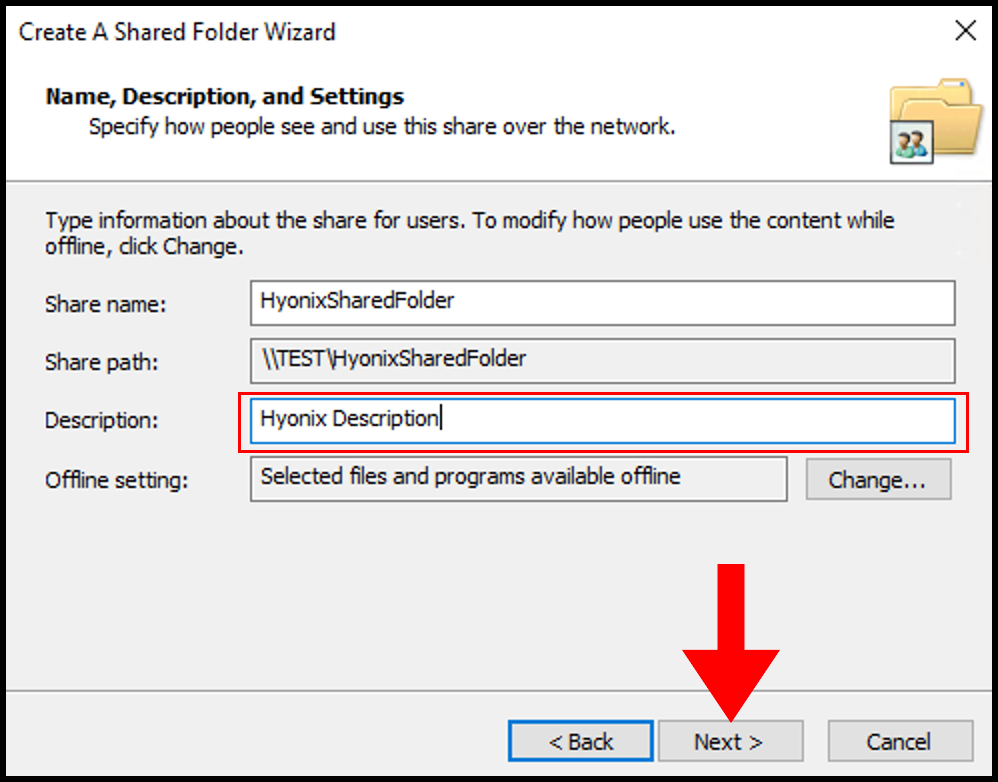
7. Here, you can find Share Name, Share Path, Description, and offline settings. You can also fill out a description in the description text field, once done click Next to move on.
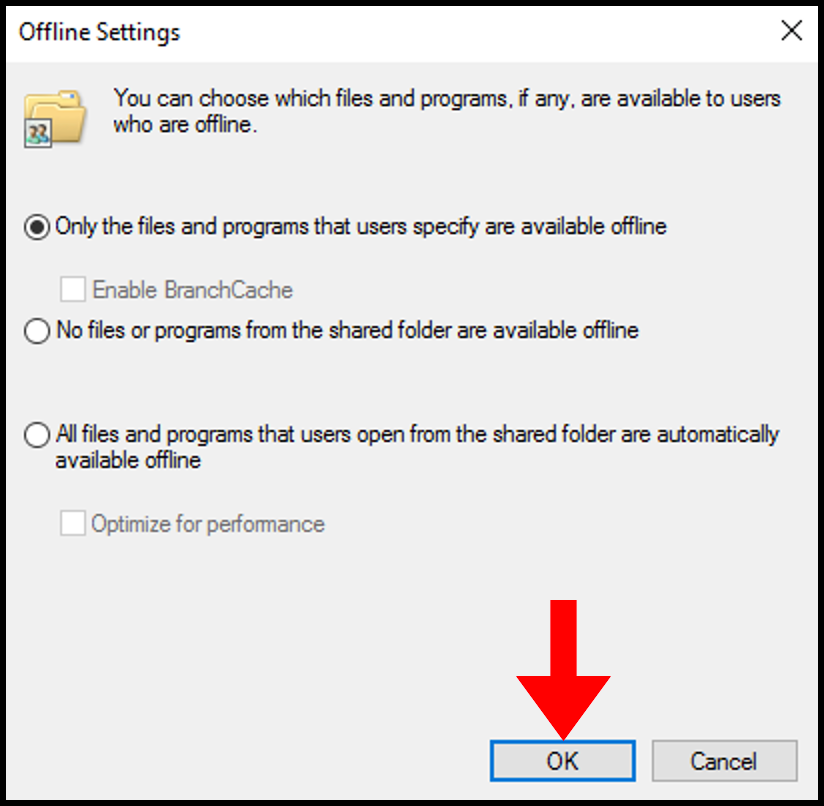
8. (Optional) You can change the offline settings if files and/or programs are accessible offline by users and/or administrators.
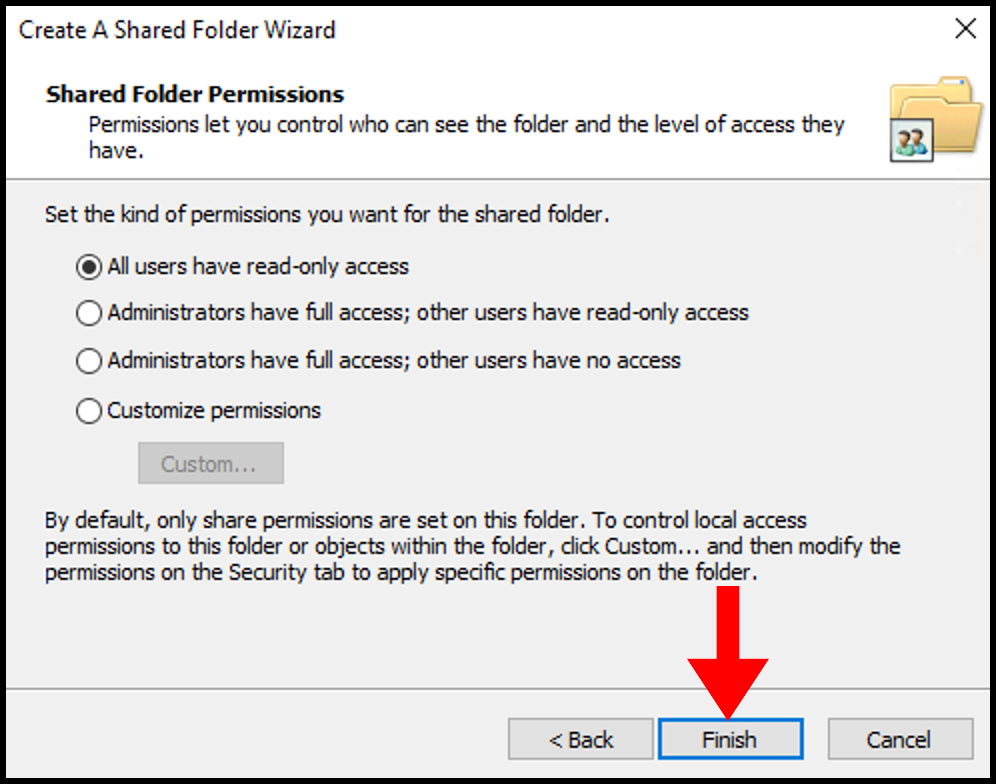
9. In the Shared Folder Permissions tab, you can select the appropriate permissions for the end-user who can access the shared folder in Windows once you are done click Finish.
- All users have read-only- access.
- Administrators have full access; other users have read-only access.
- Administrators have full access; other users have no access.
- Customize Permissions: Using this option, you can grant all the (Full Access) permissions to the users. We recommend knowingly carefully choosing the permission options.
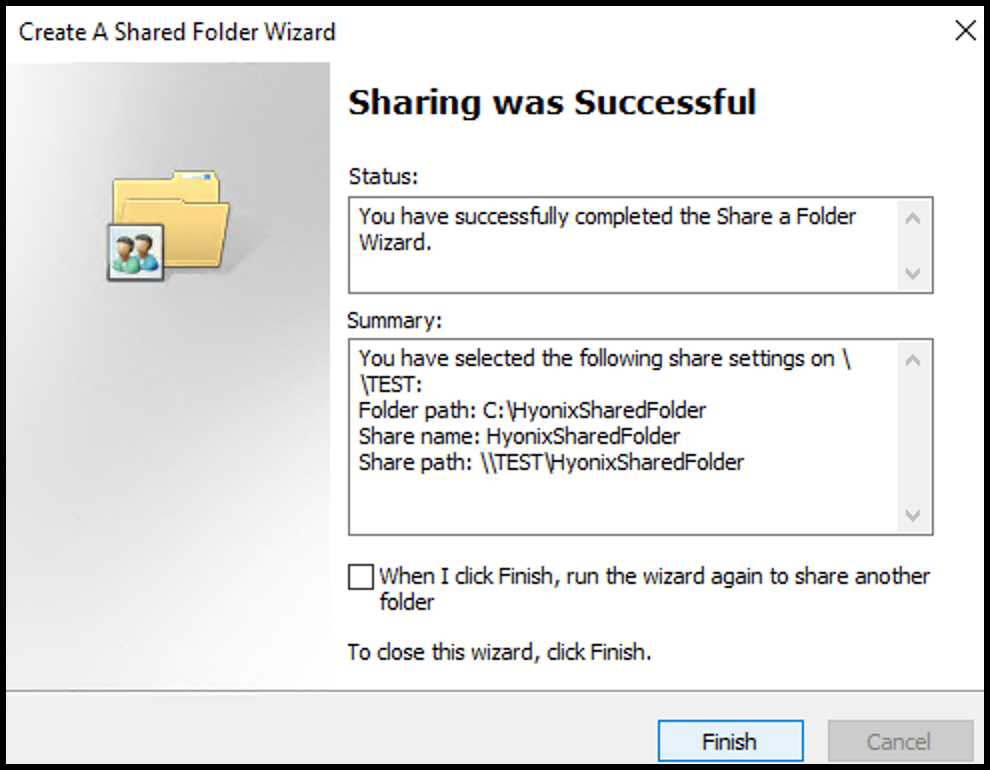
10. Congratulations! You have successfully created Shared Folder in the Windows Server. You may close out of the wizard by clicking Finish.
How to Access a Shared Folder
Now we have created a shared folder that is accessible by every other user associated with this windows server. To access the shared folder, you need to map it as a drive in the windows machine providing the path. Want to know how? Follow the below steps,
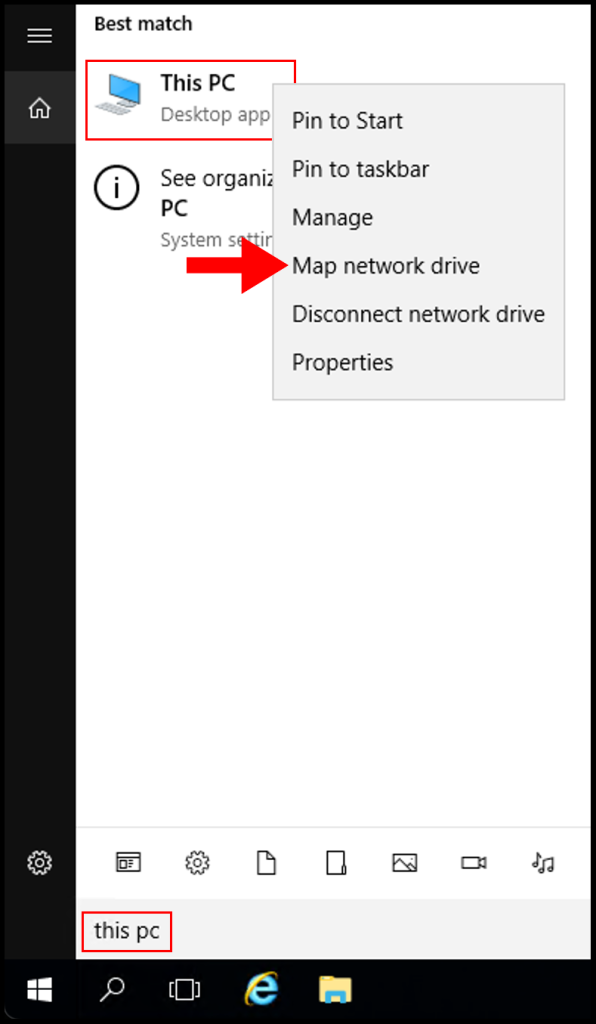
1. To start off, log in to your Windows server then search and right-click This PC. From the menu that appears, click Map network drive.
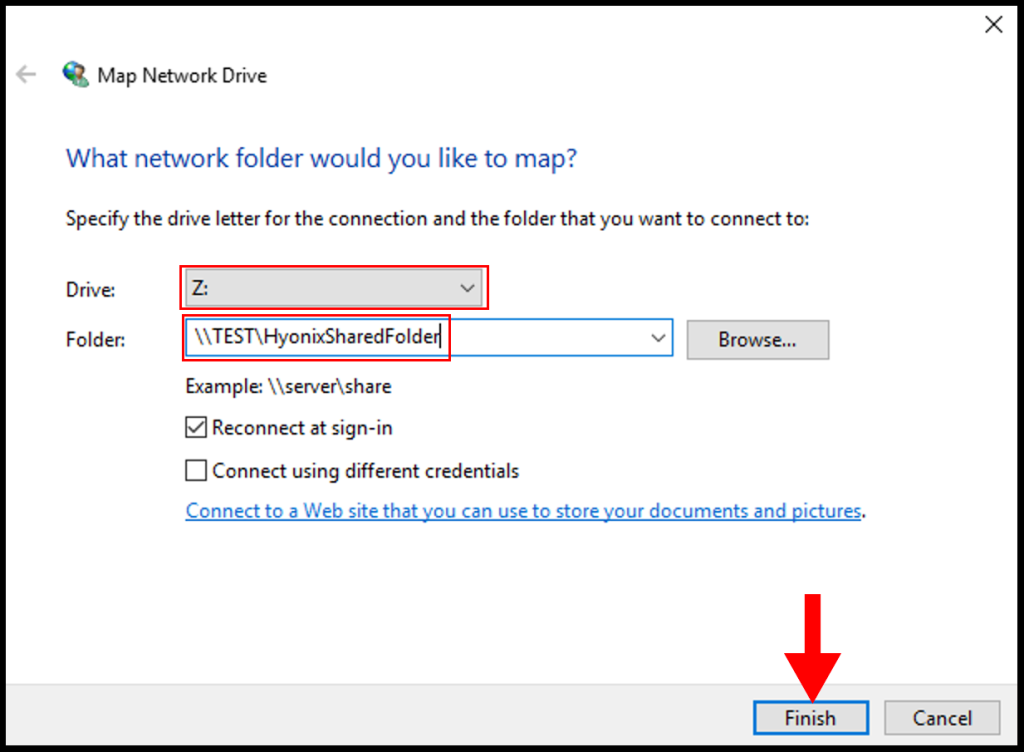
2. On the Map Network Drive window, you can specify a drive letter and you will need to specify the folder in the format \serversharedfoldername. Once you’re done click Finish.
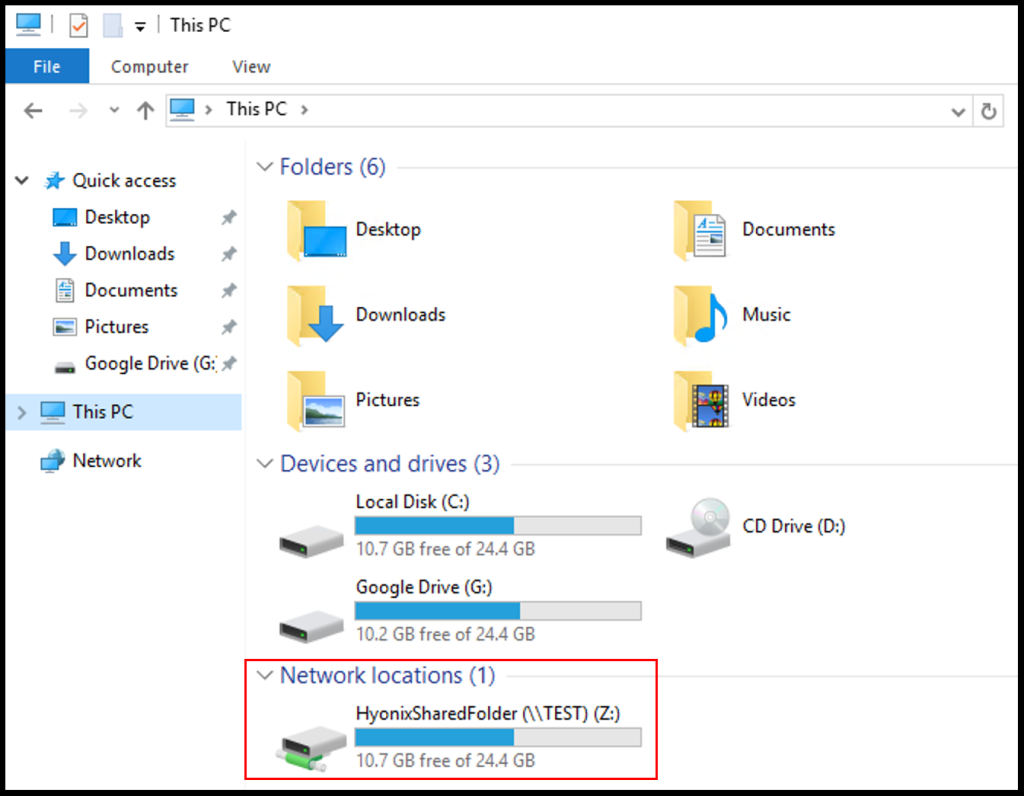
3. Now you can find the shared folder by going to File Explorer and clicking This PC and it will appear similar to the below image.