In this article, you will learn How to enable Copy and Paste (Clipboard) in Remote Desktop. We will go over how to enable clipboard on Remote Desktop for different operating systems such as Windows, Android, macOS, and iOS.
What is Clipboard?
The clipboard is a temporary buffer, in which content will be stored temporarily in system RAM. For example, if you copy anything, temporarily that content will be copied into the Clipboard.
How to enable Copy and Paste (Clipboard) for Remote Desktop in Windows
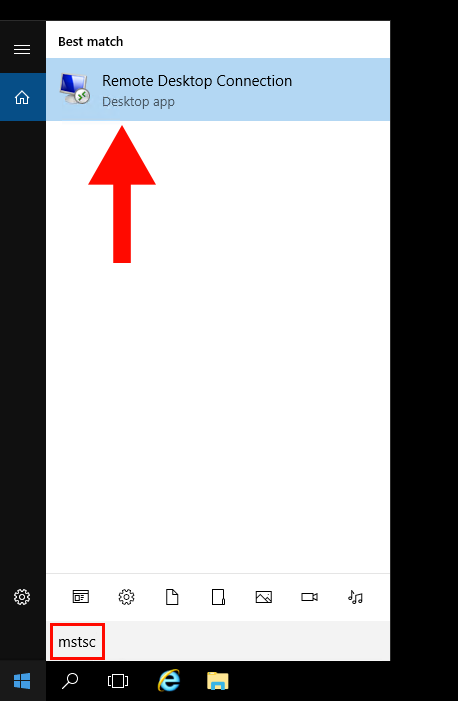
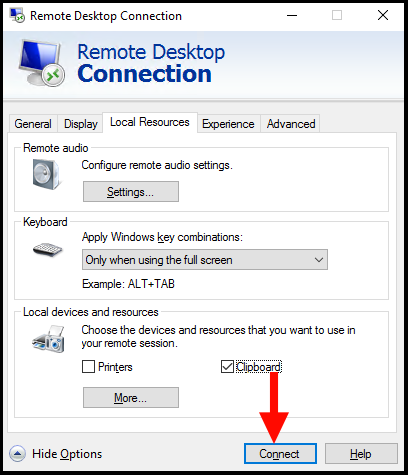
1. Get started by searching Remote Desktop Connection or mstsc in the search box.
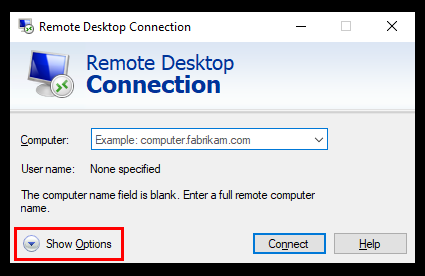
2. Next, click on the Show Options drop-down.
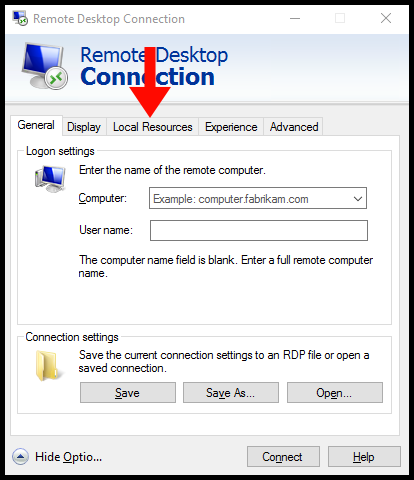
3. Then, navigate to the Local Resources tab.
4. Next, tick the box next to the Clipboard option.
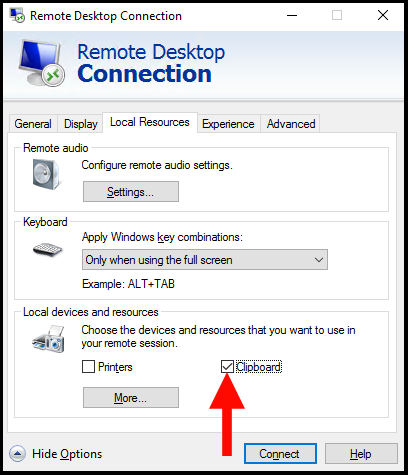
5. Lastly, connect to your server. Now you will be able to use the clipboard from your local device to your server or vice-versa.
How to enable Copy and Paste (Clipboard) for Remote Desktop in Android
Please follow this guide if you already have an existing Remote Desktop profile. If not, please follow How to Connect to Windows VPS using RDP to save a Remote Desktop profile.
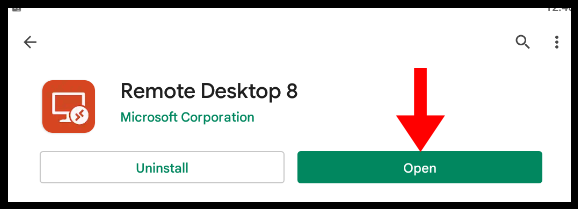
1. Open the Remote Desktop application by Microsoft Corporation.
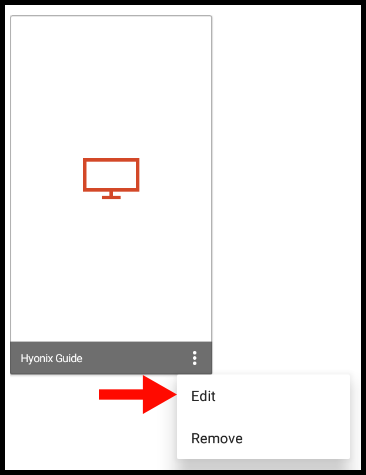
2. Next, click on •••, then select Edit.
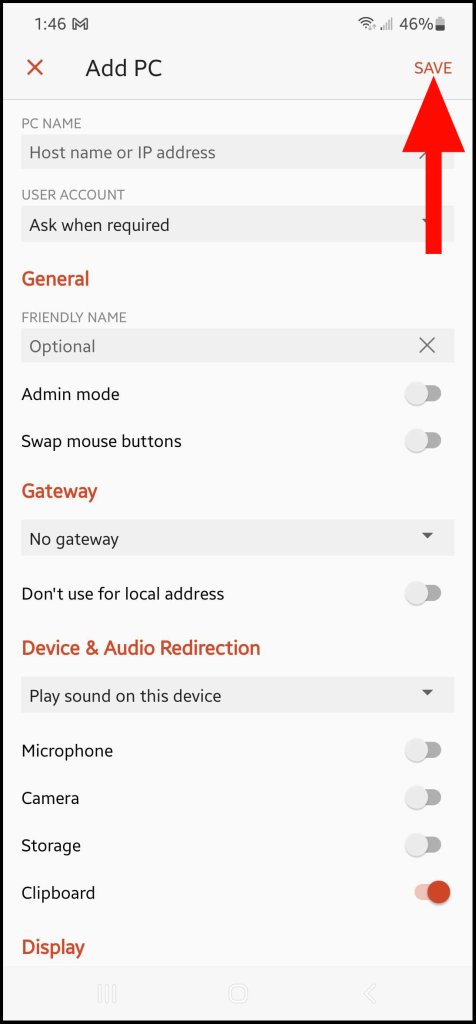
3. Then, navigate to the Devices & Audio Redirection section towards the bottom of the screen, and enable the Clipboard option.
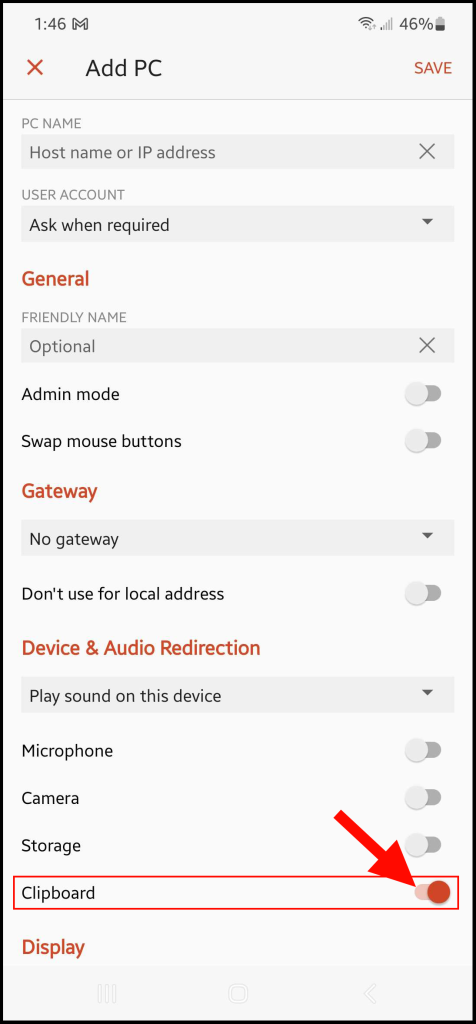
4. Lastly, click on Save to finalize the changes. Now you will be able to use the clipboard from your local device to your server or vice-versa.
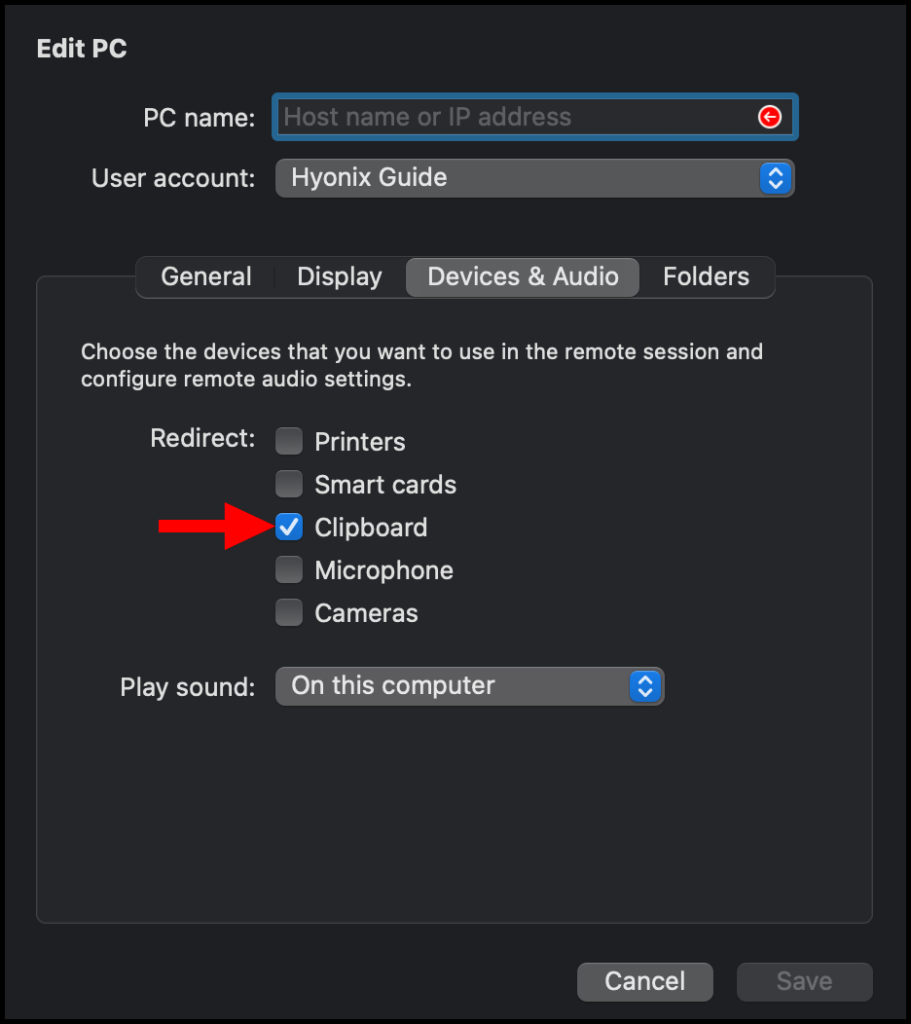
How to enable Copy and Paste (Clipboard) for Remote Desktop in macOS
Please follow this guide if you already have an existing Remote Desktop profile. If not, please follow How to Connect to Windows VPS using RDP to save a Remote Desktop profile.
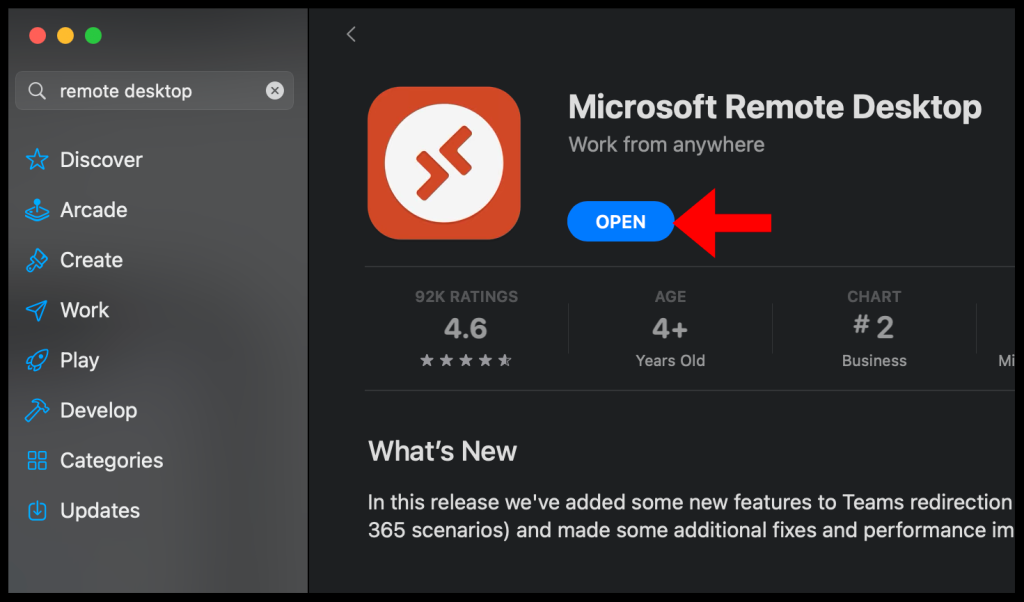
1. First, open the Microsoft Remote Desktop application.
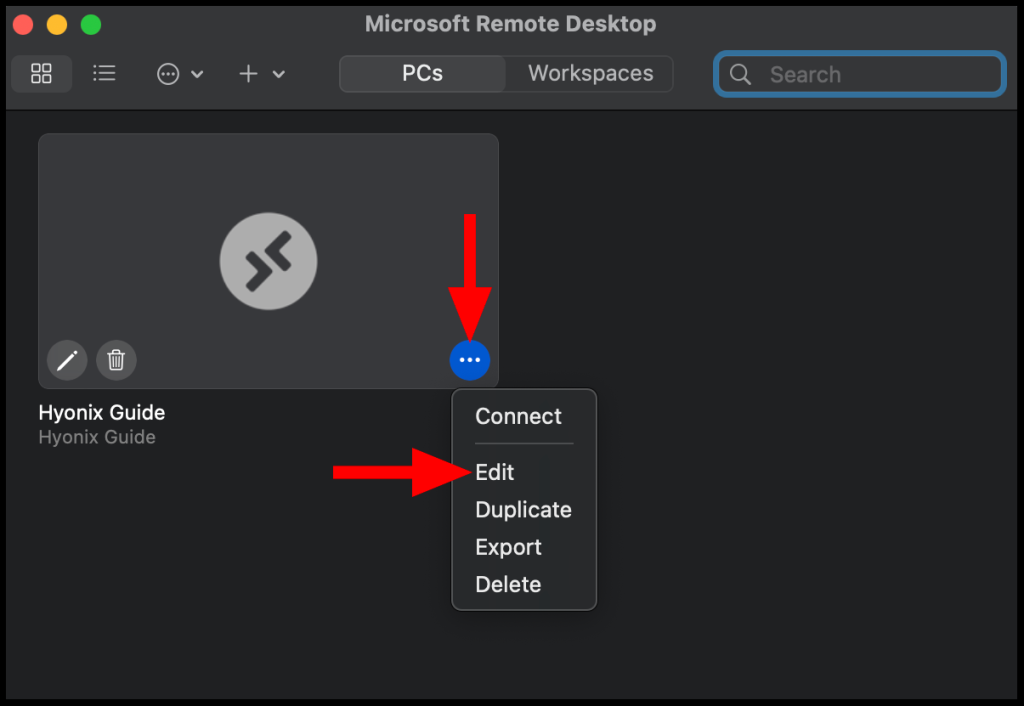
2. Once Remote Desktop is open, click the ••• button and select the Edit option.
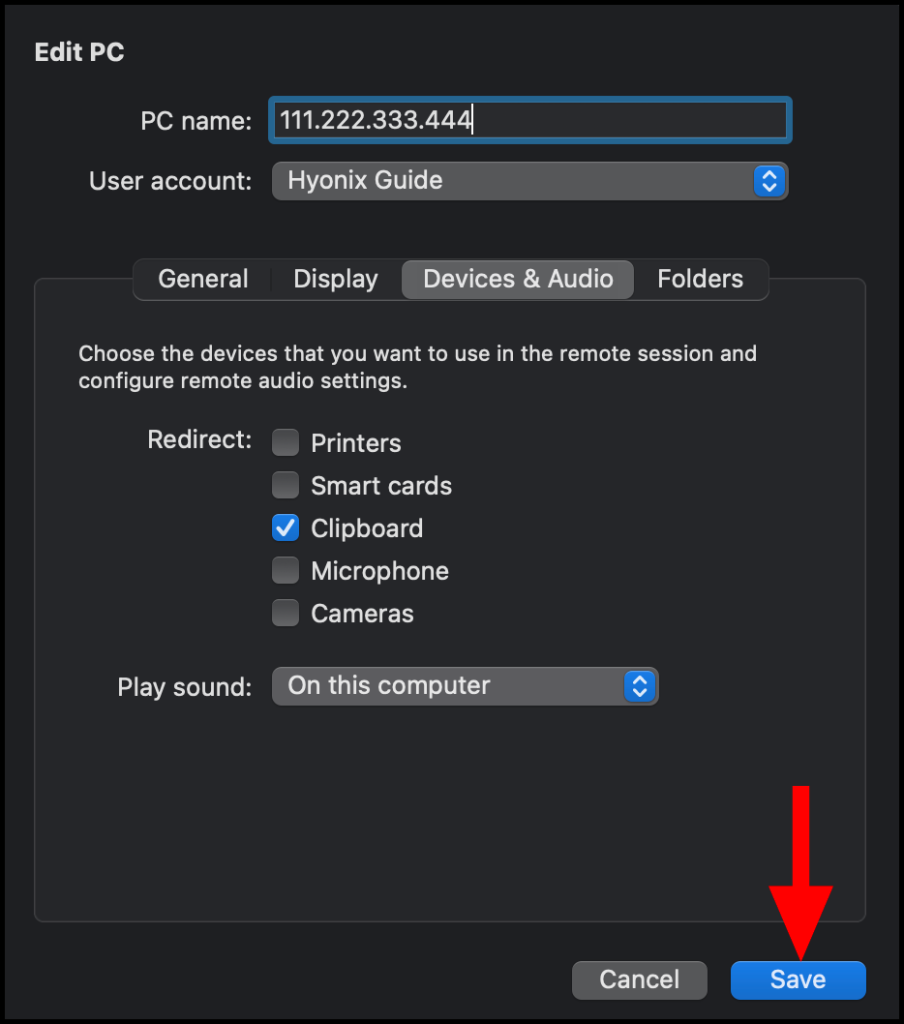
3. Then, navigate to the Devices & Audio option.
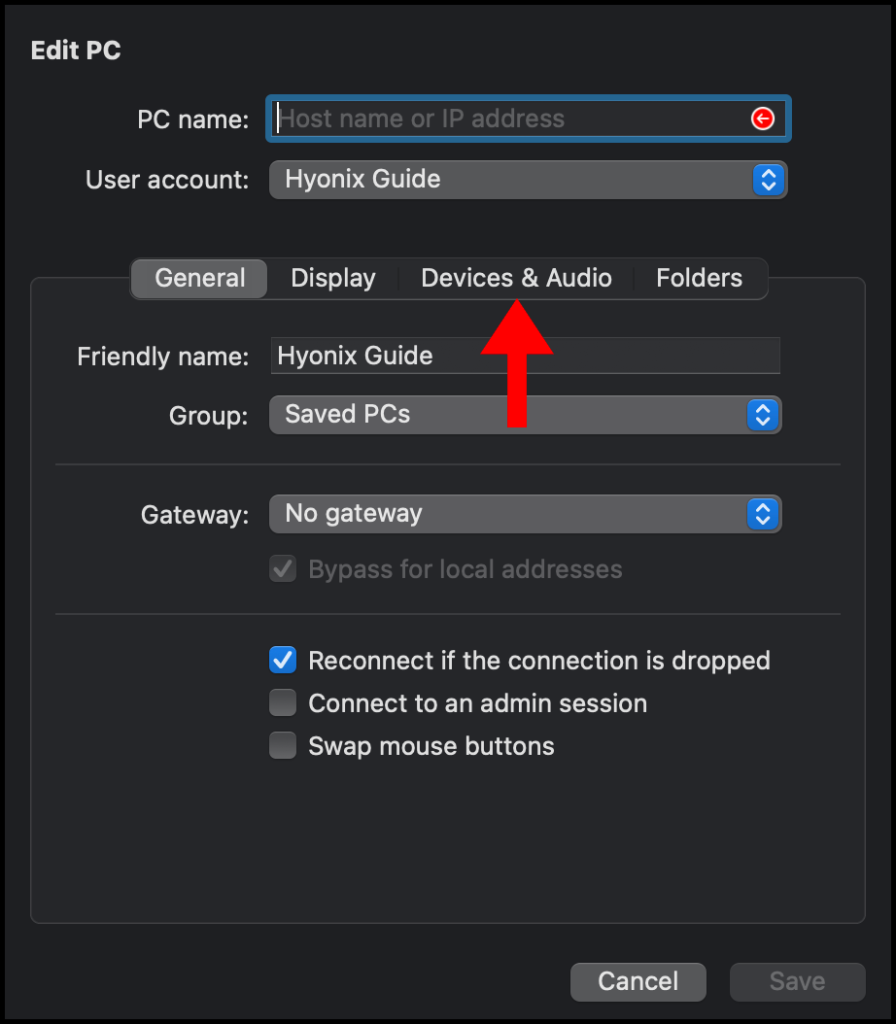
4. Next, tick the check box next to the Clipboard option.
5. Lastly, click on Save to finalize the changes. Now you will be able to use the clipboard from your local device to your server or vice-versa.
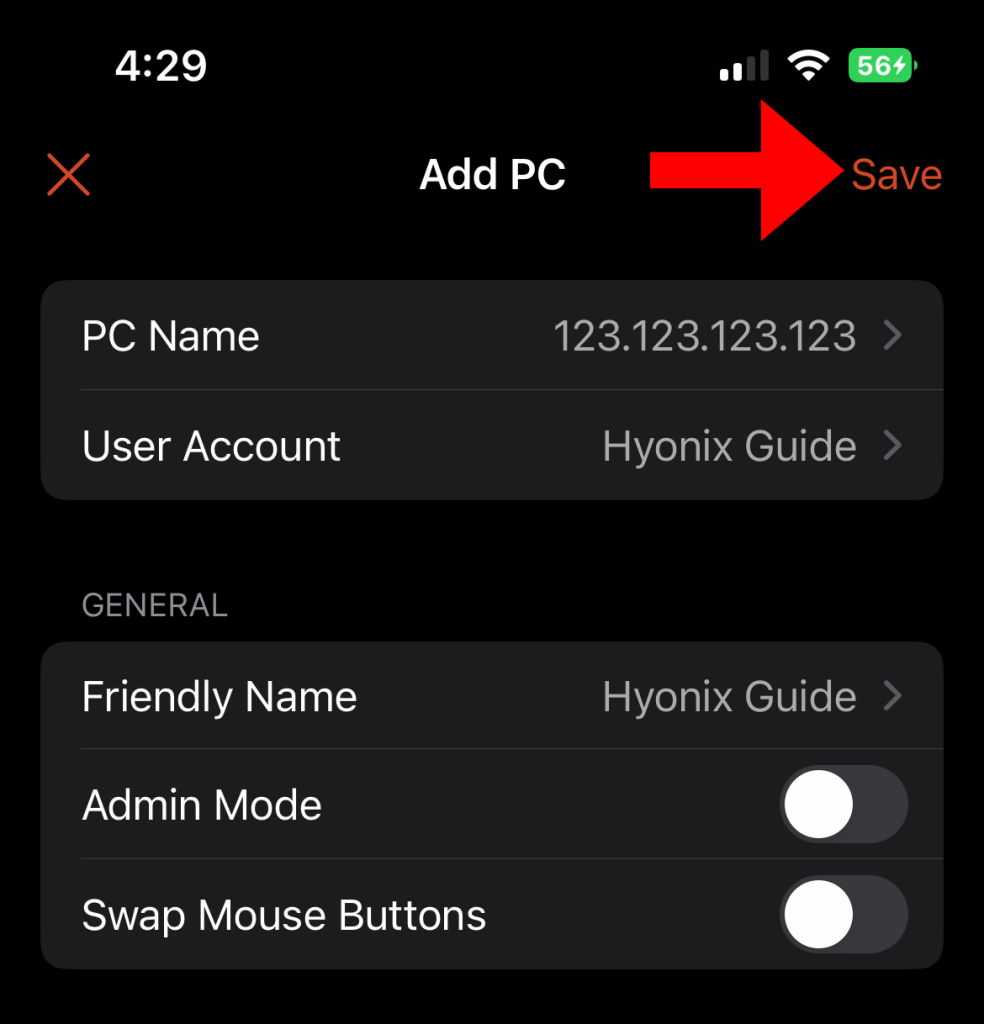
How to enable Copy and Paste (Clipboard) for Remote Desktop in iOS
Please follow this guide if you already have an existing Remote Desktop profile. If not, please follow How to Connect to Windows VPS using RDP to save a Remote Desktop profile.
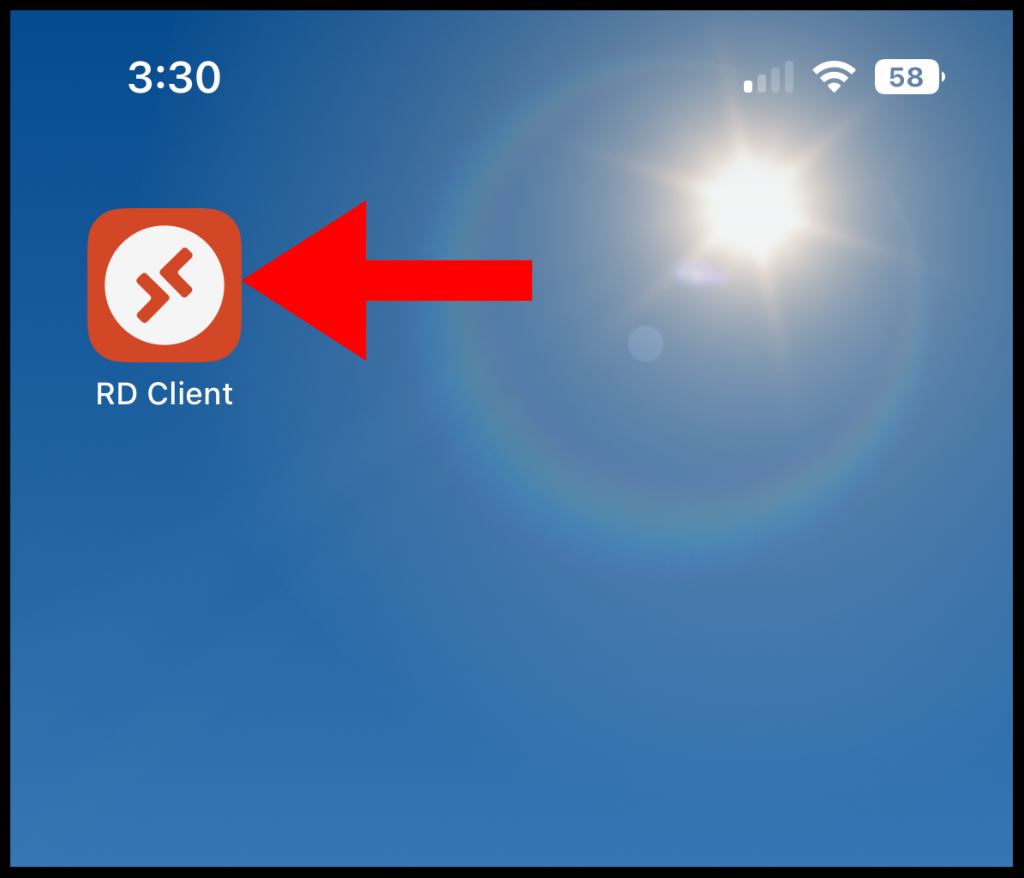
1. To start off, open the RD Client app on your iOS device.
2. Once the application is open, long-press an existing server until the Edit option appears and select the Edit option to get to the server settings.
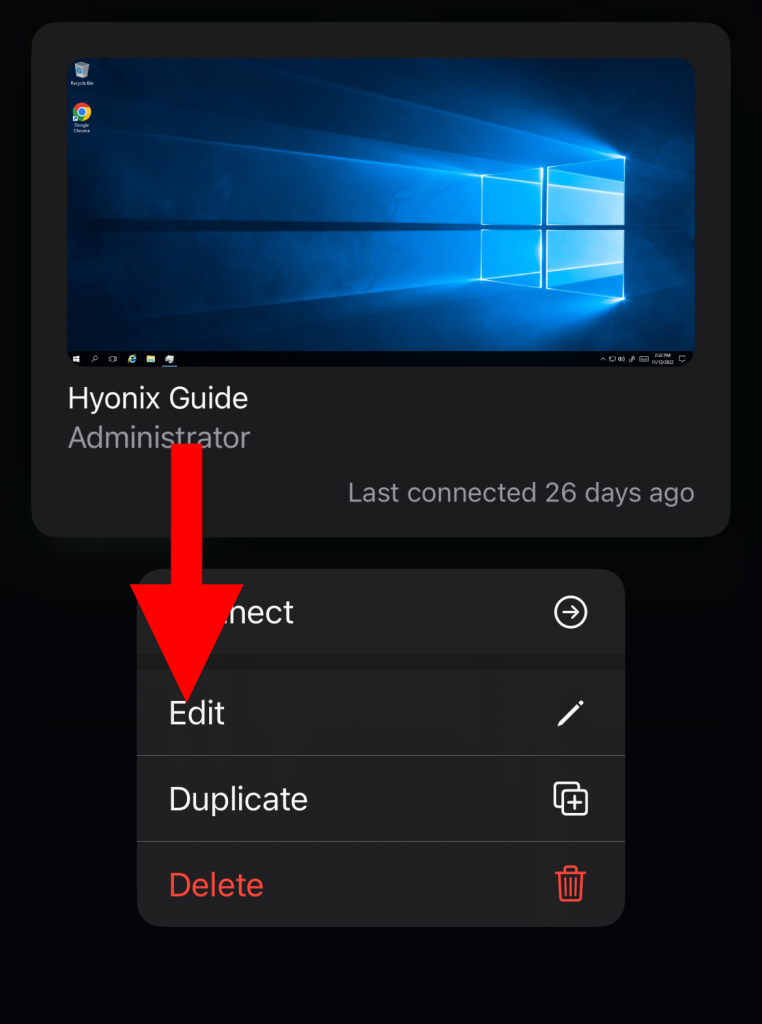
3. Then, navigate to the DEVICES & AUDIO REDIRECTION section towards the bottom of the screen, and enable the Clipboard option.
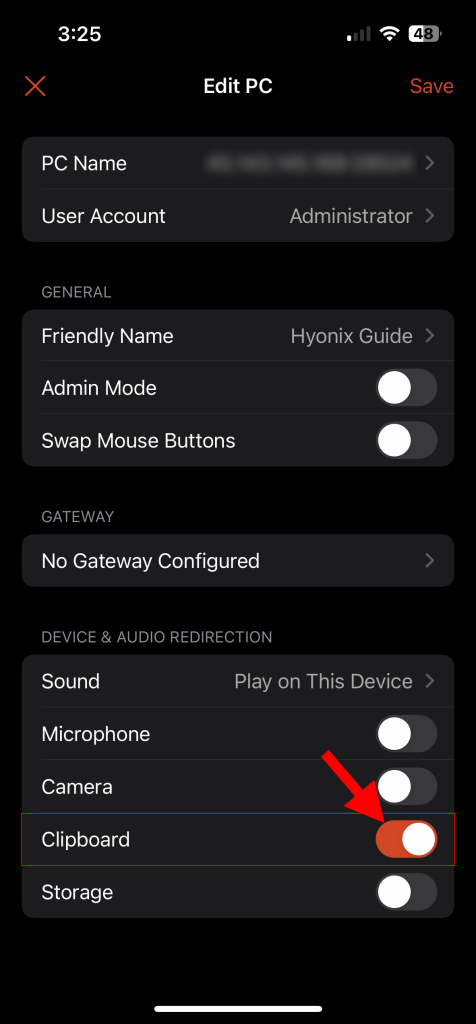
4. Lastly, click on Save to finalize the changes. Now you will be able to use the clipboard from your local device to your server or vice-versa.
How to troubleshoot the clipboard
Sometimes copy and paste feature doesn’t work. If you are caught up in an issue like this, then follow the below steps to fix it,
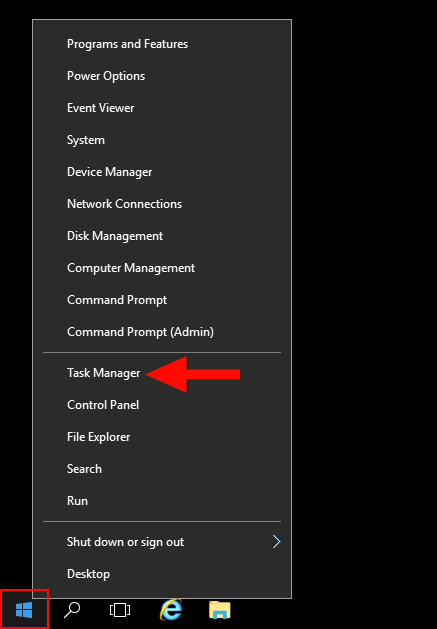
1. On the Windows VPS, navigate to the windows icon in the bottom left corner and right-click it. Then select Task Manager.
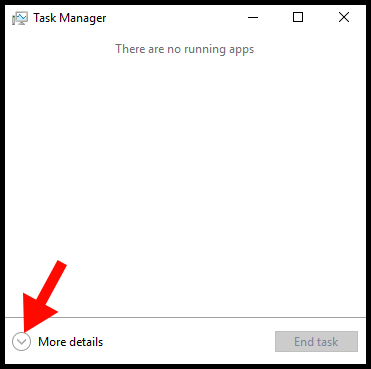
2. The Task Manager window will then appear, click the More details drop-down arrow.
3. Next, navigate to the Processes tab in the Task Manager window.
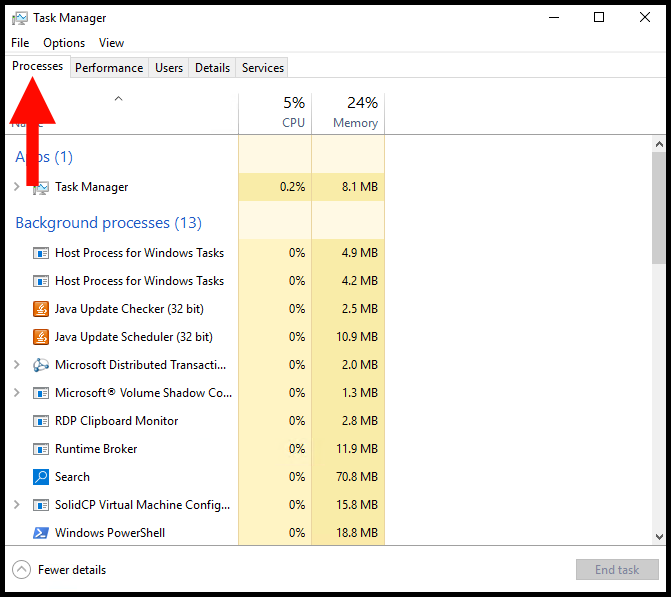
3. Then, locate the process called RDP Clipboard Monitor or rdclip.exe, both are the same thing.
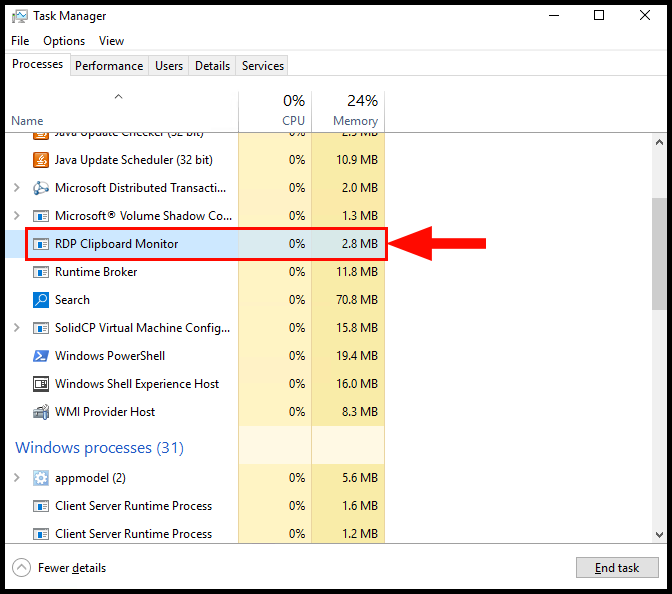
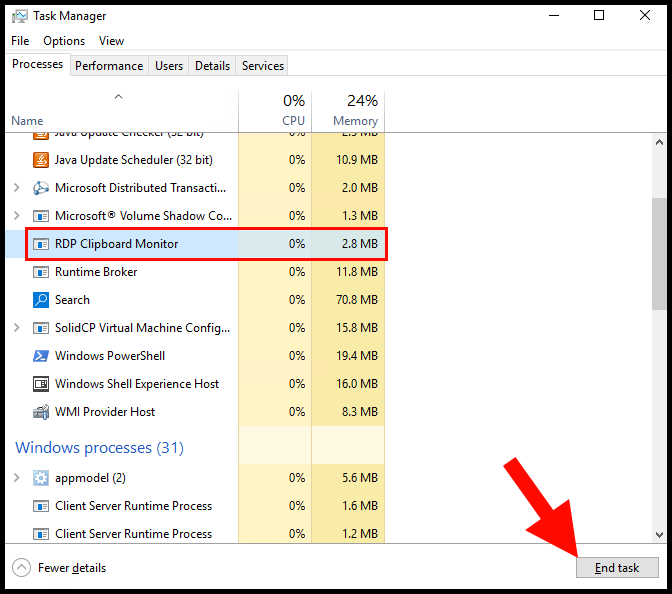
4. Next, select RDP Clipboard Monitor or rdclip.exe, so that it is highlighted in blue, and click the End task button on the bottom right corner.
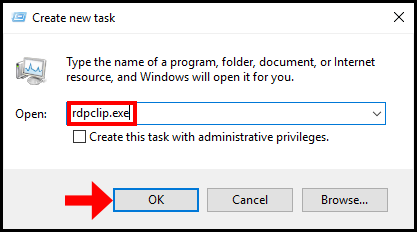
5. Then, click on File in the top left-hand corner and select Run new task.
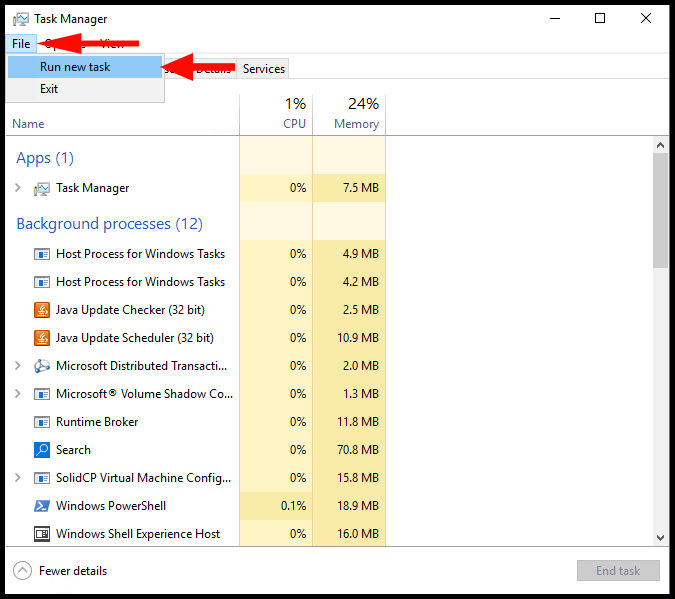
6. Once the Create new task window appears, enter rdpclip.exe in the text box and then select OK.
After following the above steps, the clipboard functionality within your server should begin to work again.