In some platforms’ remote desktop applications, local microphone access is disabled by default. In this case, you need to manually turn on the remote microphone access for the remote desktop. So, In this article, you will learn more about: How to enable a microphone on a Remote Desktop Server
Step 1: Local Device configuration – Enable a microphone on Remote Desktop program
1.1 – If your local device is Windows
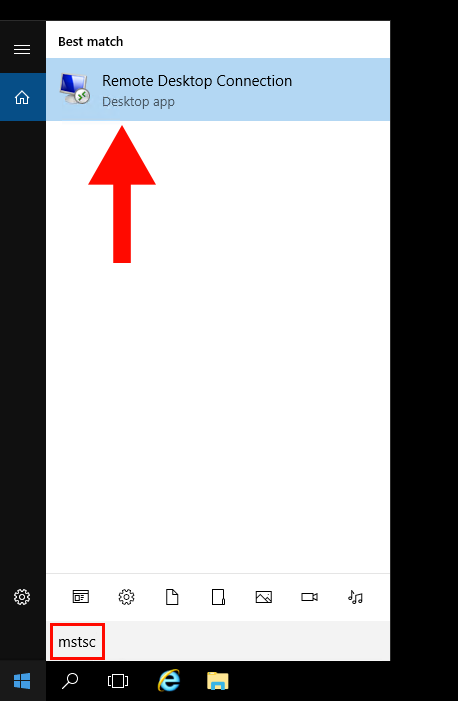
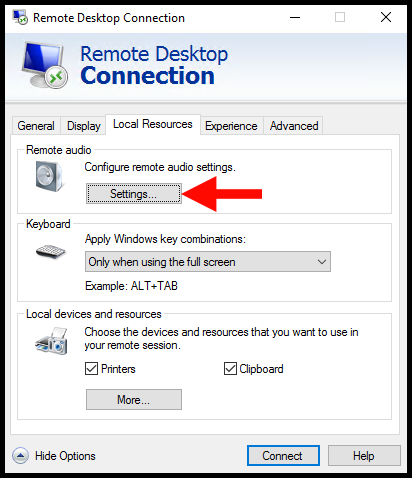
1. Get started by searching Remote Desktop Connection or mstsc in the search box on your local computer.
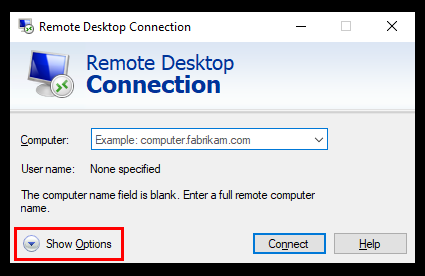
2. Then, click on the Show Options drop-down.
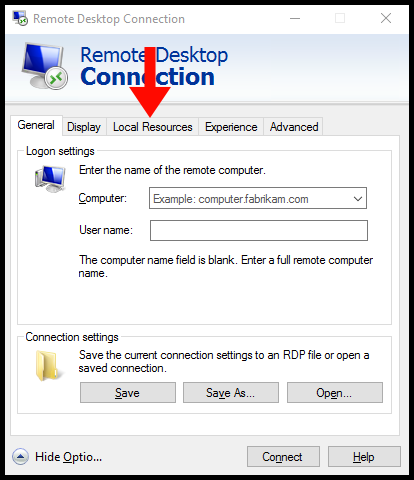
3. Next, navigate to the Local Resources tab.
4. Then, select the Settings button under the Remote Audio option.
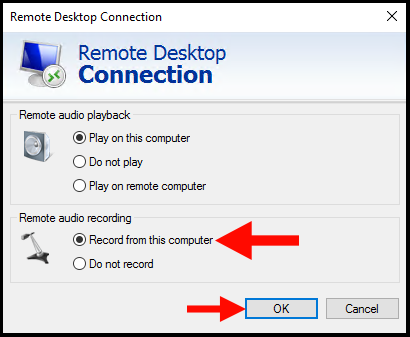
5. Next, tick the box Record from this computer and click on OK, then proceed to connect to the remote desktop.
6. Once done, proceed to the server-end configuration of this article at the bottom of the page.
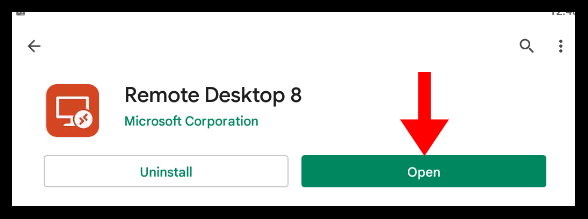
1.2 – If your local device is Android
Please follow this guide if you already have an existing Remote Desktop profile. If not, please follow How to Connect to Windows VPS using RDP to save a Remote Desktop profile.
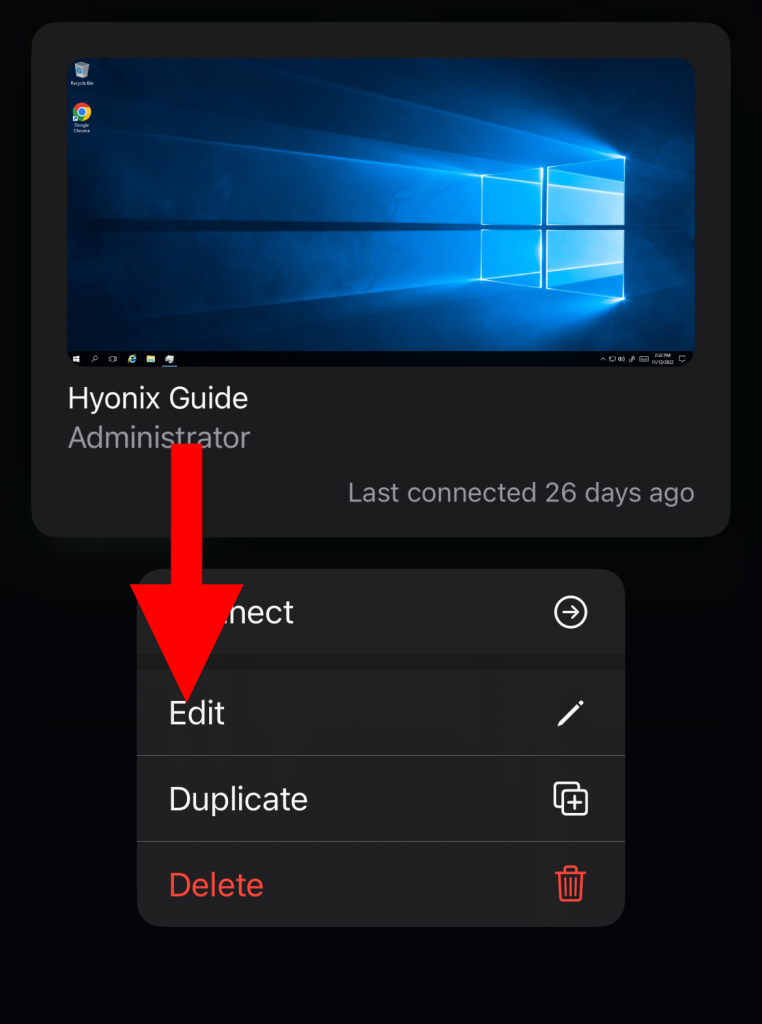
1. Open the Remote Desktop application by Microsoft Corporation.
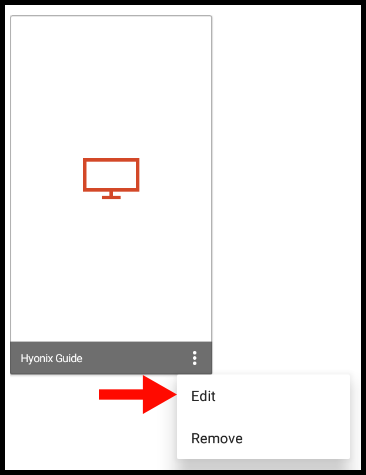
2. Next, click on •••, then select Edit.
3. Then, navigate to the Devices & Audio Redirection section towards the bottom of the screen, and enable the Clipboard option.
4. Lastly, click on Save to finalize the changes. Now proceed to the server-end configuration of this article at the bottom of the page.
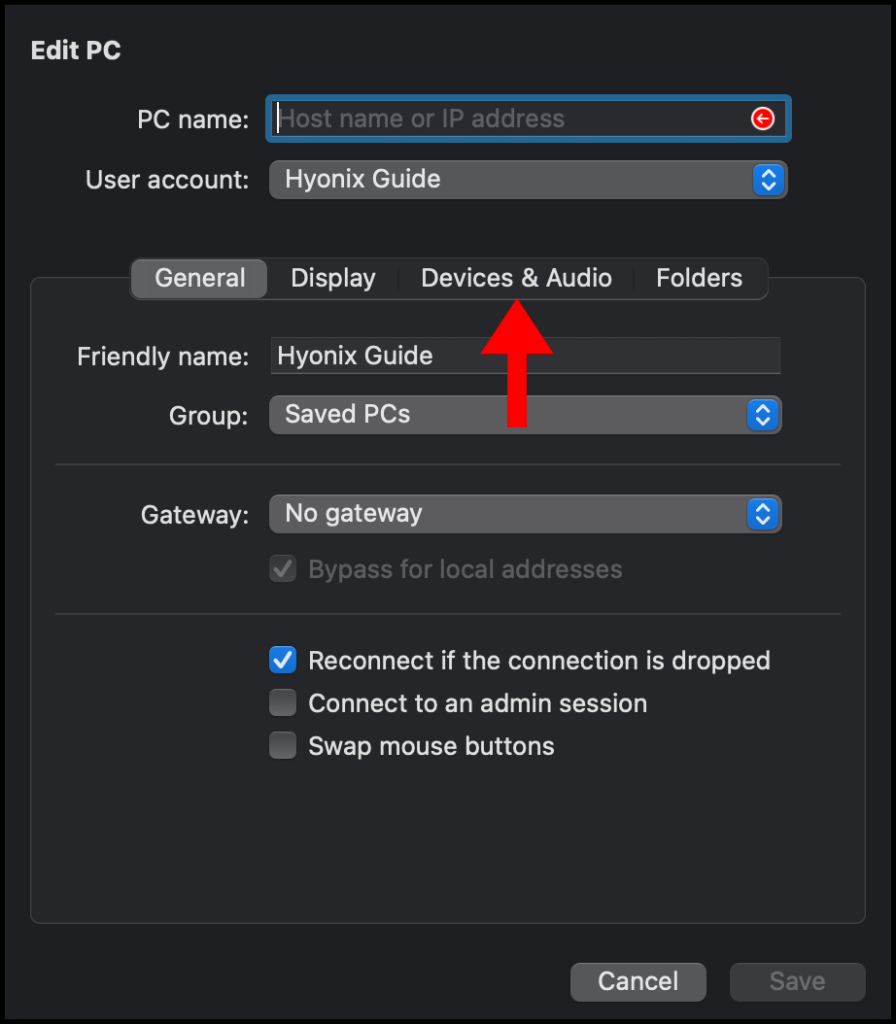
1.3 – If your local device is macOS
Please follow this guide if you already have an existing Remote Desktop profile. If not, please follow How to Connect to Windows VPS using RDP to save a Remote Desktop profile.
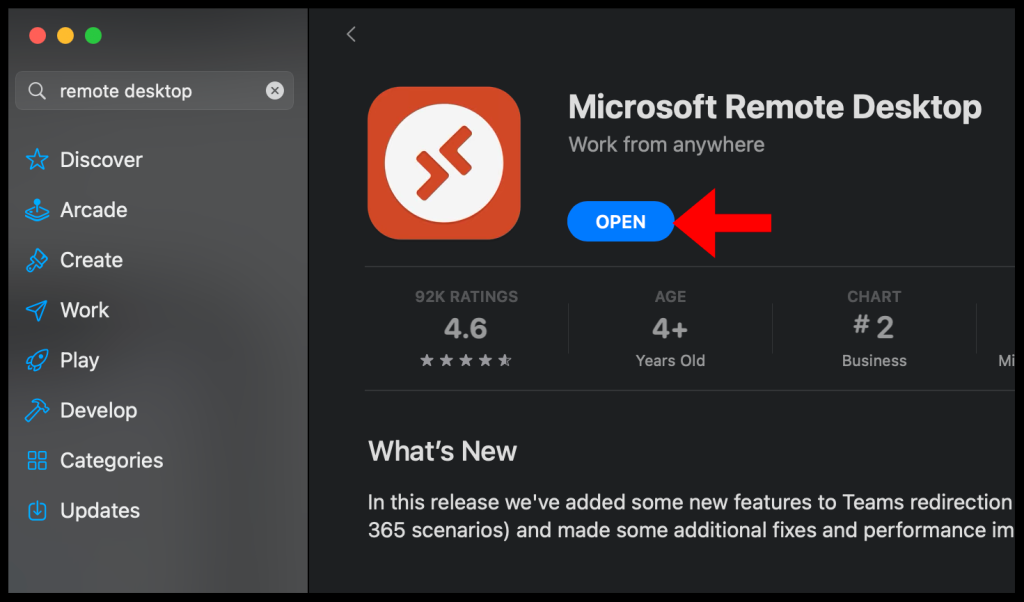
1. First, open the Microsoft Remote Desktop application.
2. Once Remote Desktop is open, click the ••• button and select the Edit option.
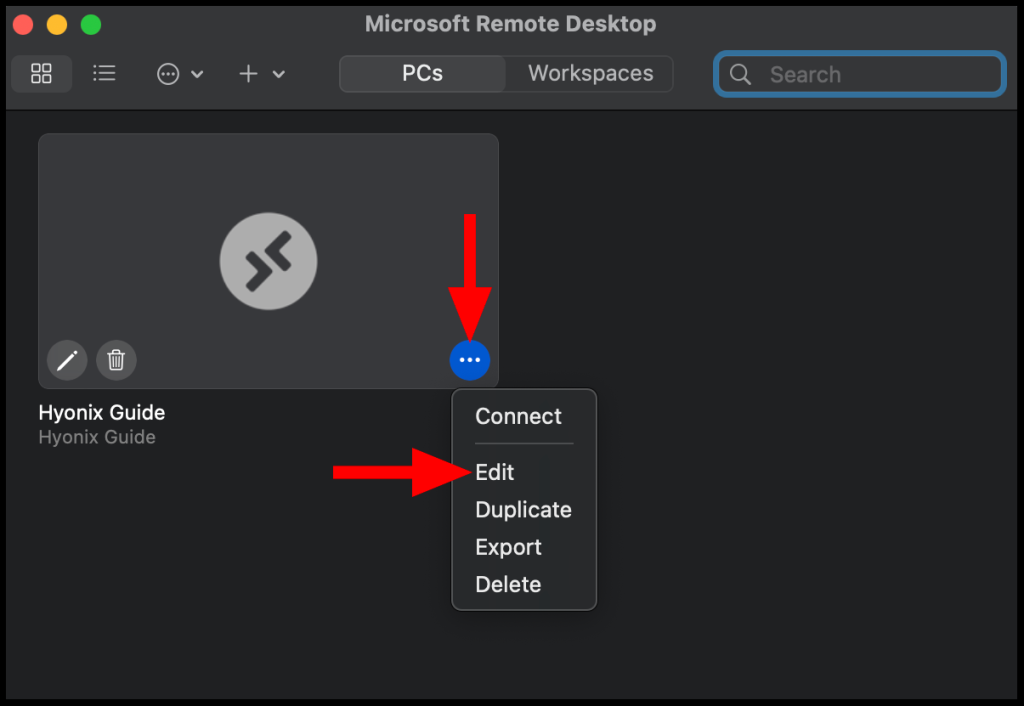
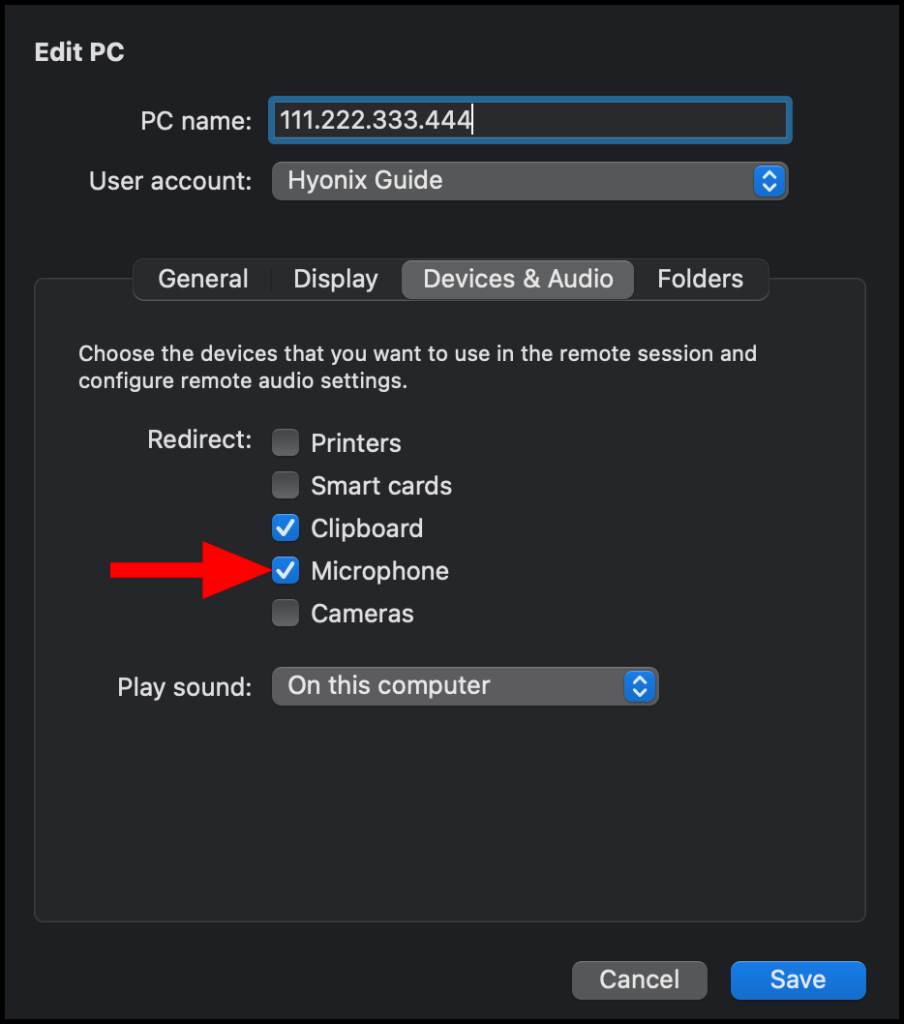
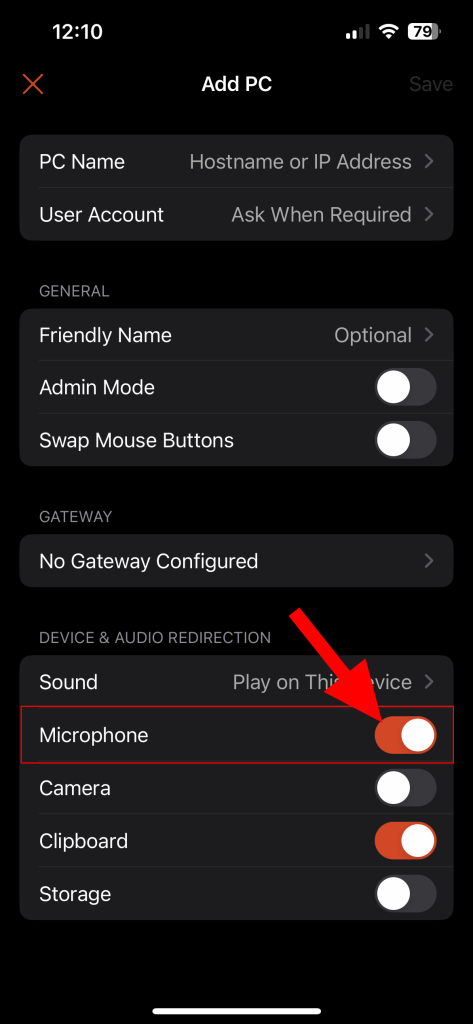
3. Then, navigate to the Devices & Audio tab.
4. Next, tick the check box next to the Microphone option.
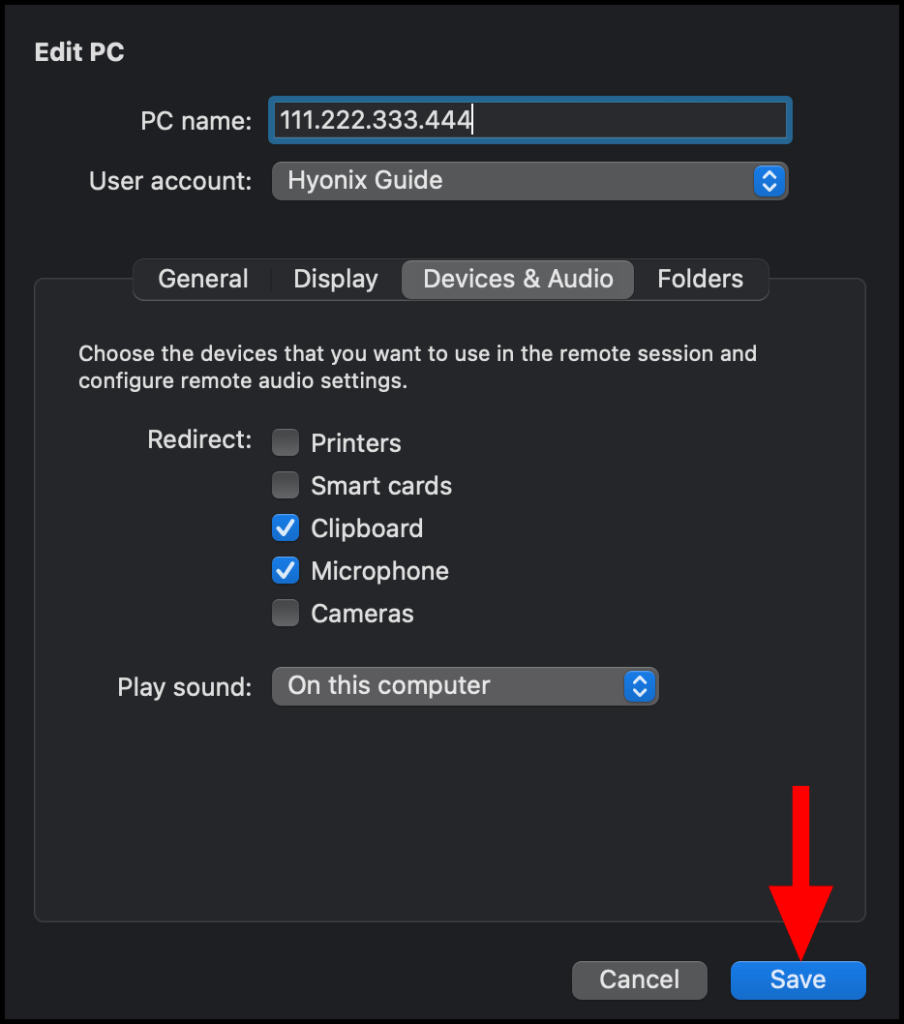
4. Lastly, click on Save to finalize the changes. Now proceed to the server-end configuration of this article at the bottom of the page.
1.4 – If your local device is iOS
Please follow this guide if you already have an existing Remote Desktop profile. If not, please follow How to Connect to Windows VPS using RDP to save a Remote Desktop profile.
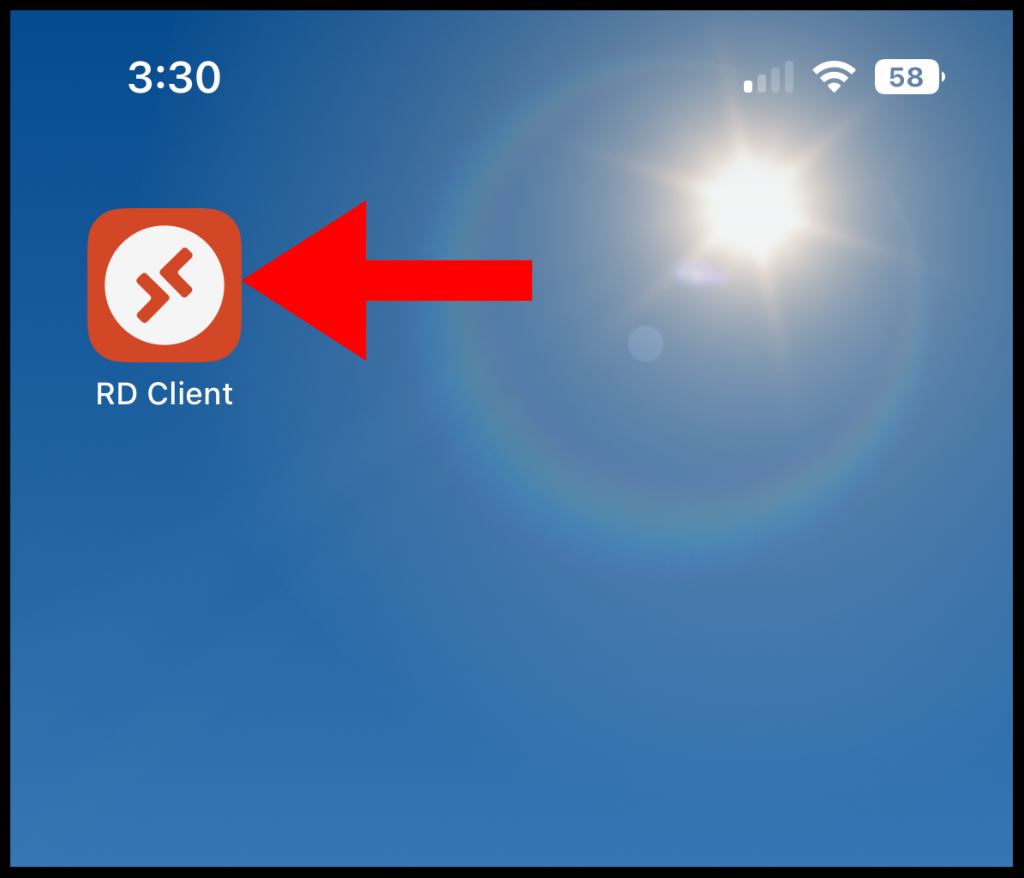
1. To start off, open the RD Client app on your iOS device.
2. Once the application is open, long-press an existing server until the options appear and select the Edit option to get to the server settings.
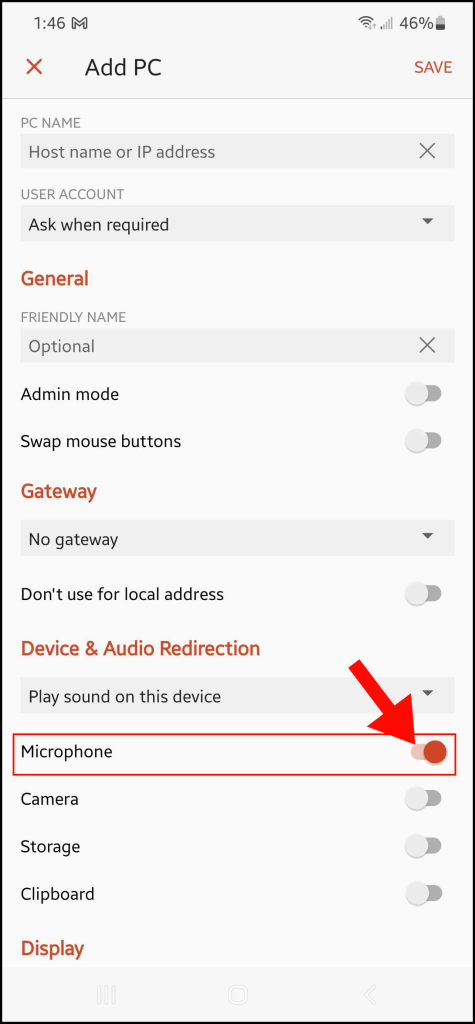
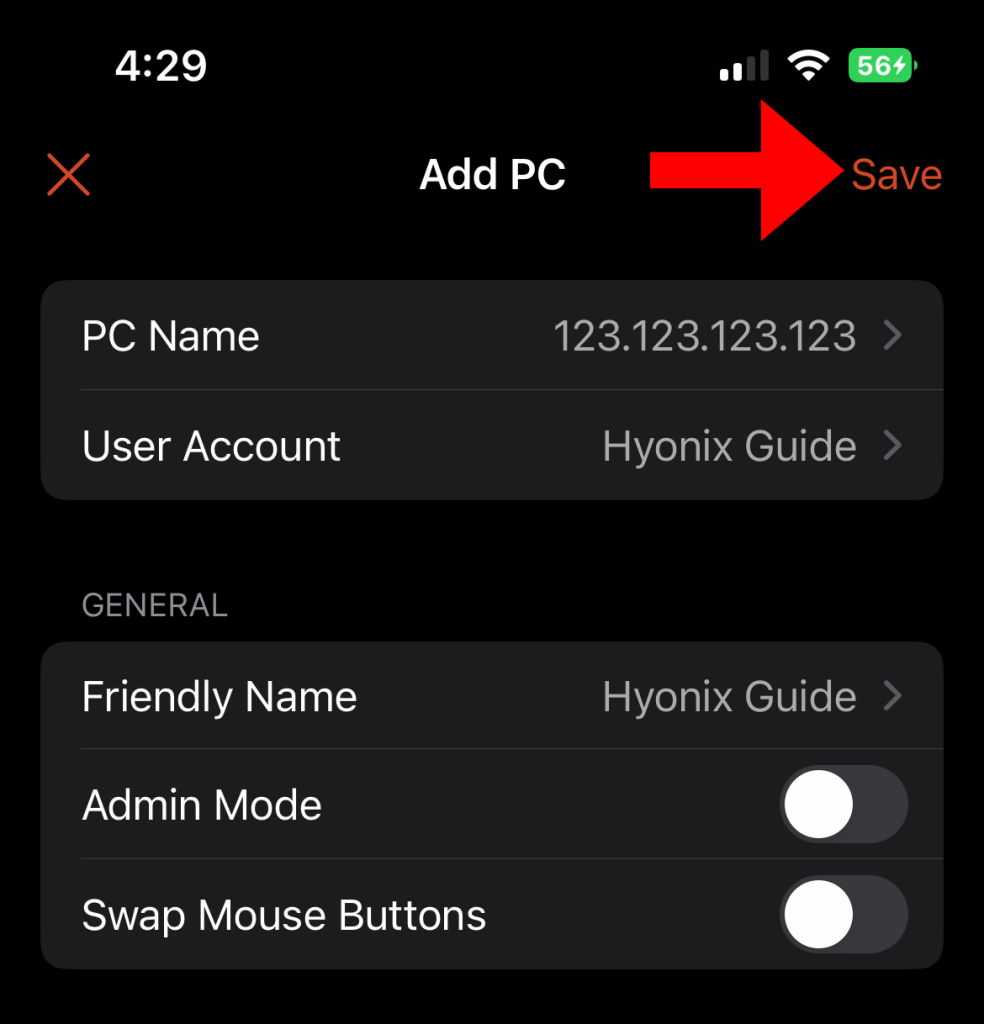
3. Then, navigate to the DEVICES & AUDIO REDIRECTION section towards the bottom of the screen, and enable the Microphone option.
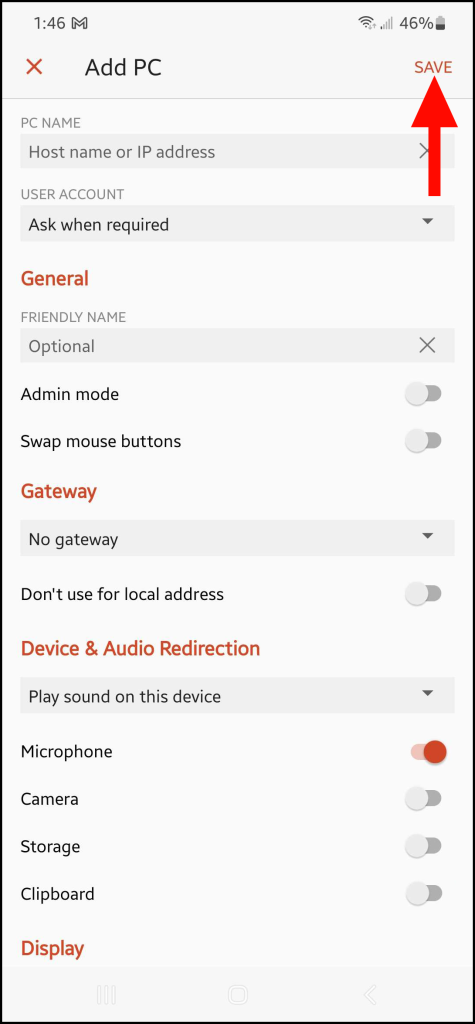
4. Lastly, click on Save to finalize the changes. Now proceed to the server-end configuration of this article at the bottom of the page.
Step 2: Server End Configuration
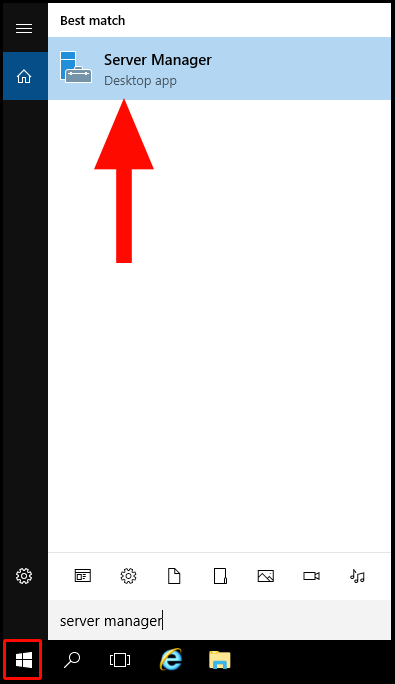
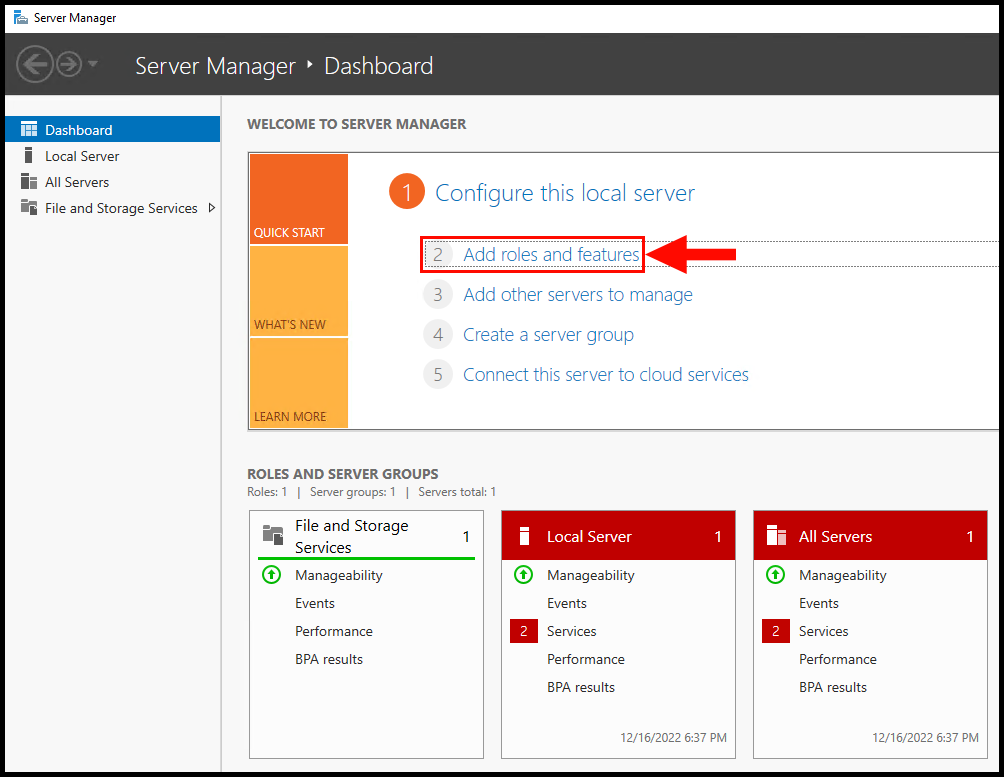
Once you configure the microphone access to the remote desktop server, now you need to install Remote Desktop Session Host → Client Experience → Audio and video playback from Server Manager.
1. Log in to your Windows Server, then navigate to the Windows search bar and search Server Manager.
2. Next, click on “Add Roles and Features“.
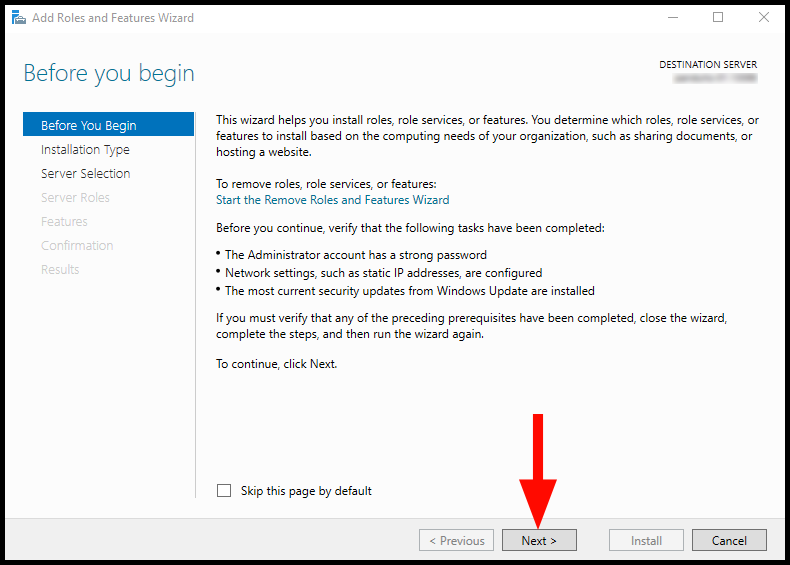
3. The Add Roles and Features Wizard page will then open, click next to reach the Installation Type menu.
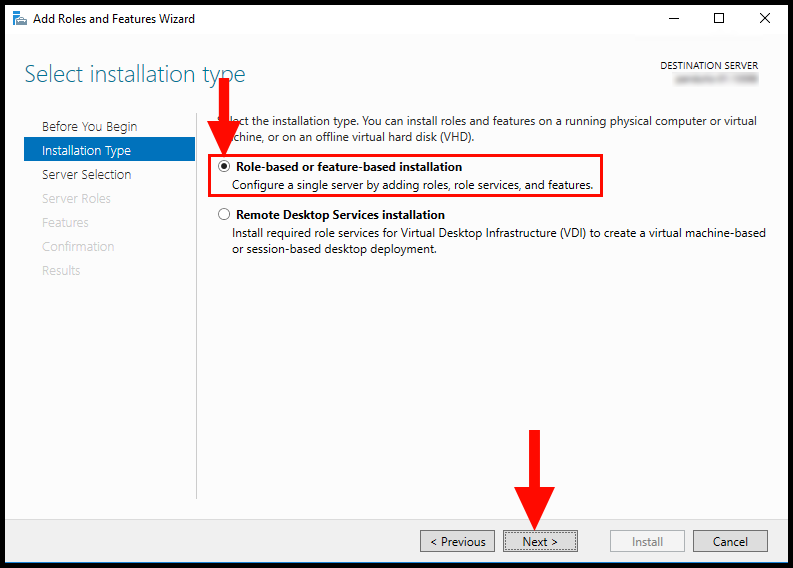
4. On the Installation Type page, select Role-based or feature-based installation.
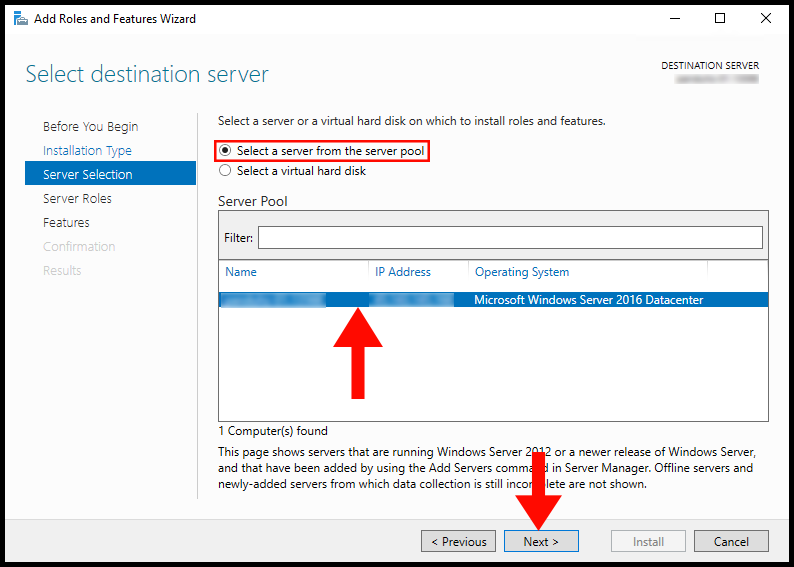
5. Next, the Server Selection page will appear. Select Select a server from the server pool and select your server in the Server Pool window. Then, click Next to proceed.
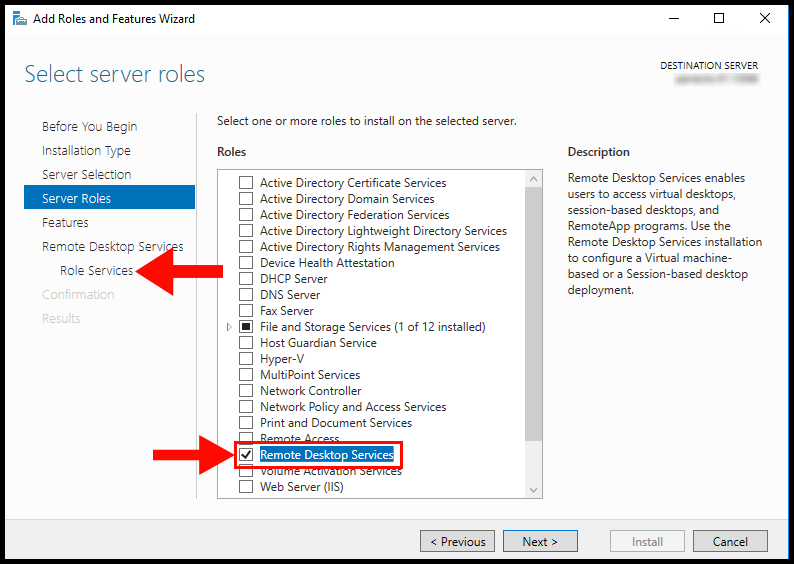
6. On the Server Roles page tick the checkbox next to Remote Desktop Services. Then, on the left side, click Role Services to proceed.
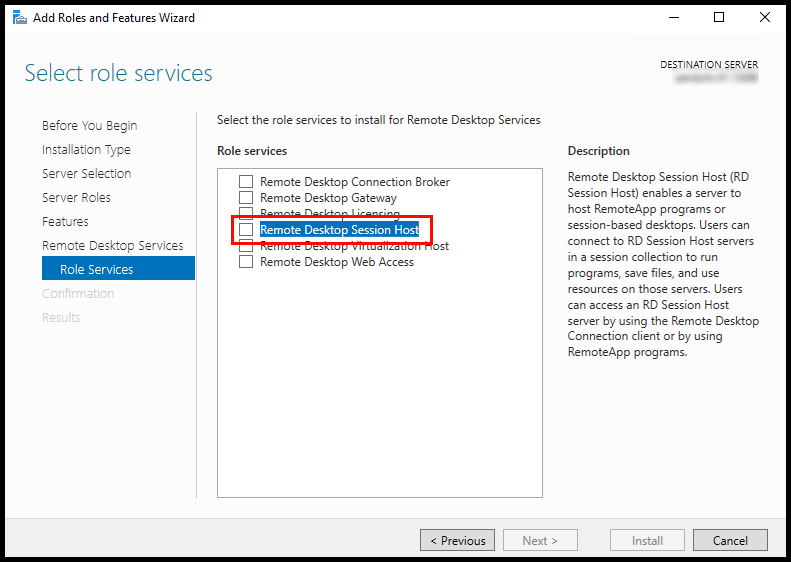
7a. In the Role Services page, tick the box next to Remote Desktop Session Host.
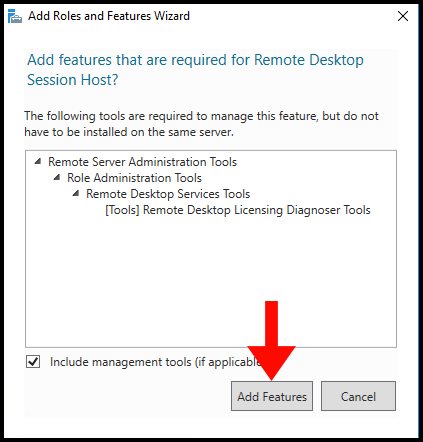
7b. Then another page will pop up, click the Add Features button to continue.
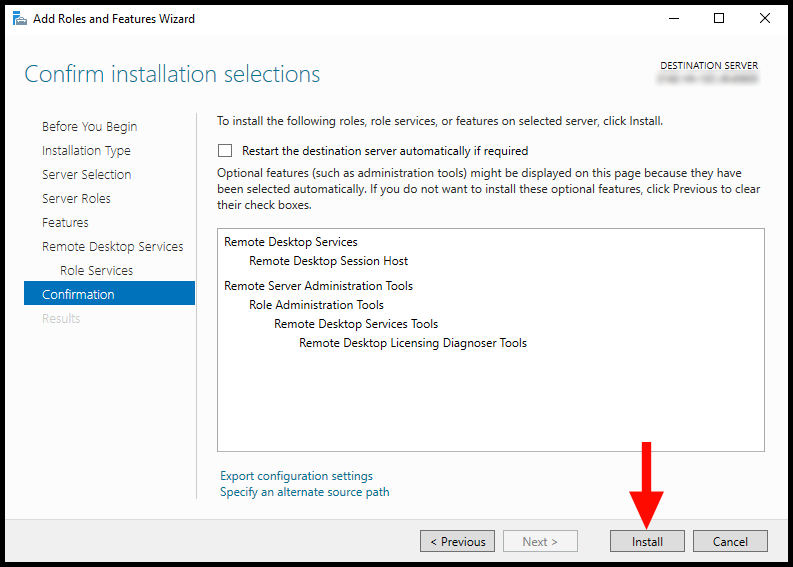
8. Once you have reached the Confirmation page, click the button Install to finish.
Step 3: Troubleshooting Microphone on Remote Desktop
If the microphone is still not working, then perform the changes below.
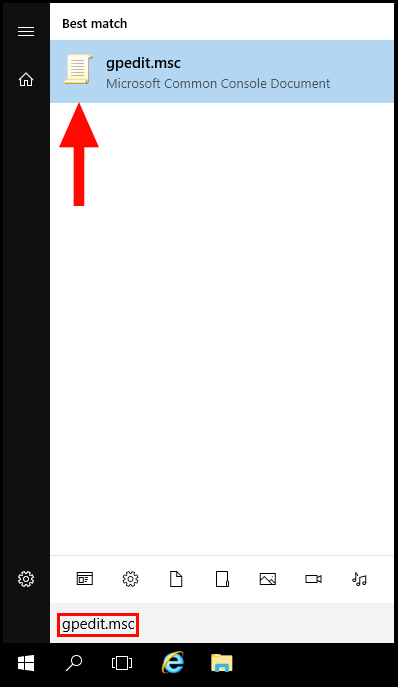
1. First, log in to your Windows server and search for gpedit.msc in the server’s search bar.
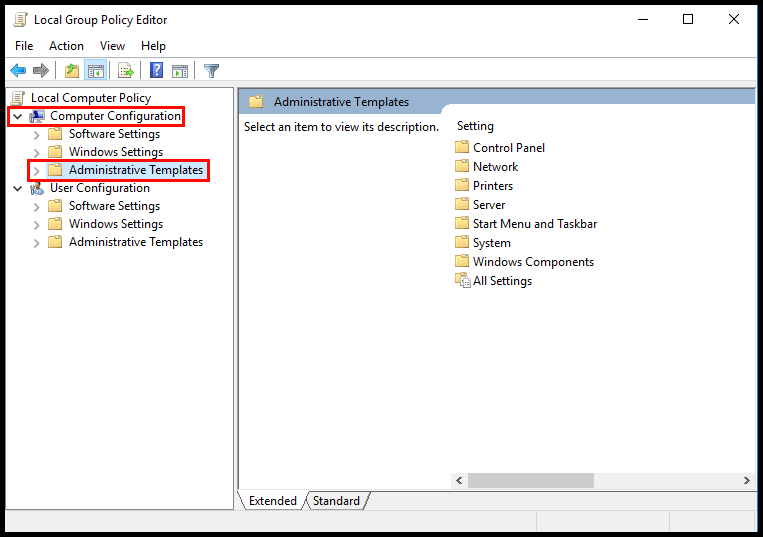
2. Next, open the drop-down menu Computer Configuration on the left-hand side and select the drop-down arrow next to Administrative Templates as seen below.
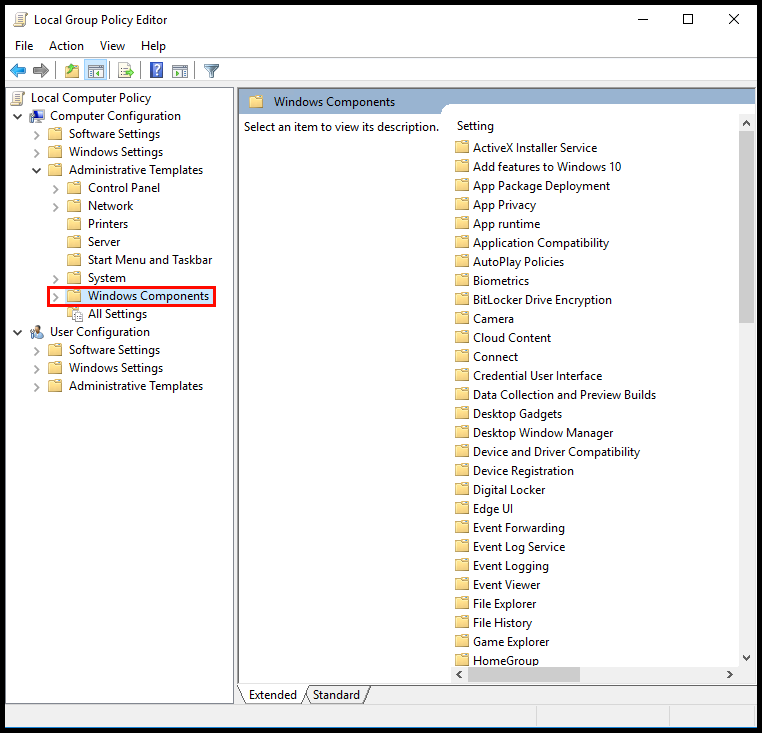
3. Continuing with the menu on the left-hand side, select the drop-down arrow next to Windows Components.
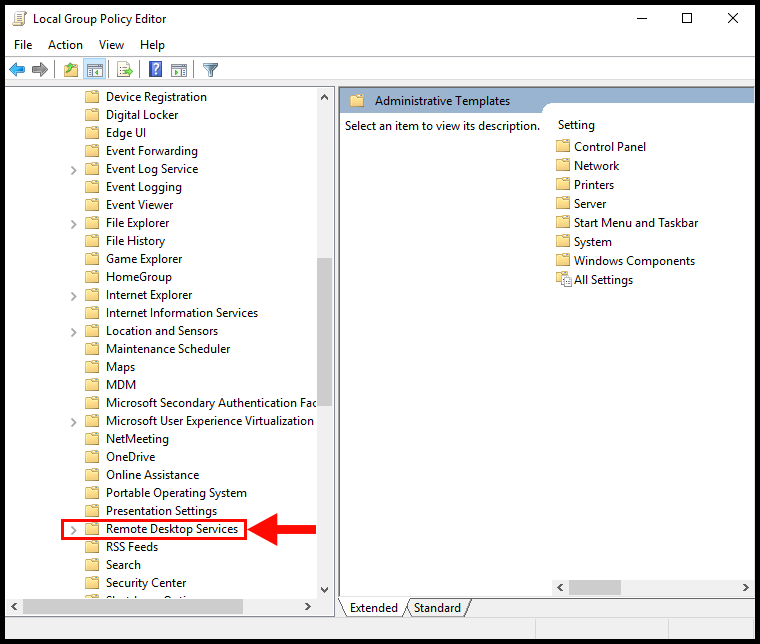
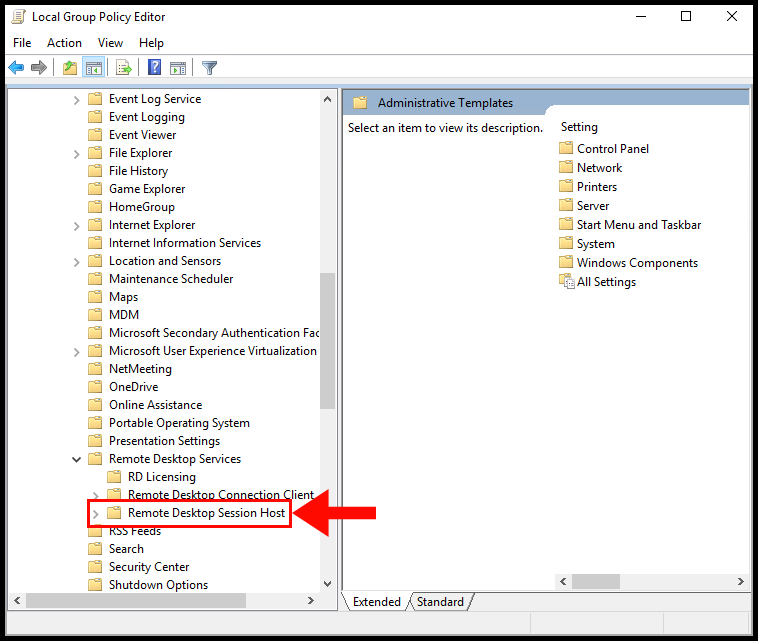
4. Next, locate Remote Desktop Services in the left-hand menu.
5. From the Remote Desktop Services drop-down, select Remote Desktop Session Host.
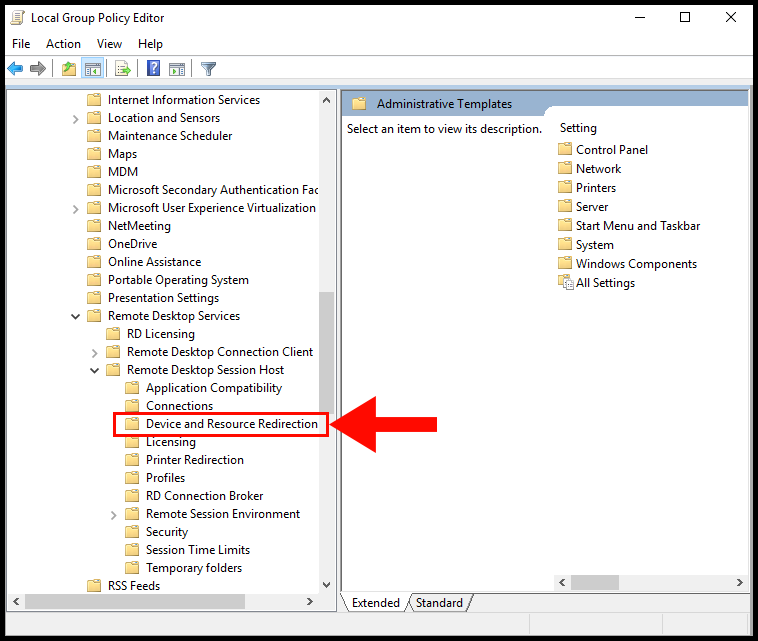
6. Then select, Device and Resource Redirection.
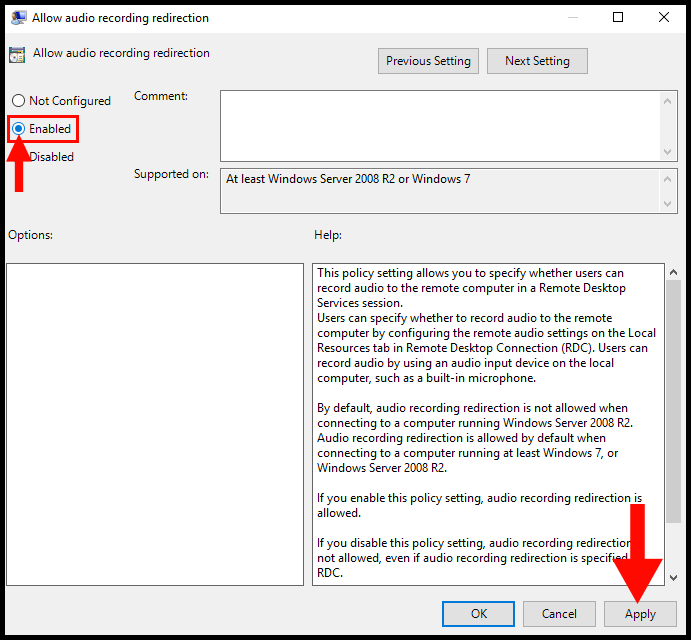
7. On the right-hand menu, right-click Allow audio recording redirection and select Edit.
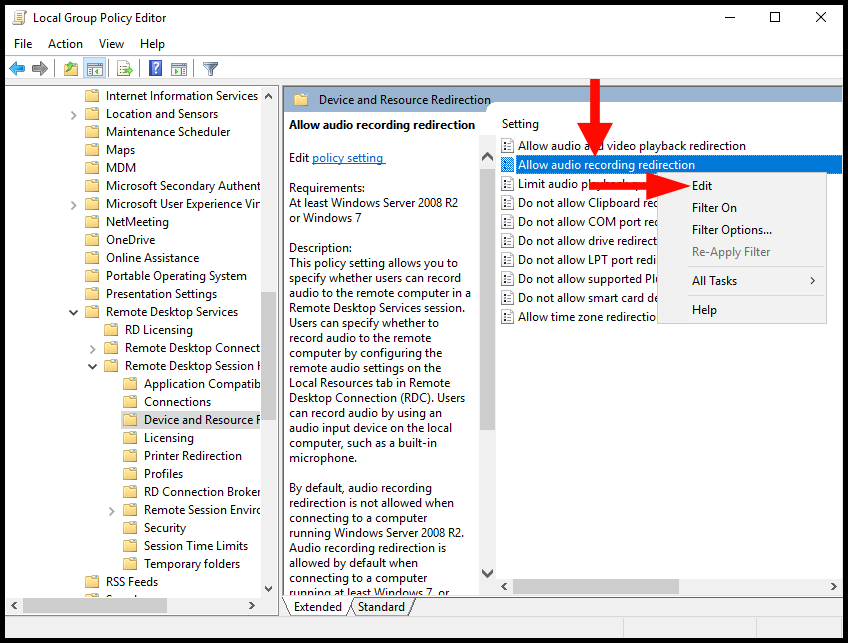
8. Once the Allow audio recording redirection window appears, tick the box next to Enabled and finish by clicking the Apply button.