Sometimes windows get loaded with unwanted files and directories with no use. The deficiency of space may cause degradation of server performance. In that case, the only way we will be having is to clean up the server. In this article, we will be covering the best way to free up drive space in Windows : A Step-by-Step Guide.
Previously, we covered how to run Disk Cleanup (Cleanmgr.exe) on Windows Server. Using this article, you can only clean the unwanted files from the C Drive (Primary Drive). But, we also need to check and clean up the unwanted files available at other windows server destinations.
How to check disk space utilization?
There are many ways through which you can check Disk Space usage. We mostly open File Explorer and check the disk space usage of each partition or use the Disk Management feature of the Windows server. But, using a different method, you can check the individual partition disk space usage by sub-categories (Documents, Pictures, System Reserved, etc.).
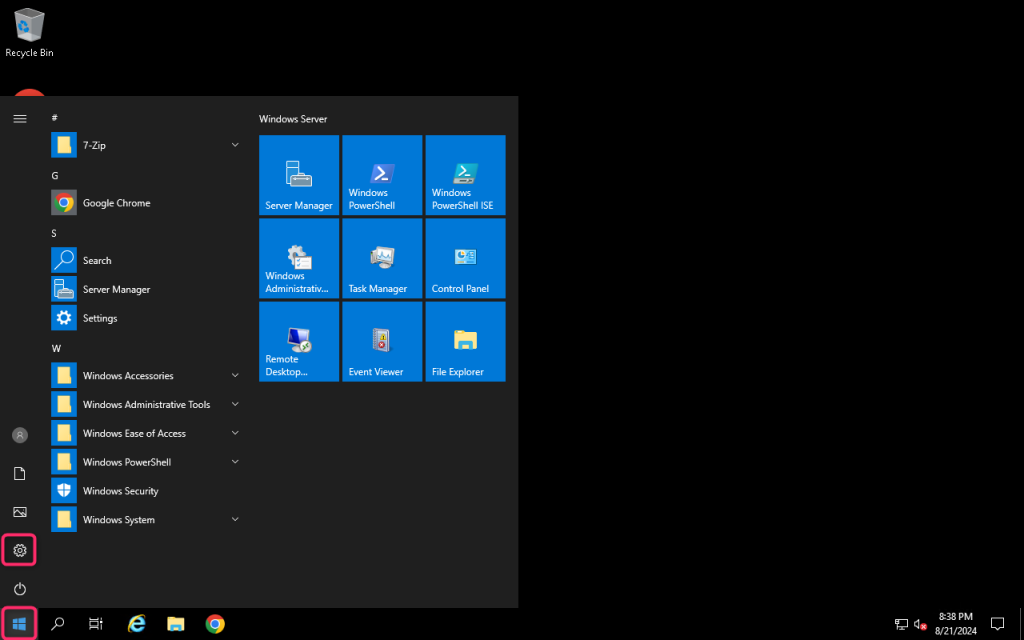
1. Login to Windows Server → Open Settings.
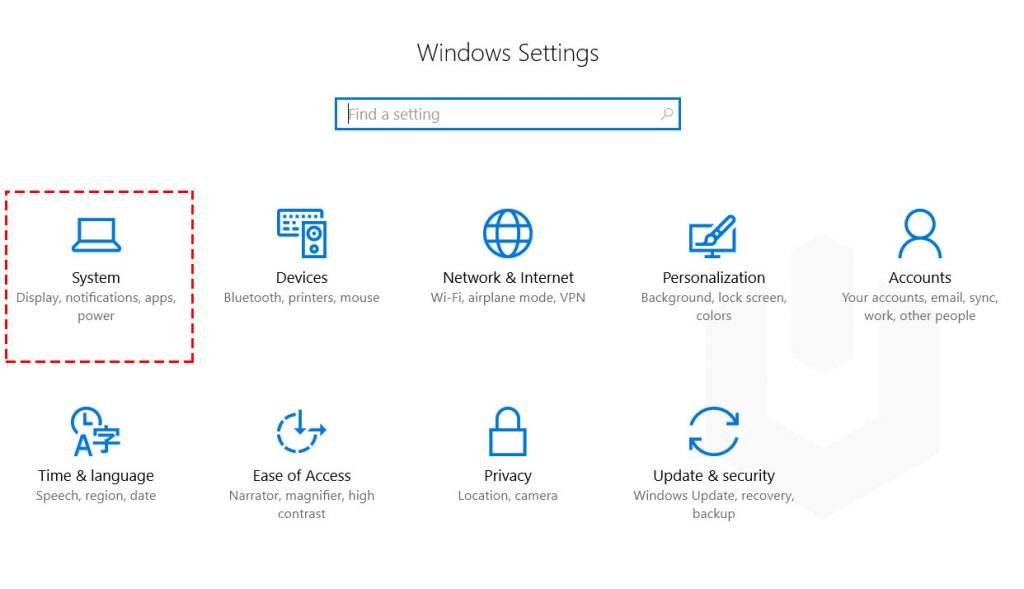
2. Navigate to System.
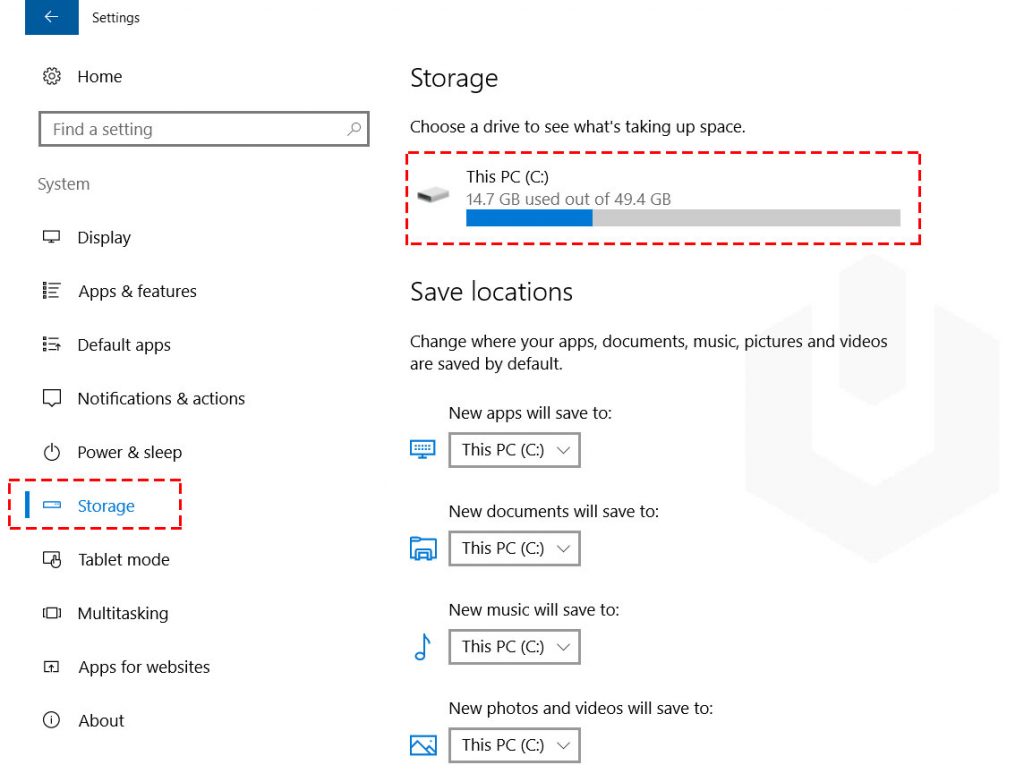
3. Click on Storage → Select the disk partition.
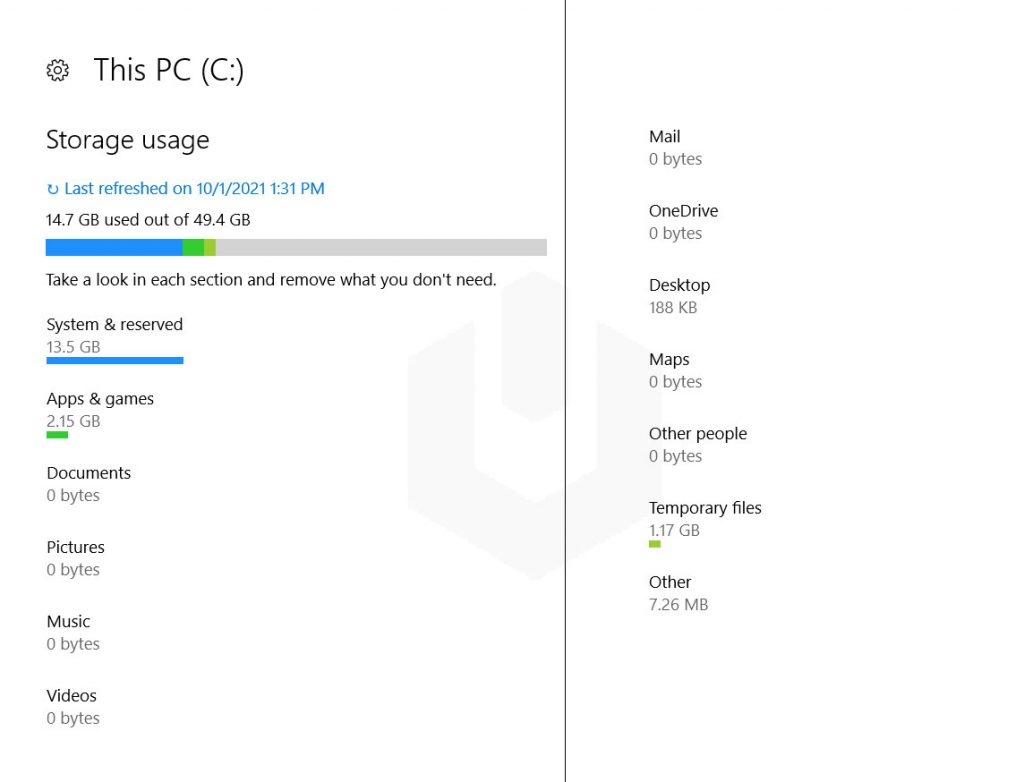
4. Here, you can find the categorically systematic disk space usage by System & reserved, Apps & games, Temporary Files, Pictures, Documents, etc.
To clean your disk, please follow the following steps.
Method 1: Run Disk Cleanup
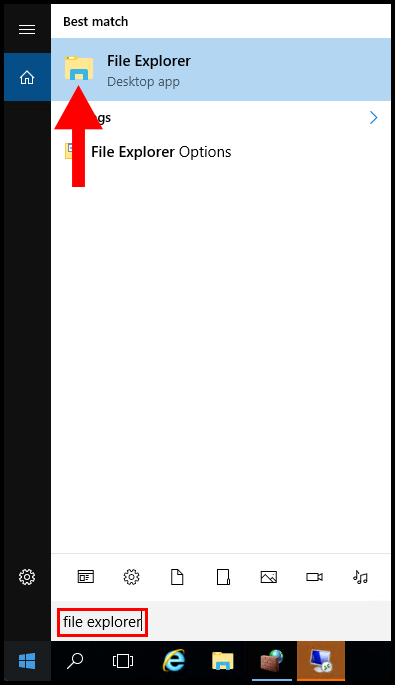
1. To start off log in to your Windows Server then search and open File Explorer
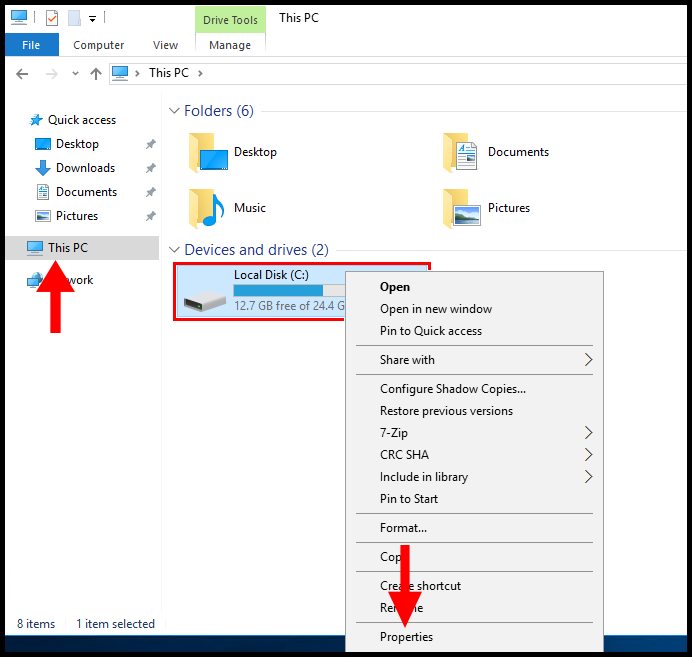
2. Then click This PC on the left-hand side and right-click a drive, then click Properties.
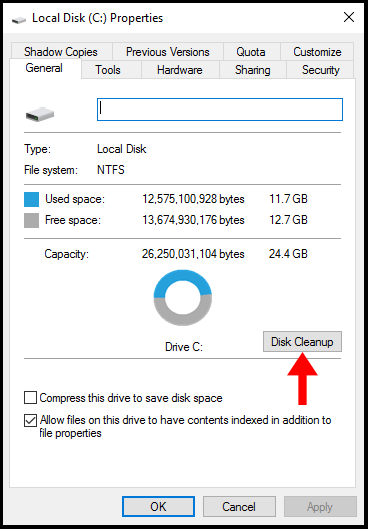
3. Next, click on Disk Cleanup.
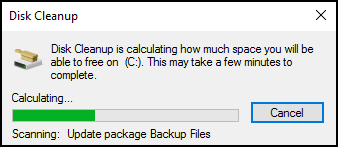
4. Now, the system will calculate the unwanted files according to their type.
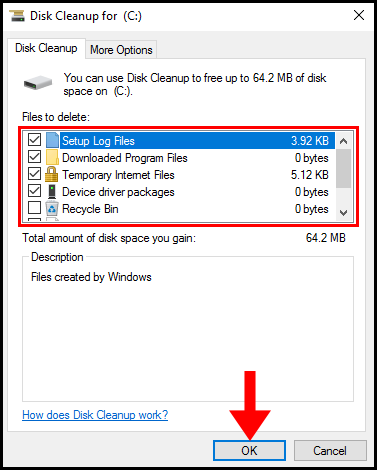
5. You will now have files that you can select to delete to clean up the disk, once you have selected the files you want to delete click OK.
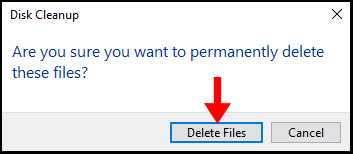
6. Next, you will be prompted to confirm that you want to permanently delete these files once you are sure click Delete Files.
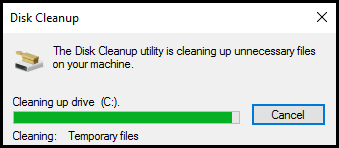
7. Now the system will begin cleaning up the drive.
Method 2: Delete Temporary & App Data Files
Generally, applications or software with heavy graphics and media-based content create the temporary files while the supported application or software is running on the windows server. These files will be available on the windows server post-application or software use as well. On the other hand, some applications create temporary files on the Windows server to store the backup or working data. If the system crashes in some application, you can recover that leftover data from the temporary files. Appdata stores the internet temporary files and those are hidden files. Removing temporary files and app data files won’t cause any problem.
Temporary field available on the windows operating acquires the most disk space sometimes. The best option is that you remove or delete all the unwanted temporary files from the system. On the Windows server, temporary files and app data files are stored at the following location,
%systemdrive%\Windows\Temp -- Temp Files
%userprofile%\AppData\Local\Temp -- Temp Files
C:\Users\%UserName%\AppData -- App Data Files
%USERPROFILE%\AppData. -- App Data Files
To remove the temporary files, follow the below steps,
1. Login to Windows Server → Open Settings.
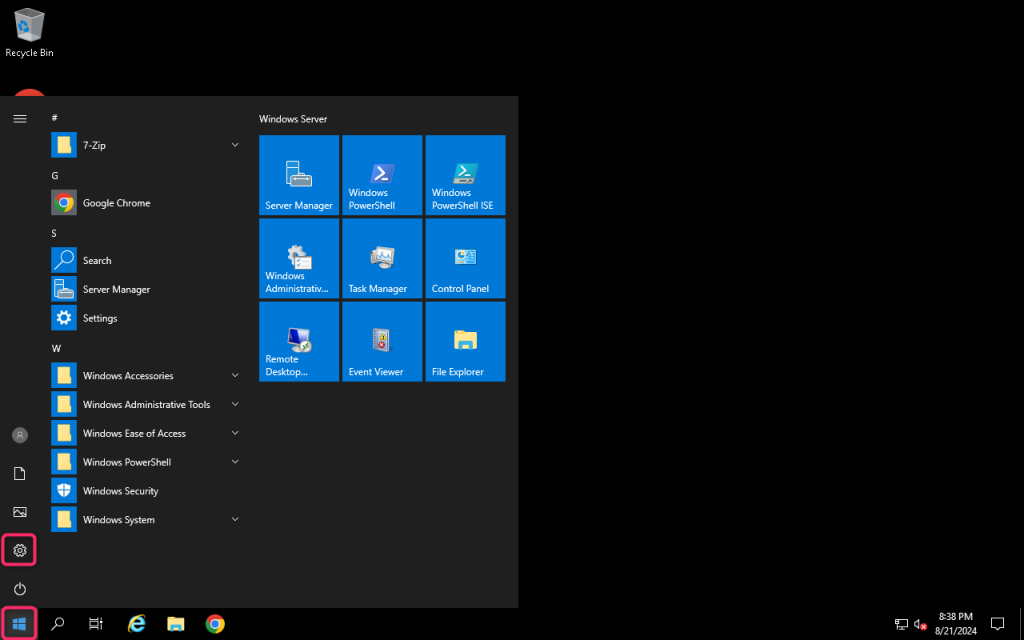
2. Navigate to System.

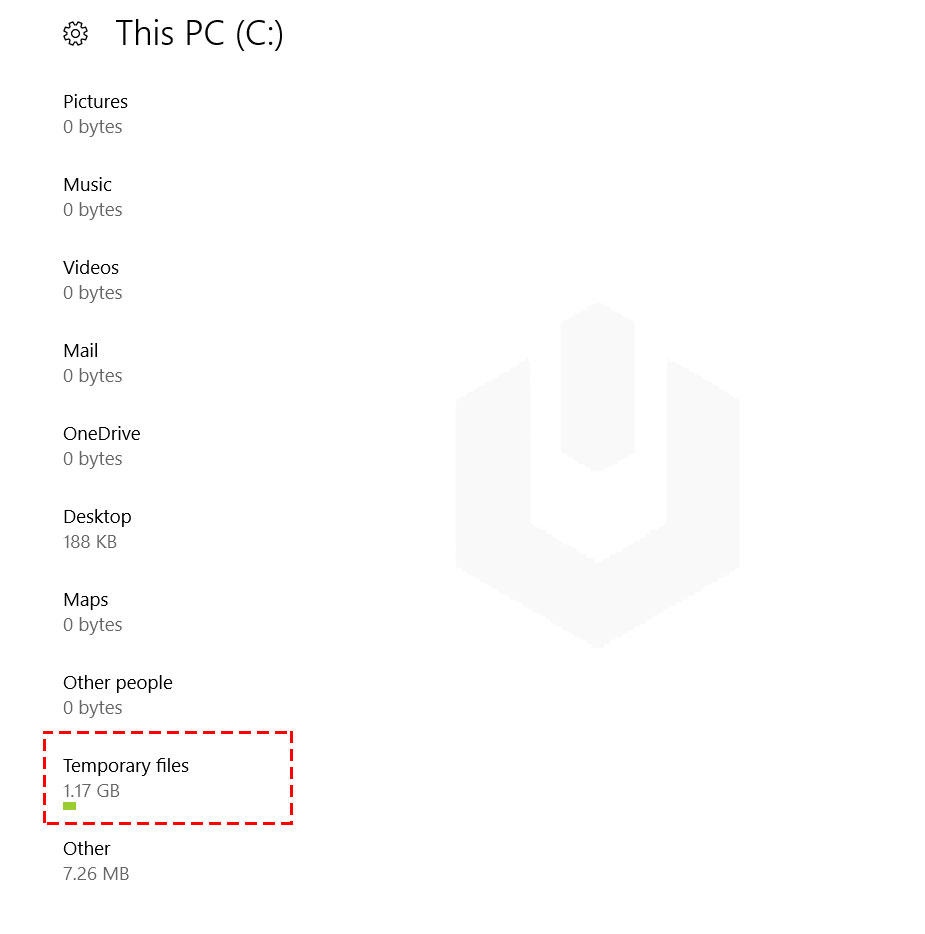
3. Click on Storage → Select the system disk partition.

4. Click on the Temporary Files.
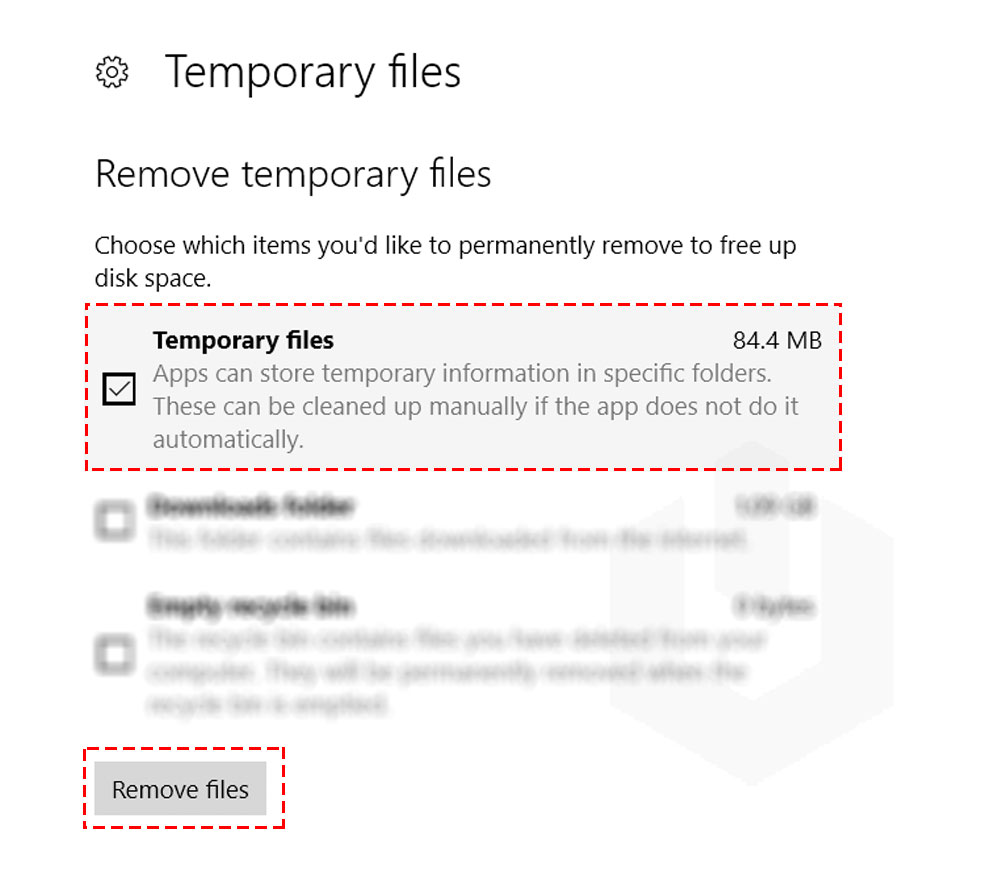
5. Check the option Temporary Files → Click on Remove Files.
Method 3: Clean up WinSxs folder
The WinSxS (Windows Side-by-Side) folder is a directory in Windows that stores different versions of system files, libraries, and components. It allows Windows to support different applications that might need specific versions of these files. When you install updates or new software, Windows often keeps the old versions in the WinSxS folder, just in case they’re needed by other applications.
Why Clean the WinSxS Folder?
Over time, the WinSxS folder can grow large because it accumulates these older versions. Cleaning it up helps free up disk space. Please follow the following steps to clean up WinSxS folder
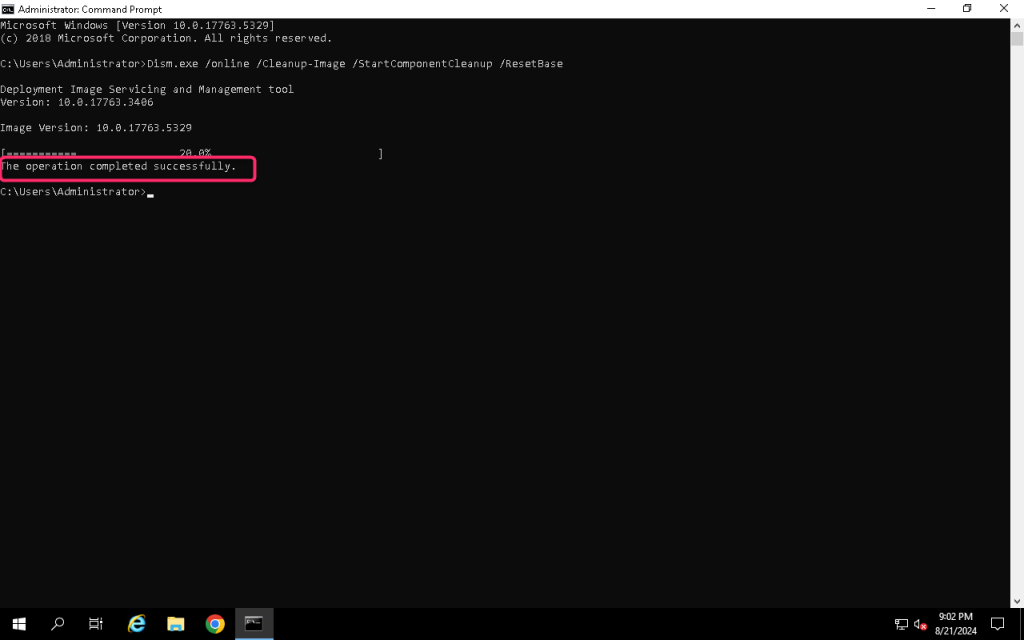
1. Open PowerShell or CMD on your server
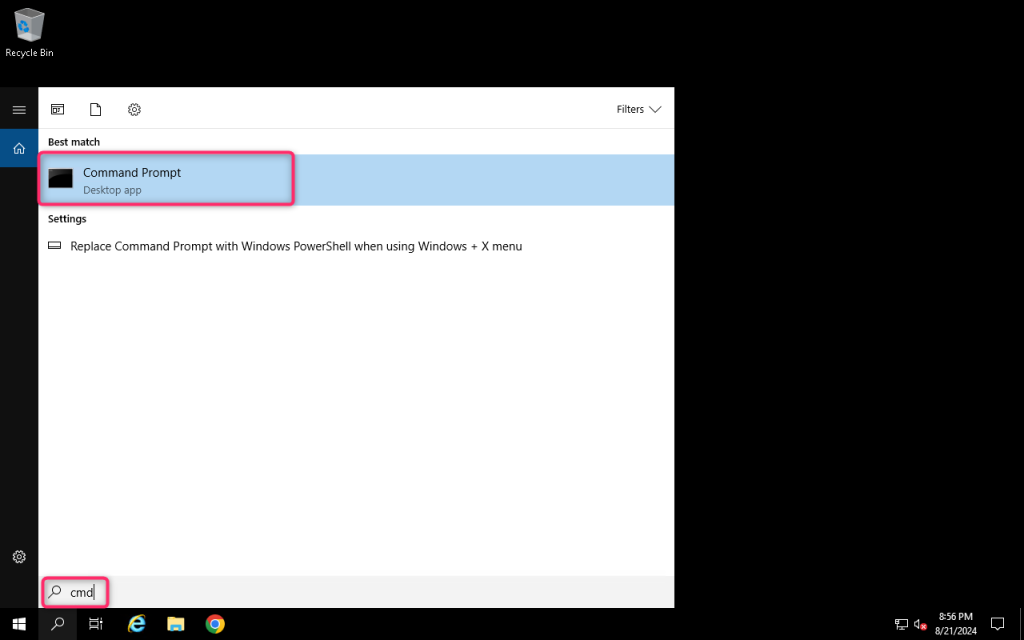
2. Run the following command, then hit Enter:
Dism.exe /online /Cleanup-Image /StartComponentCleanup /ResetBase
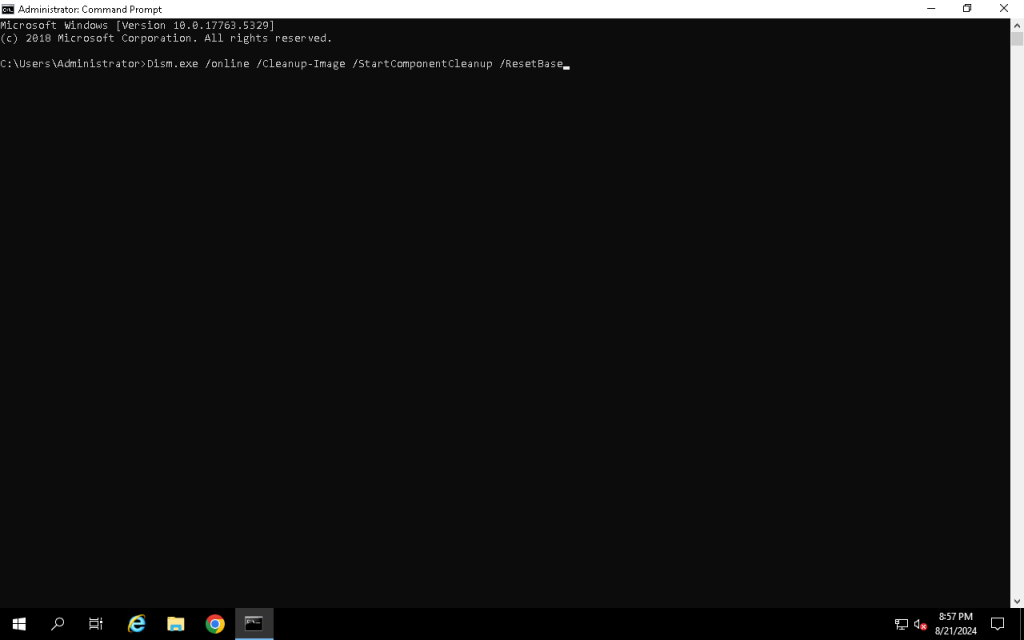
Please wait for a few minutes for the process to take place.
Method 4: Uninstall Softwares
Often you like the software and forget about it later, or you install the software for the single and keep it on the windows server for the rest of the time. That installed software will acquire the disk space on the Windows server’s system partition (mostly). In windows, we can uninstall the software which is consuming the disk space easily. Also, the less important application for you and consumes much space on the windows server can uninstall those applications manually through settings. Let’s get started!
1. Login to Windows Server → Open Settings.
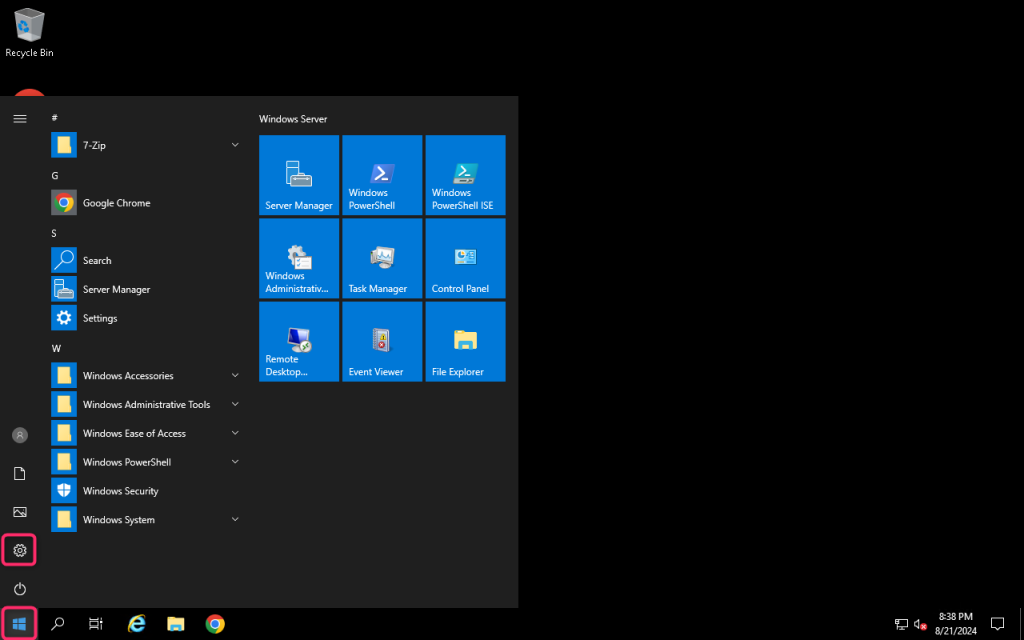
2. Navigate to System.

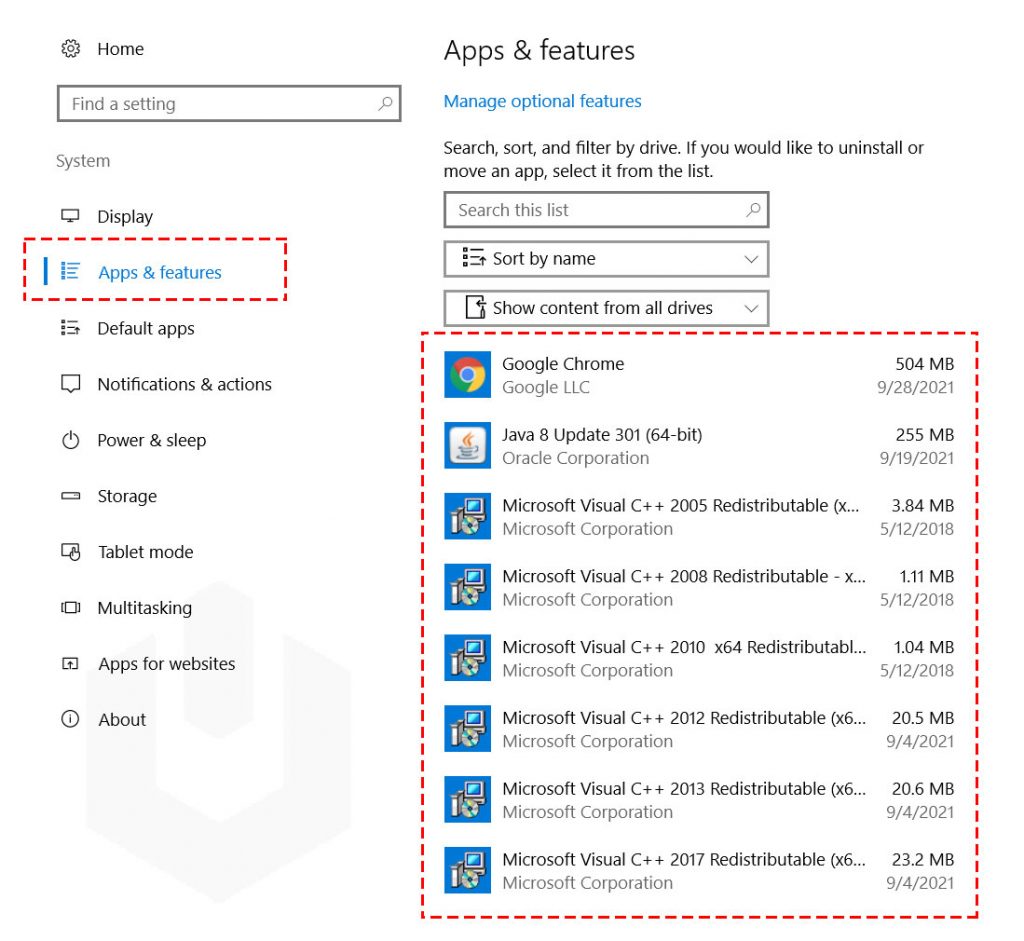
3. Now, navigate to Apps & features. Here you can find all the installed applications on the windows server.
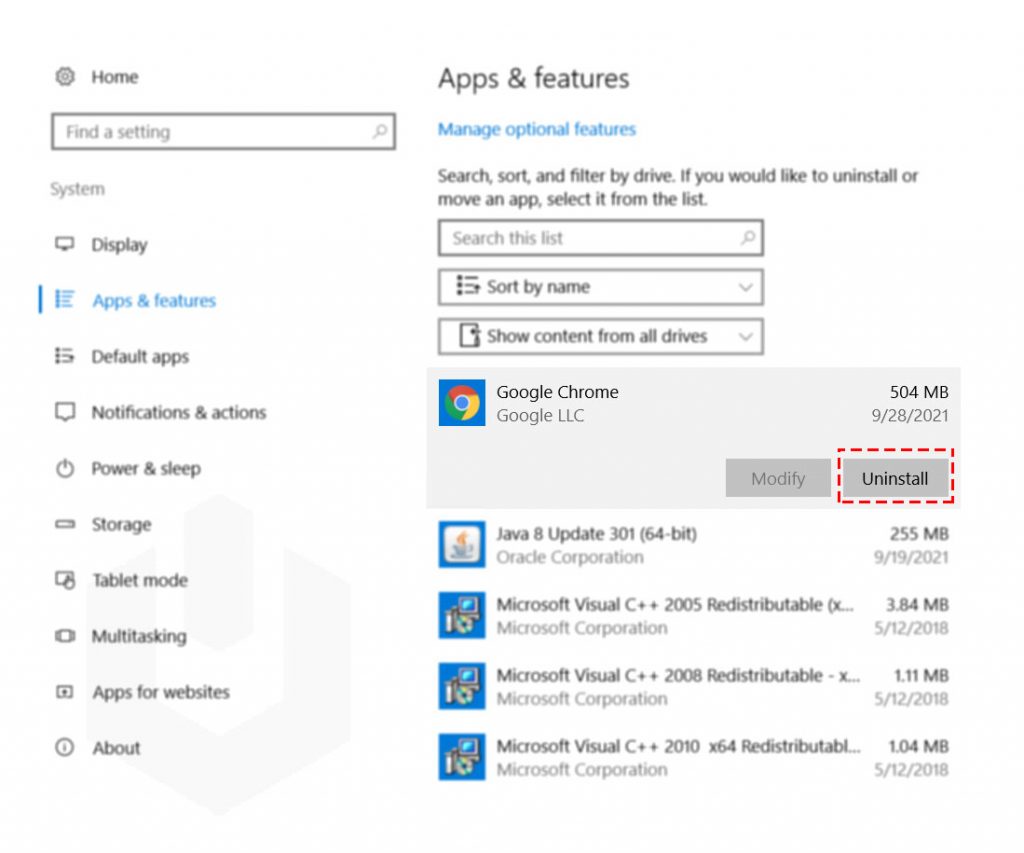
4. Select the application → Click on Uninstall.
Method 5: Empty Recycle Bin
Windows server has a very helpful feature called Recycle Bin. Every file or directory you delete will first go into the Recycle Bin, and you can recover the files anytime before they get overwritten with the newly deleted data.
Generally, we delete the files or directories that aren’t important to keep. It will be there in recycling been for a long period consuming disk space on the Windows server. We select all the available files and directories within the recycle bin and permanently delete those from the windows. Let’s get started and know how you can free up drive space in windows quickly!
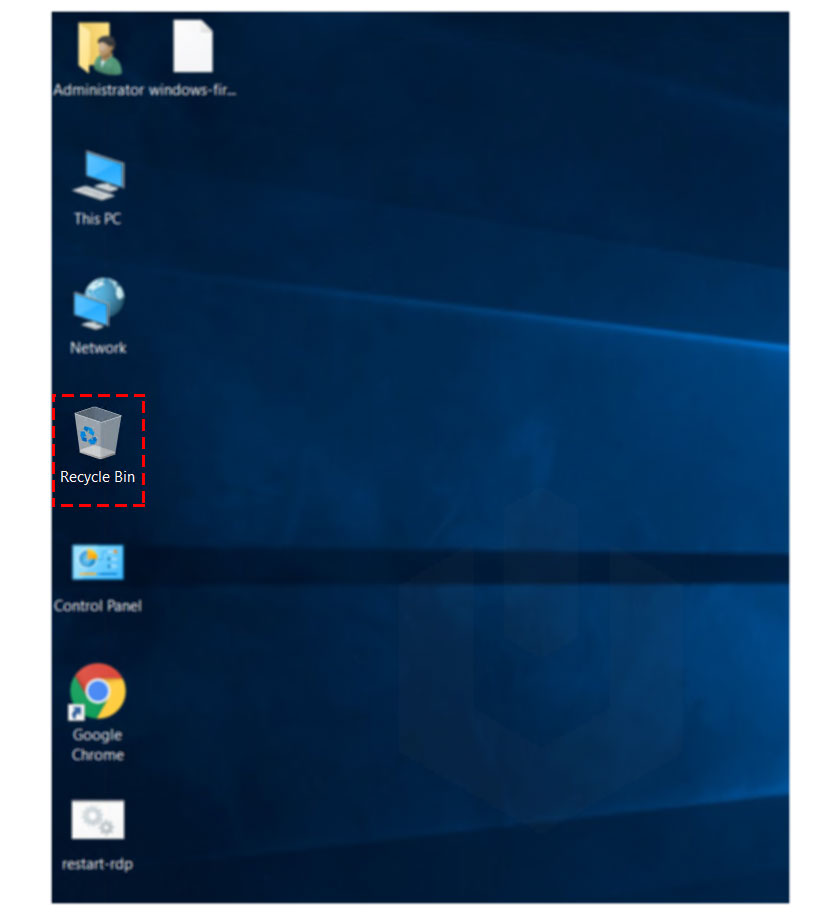
1. Login to Windows Server → Open Recycle Bin. If you are not able to see the Recycle Bin option on the desktop, then you can enable it from Windows → Show or hide common icons on the desktop.
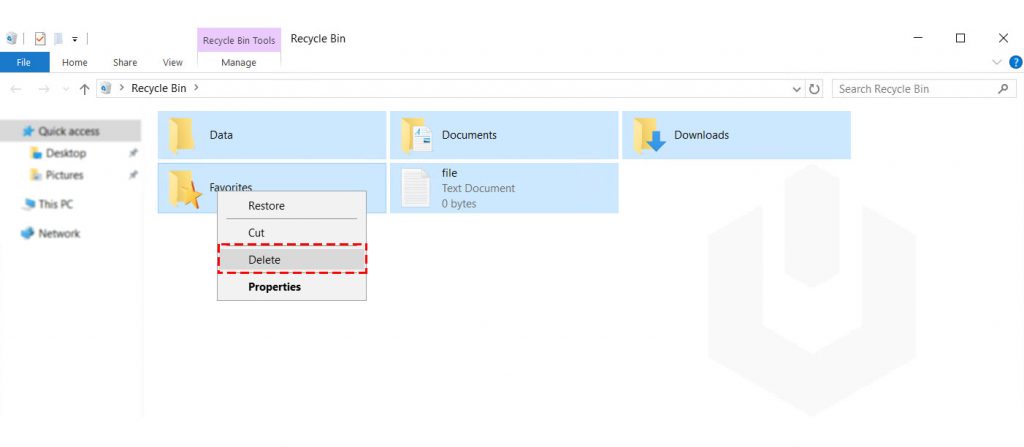
2. Select all the Items → Click on Delete.
Method 6: Delete Large Files
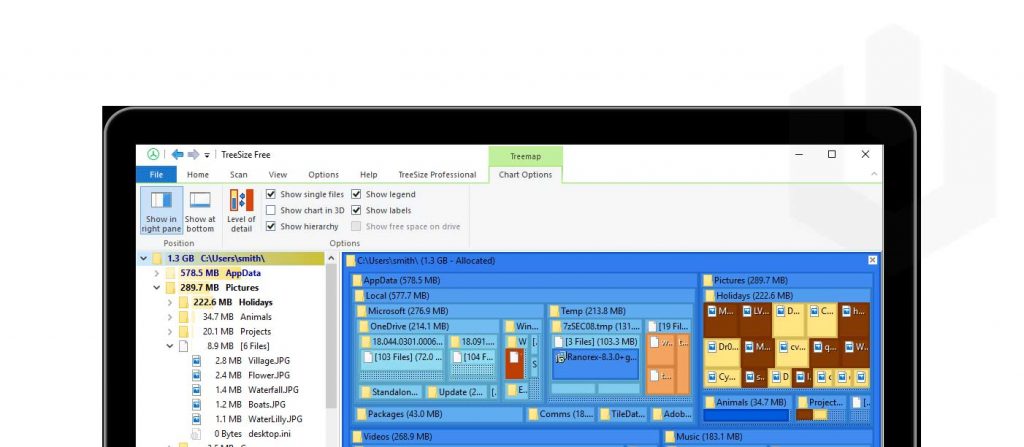
Above, we have covered all the possible ways to free up space or use cloud storage to backup files. To make the process of finding large files, you can use a third-party application such as TreeSize. Using TreeSize, you can easily find out the large files available on the windows server, and those can be removed easily by navigating to the destination of the file.
Method 7: Backup on Cloud
If you have the primary essential data on your Windows system and can’t delete or remove it from the system, then the only option you will have is to copy or keep the backup of data somewhere else. Here, you will have two options to back up the data,
- On Cloud Servers such as Google Drive, Dropbox, OneDrive
- On Physical Harddrive or USB or your local computer.
Acquiring the physical hard drive or USB for data storage will be the best option for the beginner. Generally, 1 TB SSDs will be available in the range of $75-$150, and the USB must be lower than that. Hard drives or USBs may get corrupted and their is chances of data loss is there (not much, 0.85% for the quarter). So, we will be left with another option keeping backup on Cloud.
Cloud is nothing but a collection of multiple bare-metal servers which are connected to achieve the most redundancy. Cloud infrastructure is generally recognized for scaling. You can increase or decrease the resources allocated to your server and pay the charges of used resources. In this case, you are just paying for what resources you are using, which will be at the end of the month or day, depending on the billing policy of the provider.
We have many cloud storage providers in the market, and the majority comes with the TBs of storage plans. Popular ones such as Drive, OneDrive, Dropbox, Mega, and much more. Every provider’s cost calculates the prices based on storage, bandwidth, and the majority of them charge fees with the pre-defined packages.
- Google Drive (Google One) – ~£1.99/mo.
- Microsoft OneDrive – ~£1.99/mo.
- Mega – ~£4.99/mo.
- Dropbox – ~£9.99/mo.
Singup, with any of the cloud storage provider and upload the files on their cloud server. After tat you can easily delete/remove those backed up files from the windows server.
Conclusion
In the article, we went through the best ways to free up drive space in windows server. Using this article, you will free up a significant chunk of files consuming unwanted drive space in the Windows server. Before installing any third-party application, make sure to check the application background and google to avoid any undesirable consequences.
Hyonix was founded in early 2018, as we believed the current pricing of Windows VPS was far too overpriced for most consumers. This makes it nonuser and budget-friendly for many people around the world. Our main goal is to change that – providing powerful licensed Windows VPS at a reasonable price so that everyone can grab one without thinking twice about the performance/price that you will get. Get yourself fully optimized Windows VPS starting @ $6.5/mo from Hyonix.com.
Also Read:
