Windows production environment requires a Database to store the data. Microsoft has MSSQL with commercial licensing. The free MSSQL version comes with the limitation of Memory, Space allocation per Database, etc. Hence, most production environments opt for MySQL, as it is open source and free to use. MySQL is a community-driven database server with an active community to patch and develop new updates.
In this article, you will learn about: How to Install MySQL on Windows Server?
Downloading MySQL
First download the MySQL MSI installer file from following URL,
Download URL: https://dev.mysql.com/downloads/installer/
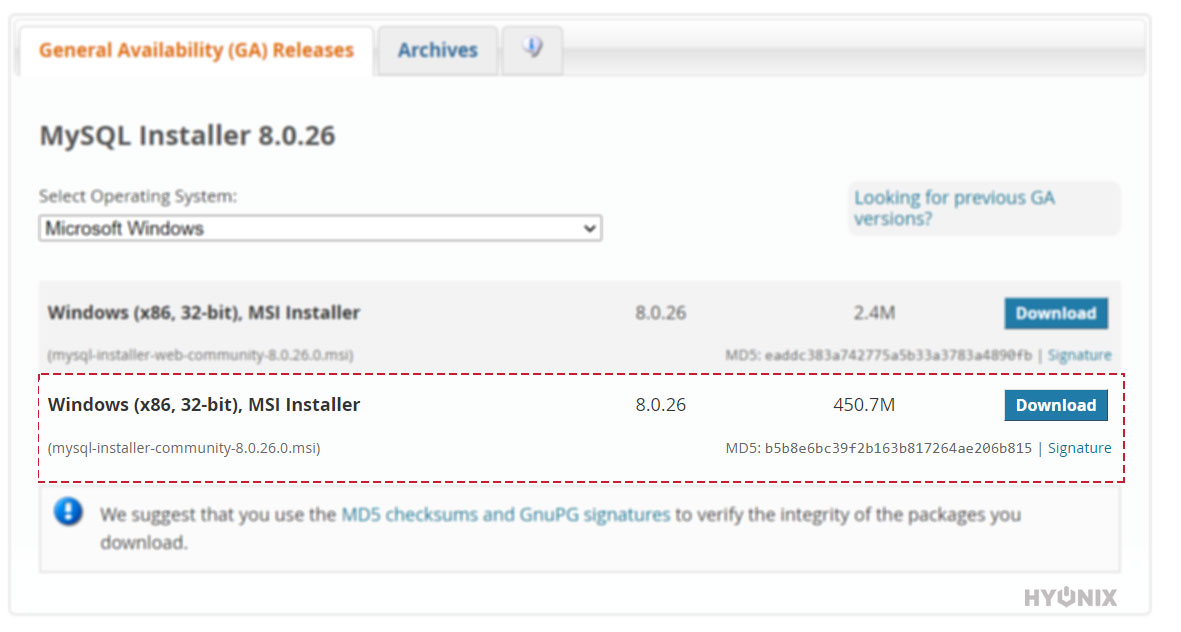
Now, you can see that there are two options to download.
a) Web Community Installer: This installer downloads the MySQL server.
b) Community Installer: This installer downloads MySQL server and required applications Workbench and other modules, which is helpful with MySQL server.
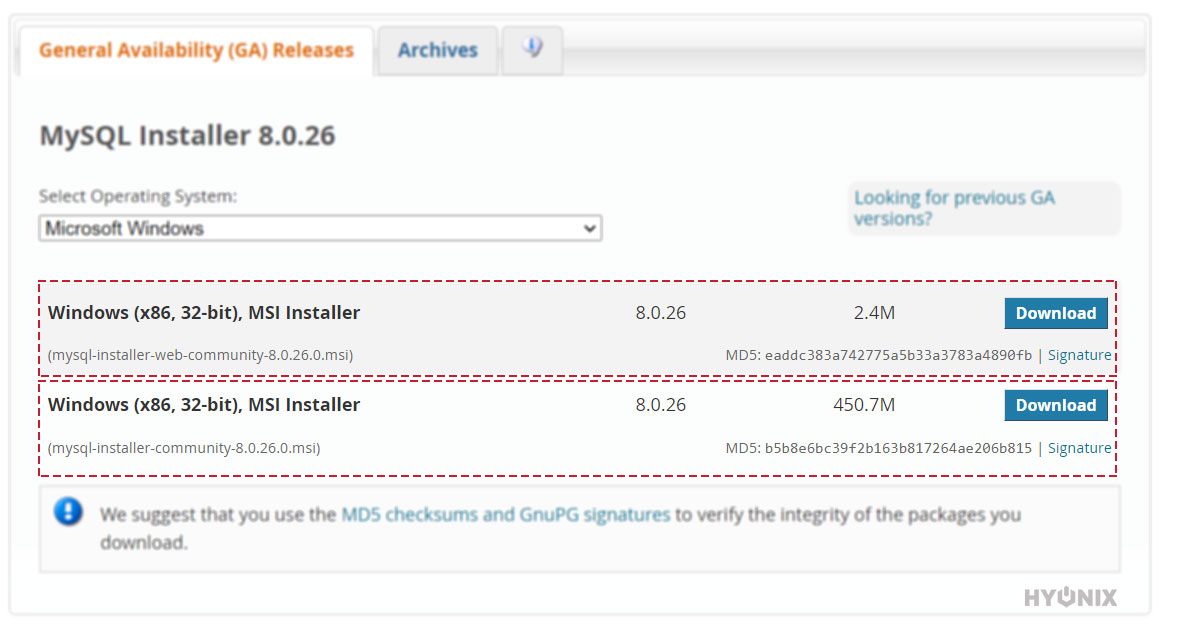
For this article, we will go ahead and download the Community Installer.
MySQL Installtion
1. Open Download location → Click on MySQL MSI Installer to start the installation → Click on “Run“.

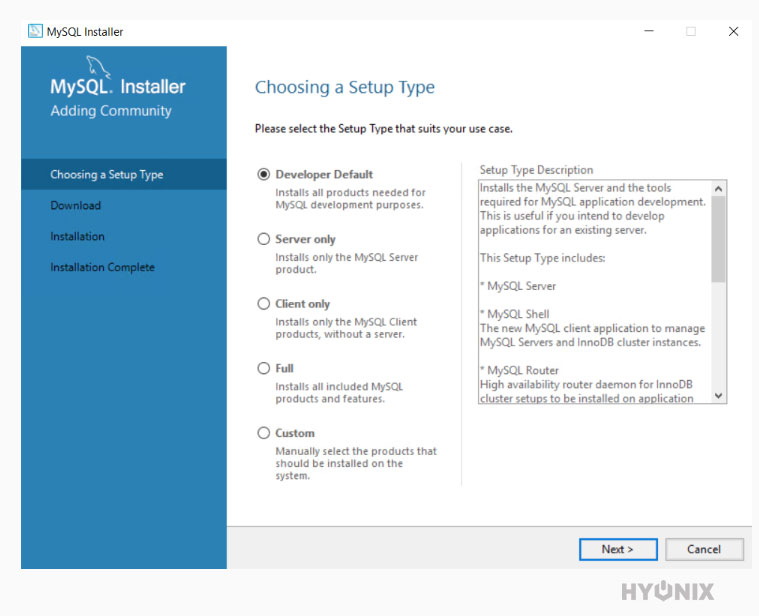
2. In this step, you need to select which MySQL Server you would like to install on the windows server → Click on Next.
Developer Default: Installs all products needed for MySQL development purposes.
The server only: Install only the MySQL Server product.
Client Only: Installs only the MySQL Client products without a server.
Full: Installs all included MySQL products and features.
Custom: Manually select the products that should be installed on the system.
3. We just need to install the MySQL Server on this windows server. So, select the MySQL Server version from the list → Click on Next.
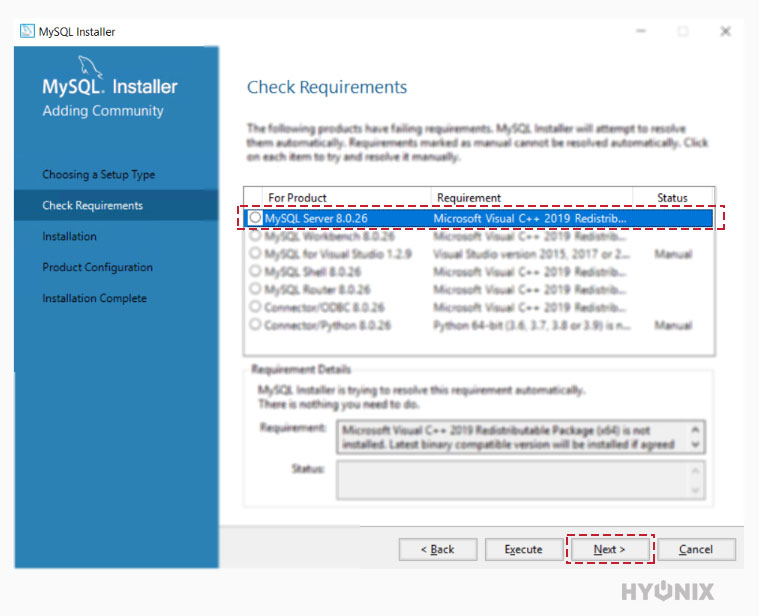
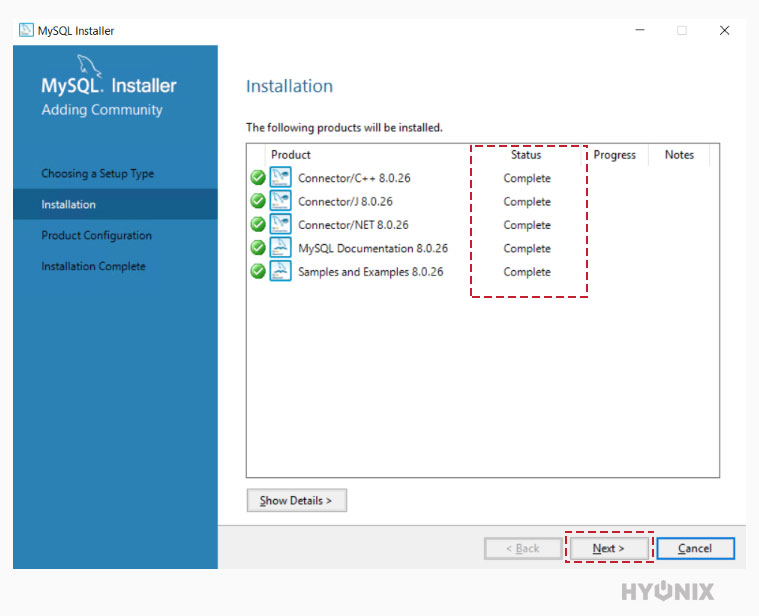
4. You will get introduced to the list of packages that will be installed → Confirm the installation by clicking on Execute.
The installer will take some time to complete all the packages installed. You can find the progress of each package installation in the Progress column.

5. Once installtion of every package is completed → Click on Next.
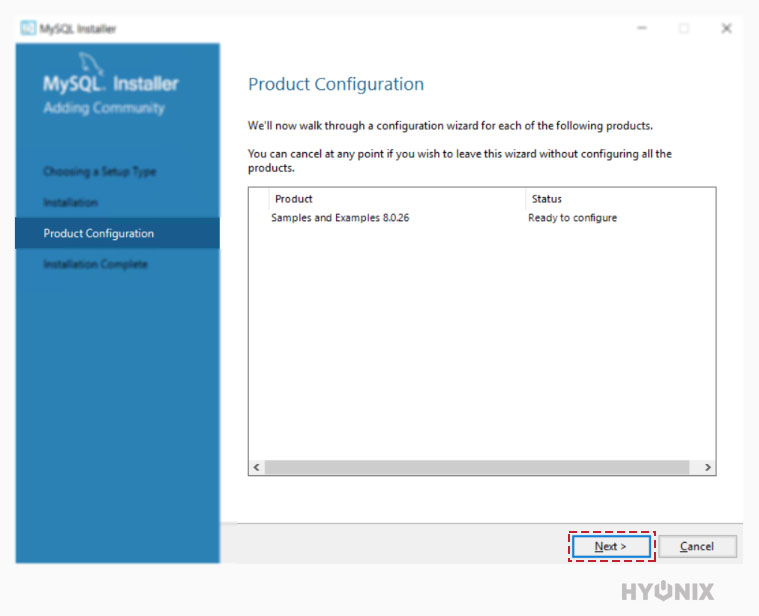
6. (Optional) In Product Configuration, MySQL Installer will walk through a configuration wizard for each of the listed products → Click on Next.
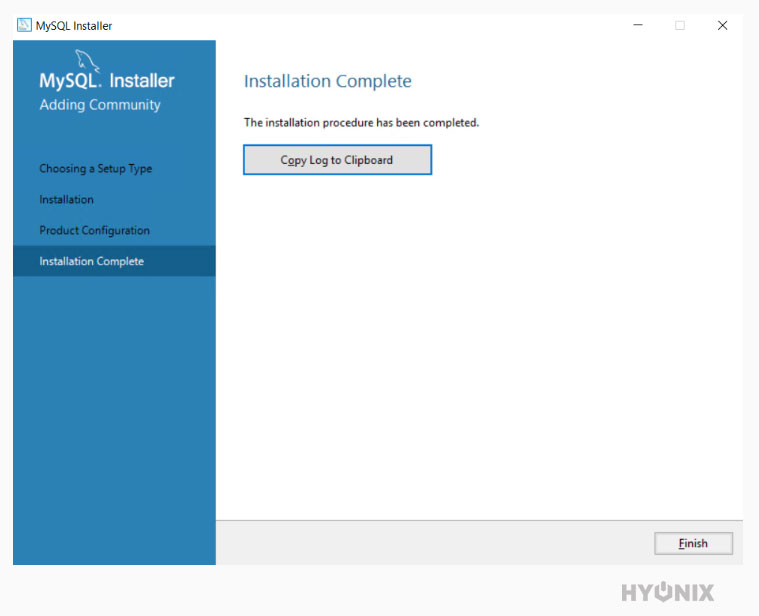
7. If you complete/skip/cancel the Product Configuration step. Congratulations! MySQL Server has been installed on your Windows Server.