On operating systems such as Windows Server 2016 and 2019, you will need to manually install the WLAN service through the server manager. In this article, we will demonstrate a step-by-step guide on how you can enable Wi-Fi on a Windows server.
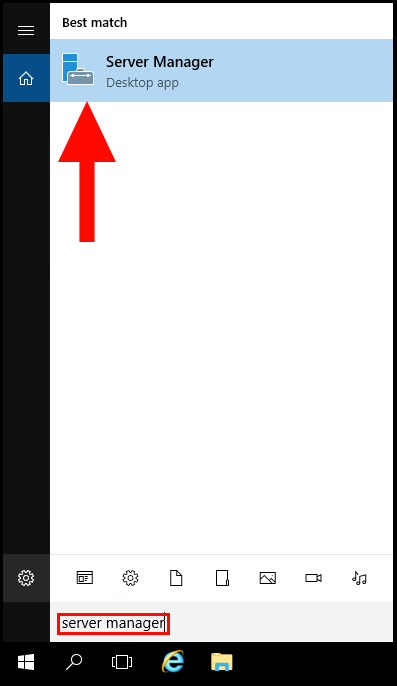
1. To start off, log in to your Windows server then search and open Server Manager.
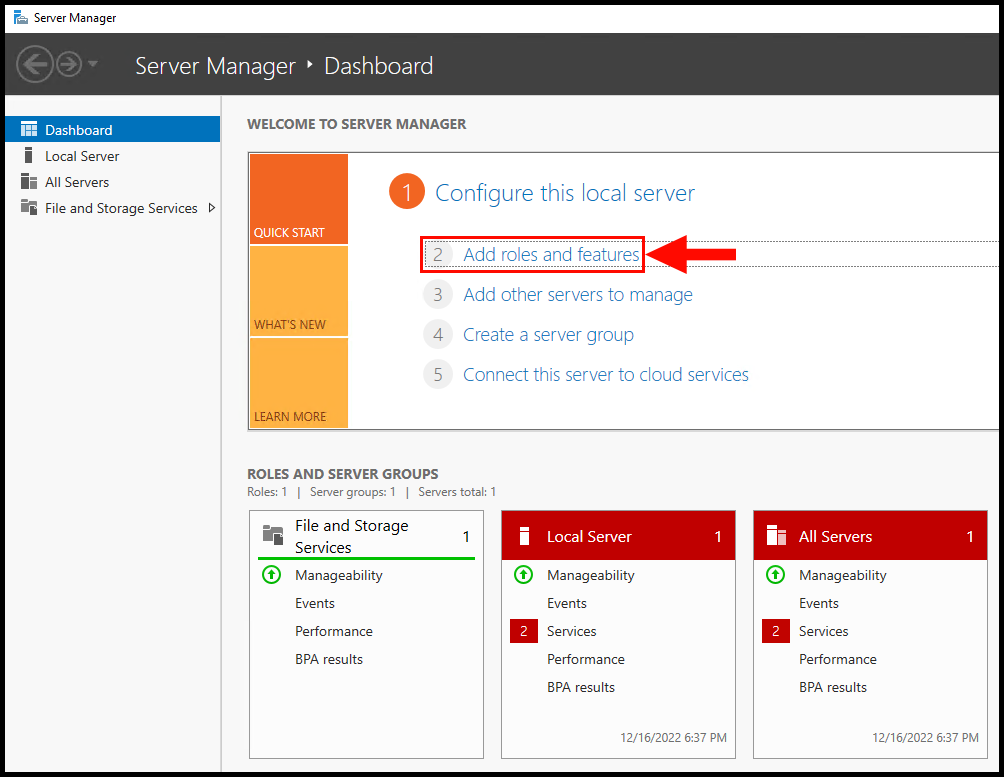
2. When the Server Manager window opens, click Add roles and features.
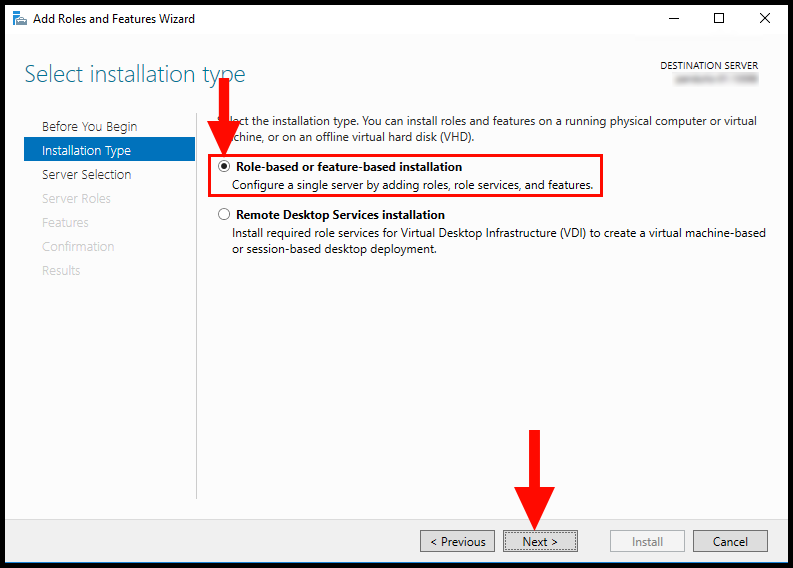
3. In the Installation Type tab, select Role-based or feature-based installation and click Next to move forward.
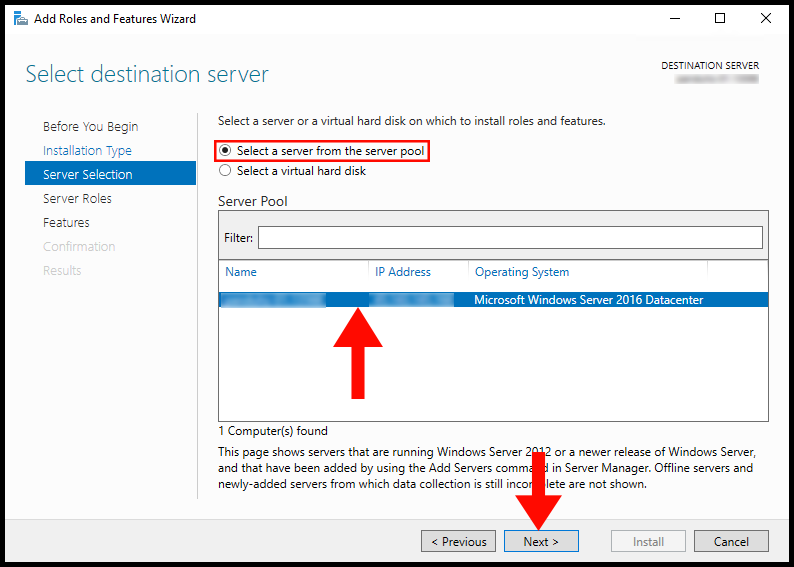
4. On the Server Selection tab, make sure to select Select a server from the server pool and click your server from the list as seen below. Once done, click Next to proceed.
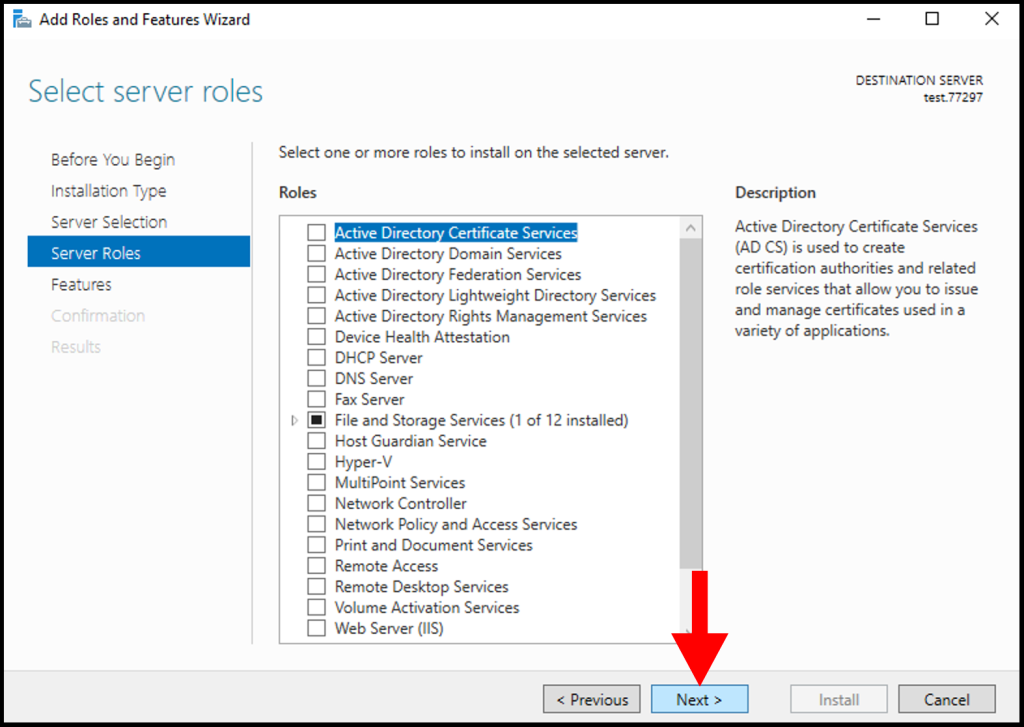
5. On the Server Roles tab, don’t make any selections and click Next.
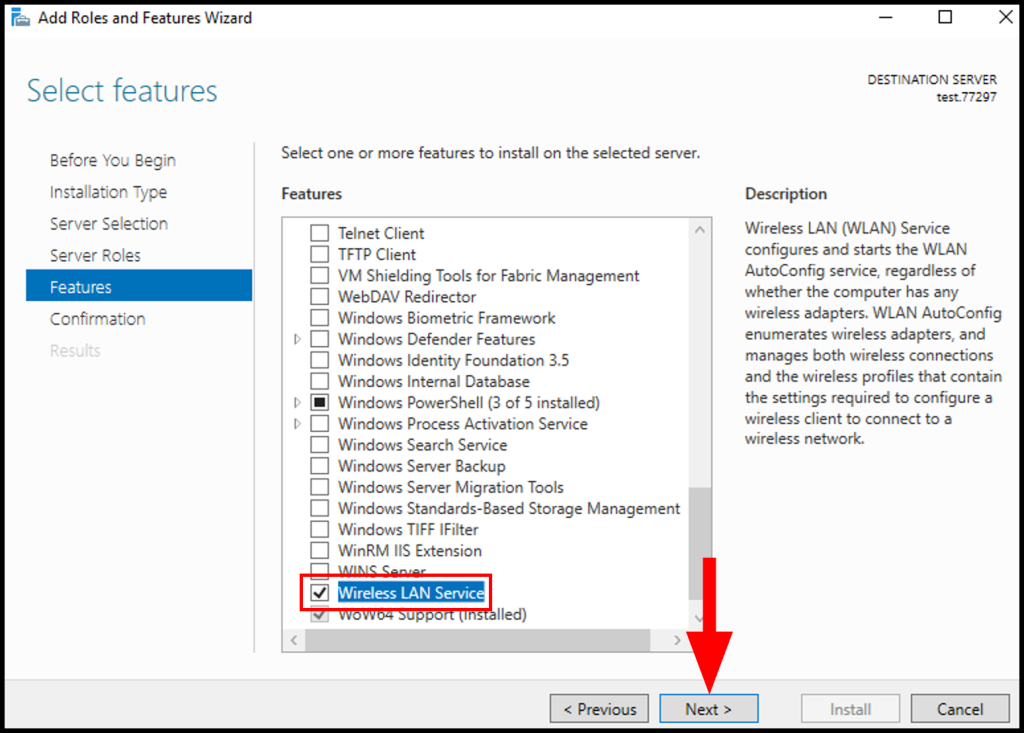
6. In the Features tab, scroll down and check the box for Wireless LAN Service. Then click Next to move forward.
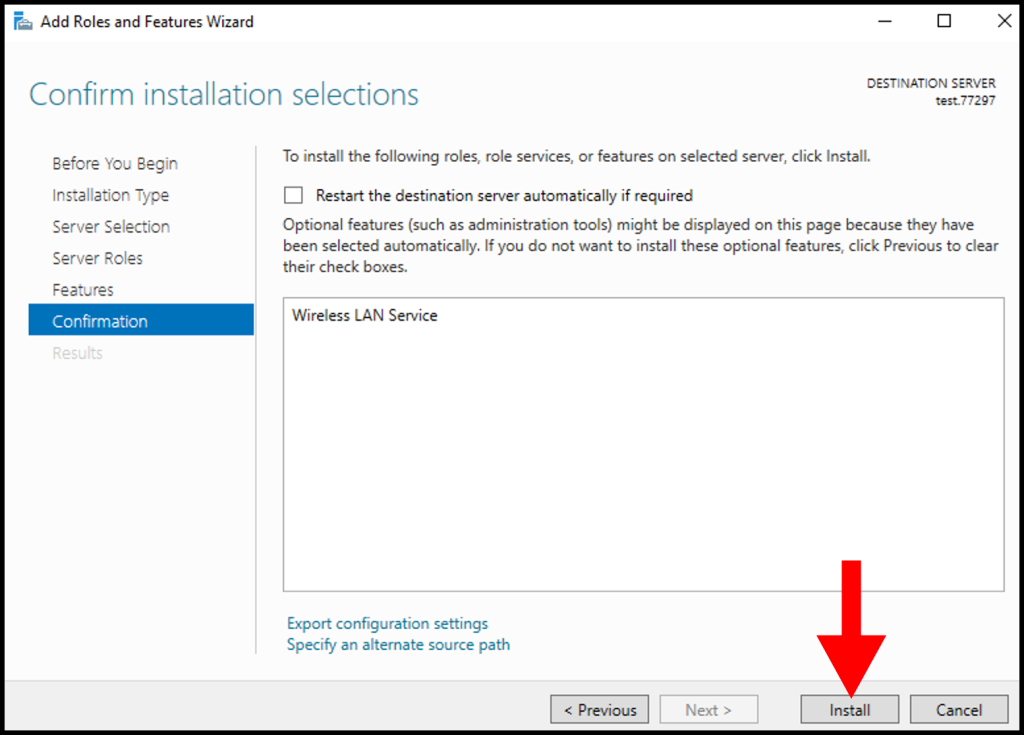
7. In the Confirmation tab, click Install to begin installing the Wireless LAN Service.
8. Congratulations! You have successfully installed Wireless LAN Service.
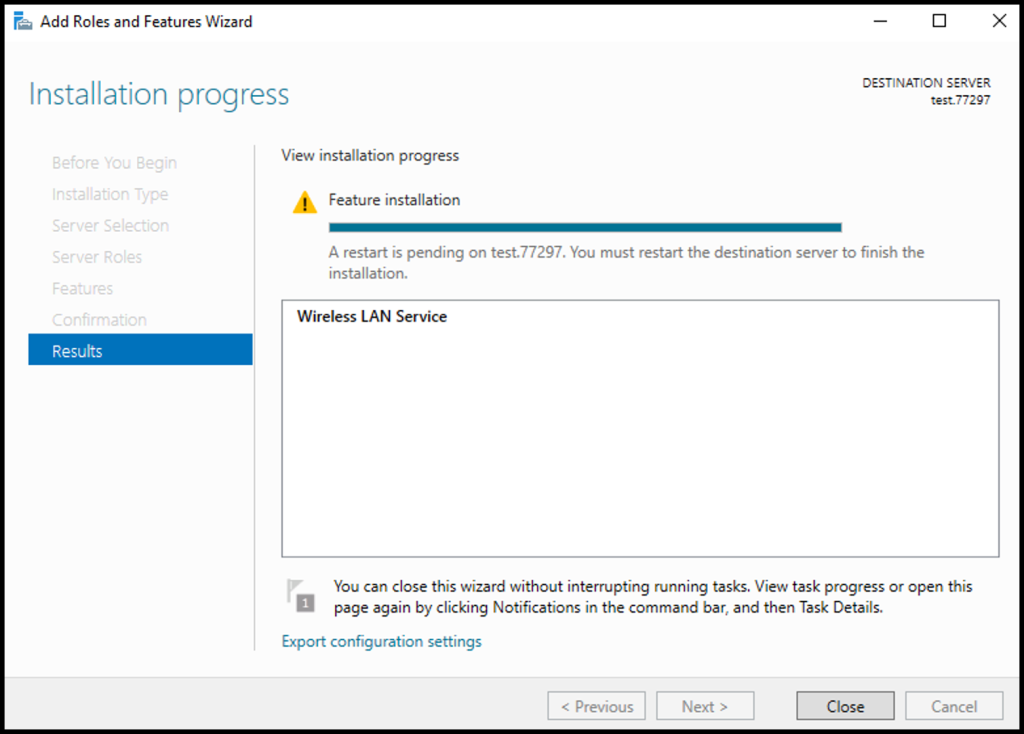
9. Finally, to complete the installation restart your Windows VPS.
