Most of the time, we need to look to block individual IP addresses on the server for a reason. We already covered Windows Firewall and Advanced Security in the previous article to block/allow specific Ports/Programs; we can block individual IP addresses through the same option.
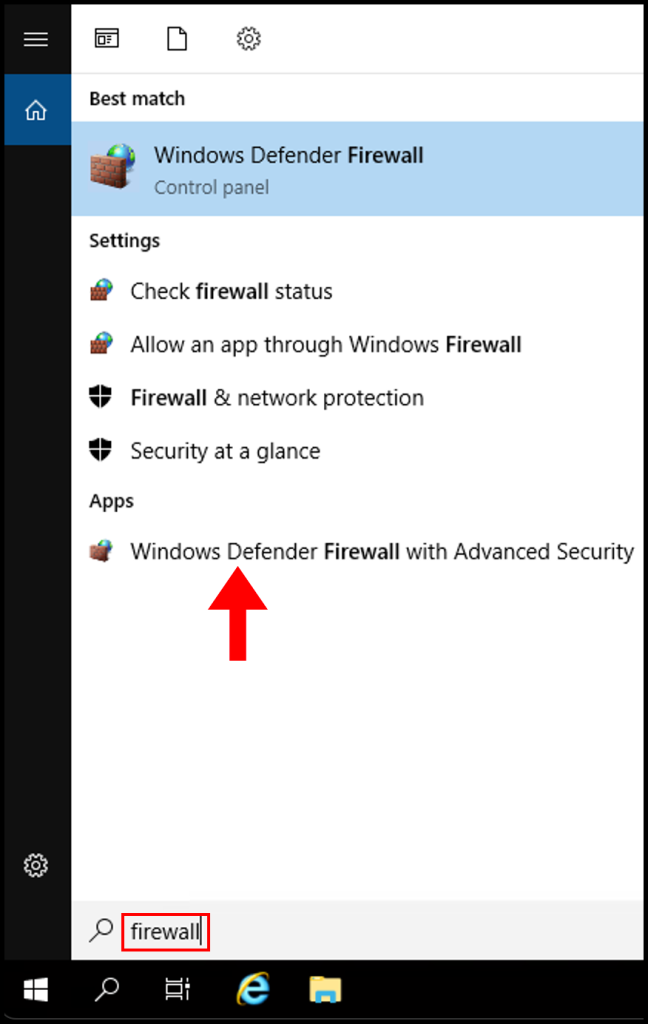
1. To start off, log in to your Windows server then search and open Windows Firewall with Advanced Security.
2. On the left side, navigate to Inbound Rules.
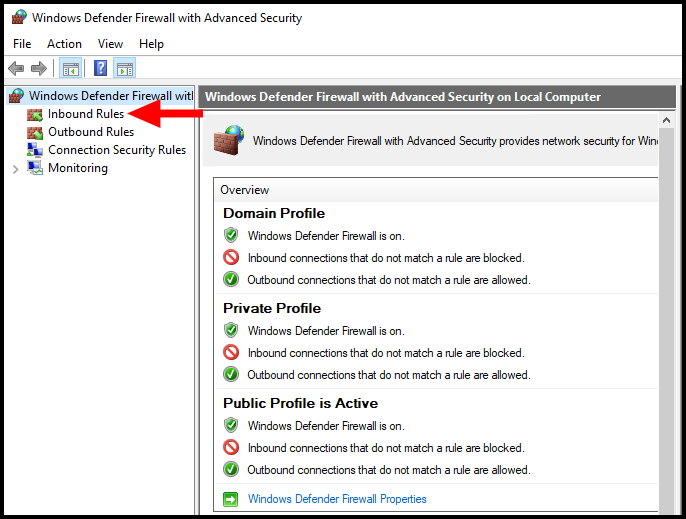
3. Then click on New Rule on the right-hand side.

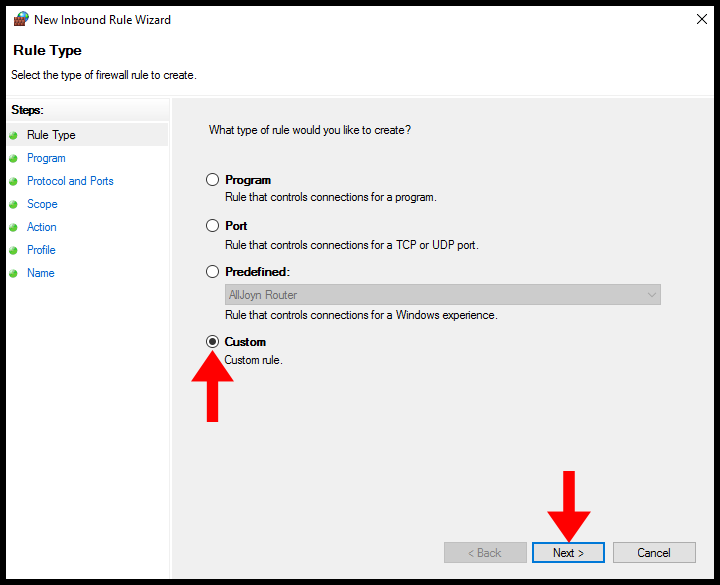
4. In the Rule Type section, select Custom and then click Next to move on.
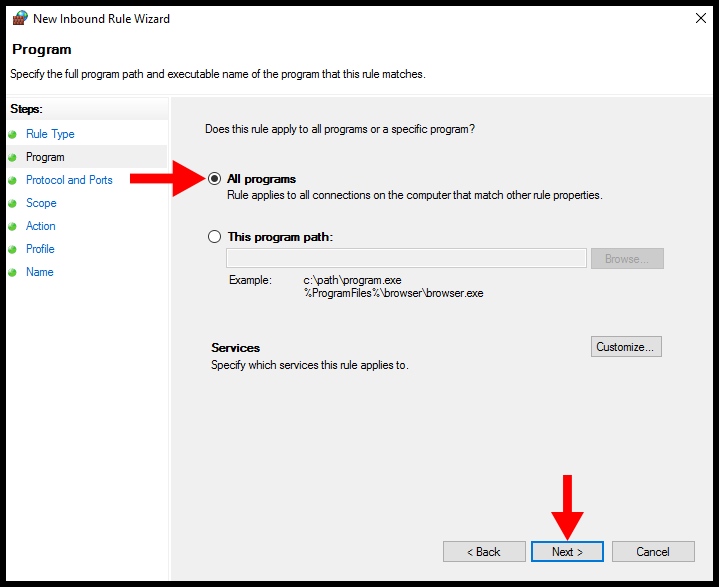
5. In the Program section, select All programs and then click Next.
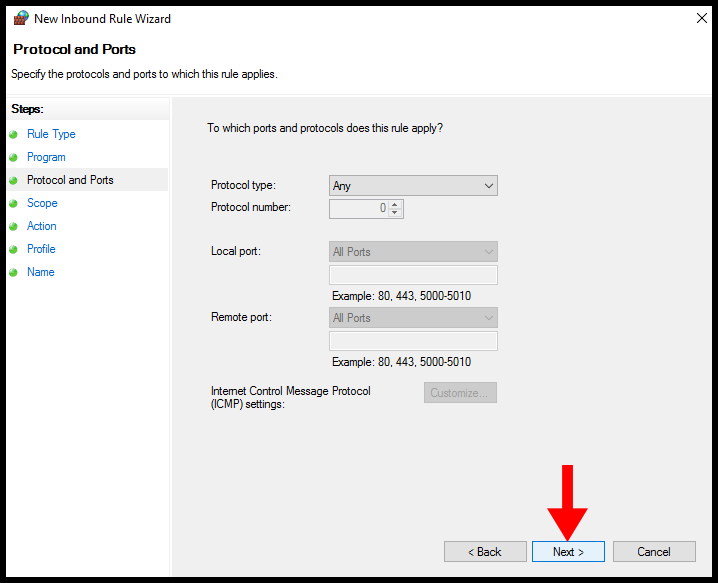
6. In the Protocol and Scope section, leave everything as is and then click Next.
7. In the Scope section, select These IP addresses under Which remote IP addresses does this rule apply to? and click Add on the right side.
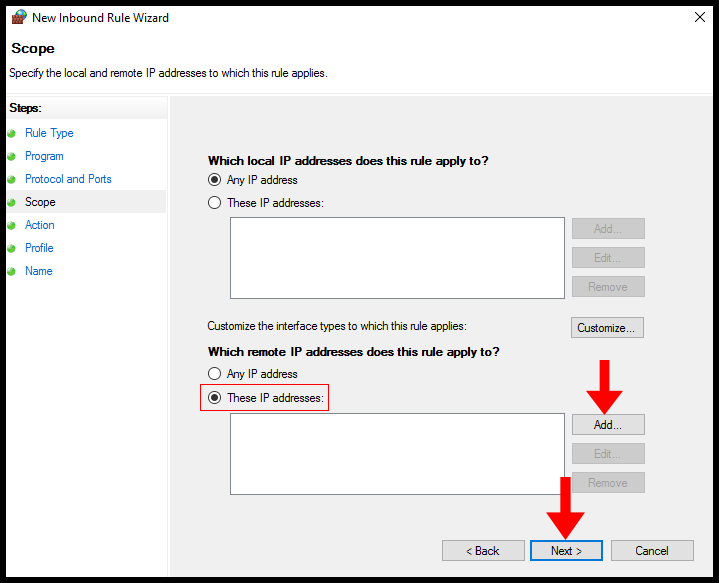
8. In the text box under This IP address or subnet enter an IP address you would like to block. Then click OK to move on.

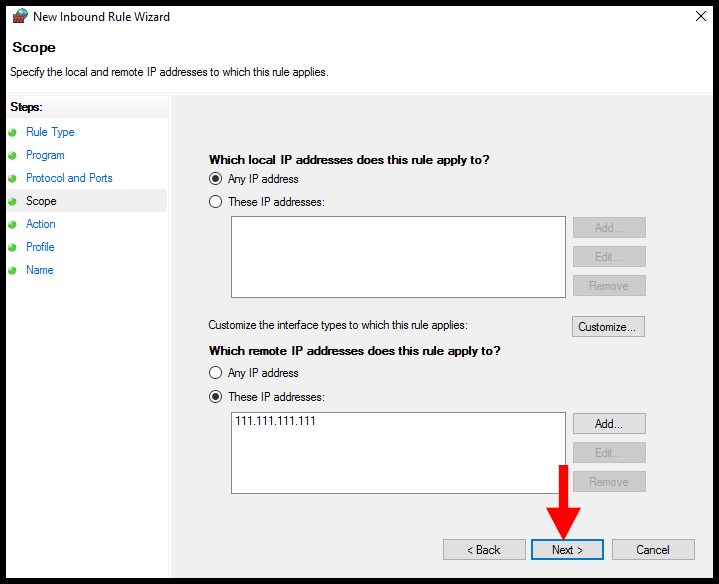
9. Now in the Scope section, click on Next.
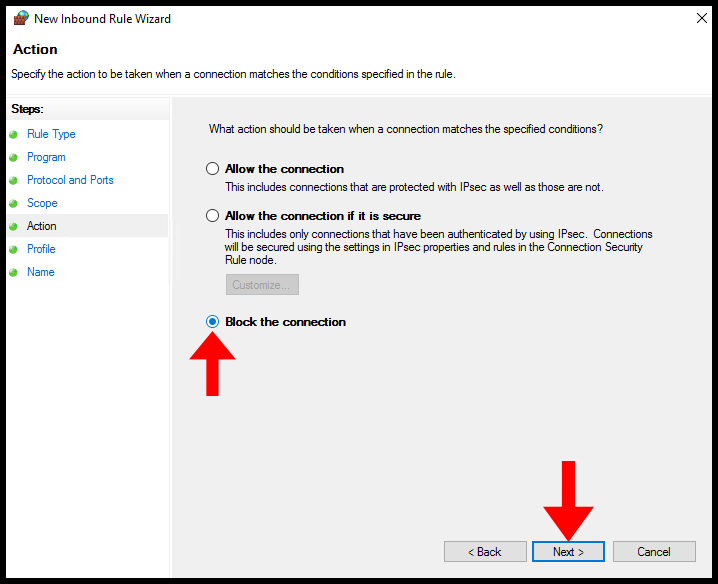
10. In the Action section, select Block the connection and click Next to move on.
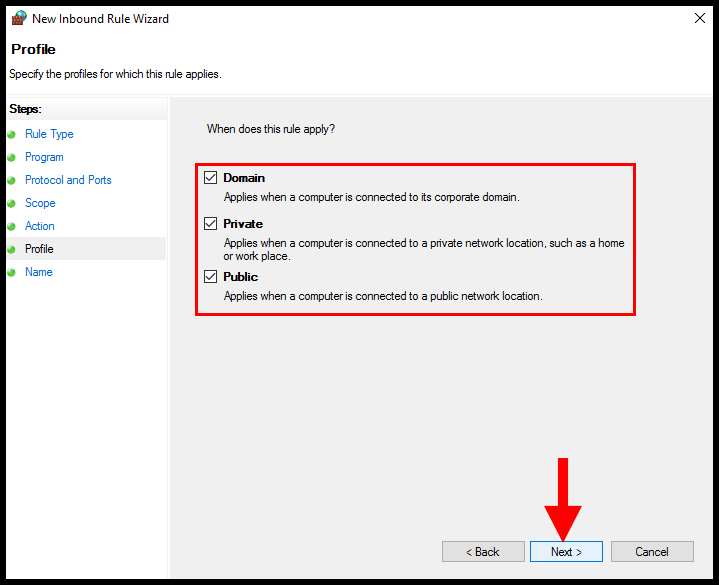
11. In the Profile section, you need to select all three options and click Next.
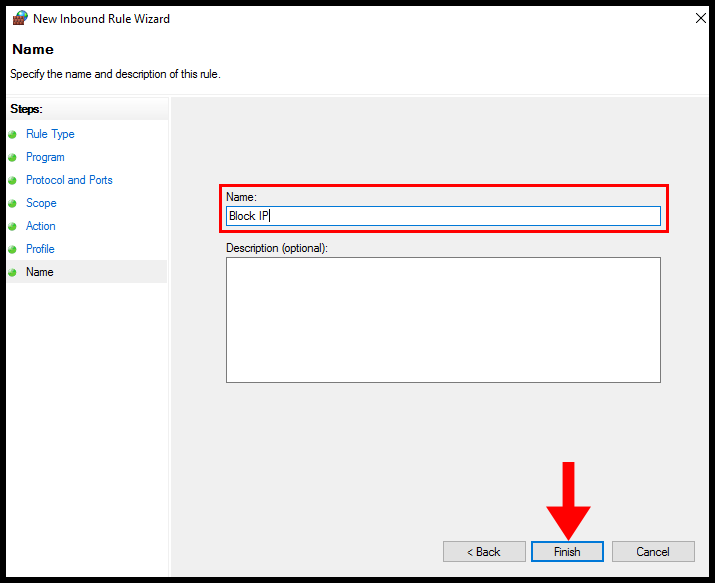
12. In the Name section, you will need to specify the name of the rule and click Finish to successfully block the IP.