Custom ports are commonly utilized by third-party applications and services to perform their operations. However, it is worth noting that in the Windows operating system, all custom firewalls except those considered standard by Windows are blocked by default. Consequently, enabling or allowing these ports through the firewall requires additional steps.
Allow Inbound Rules
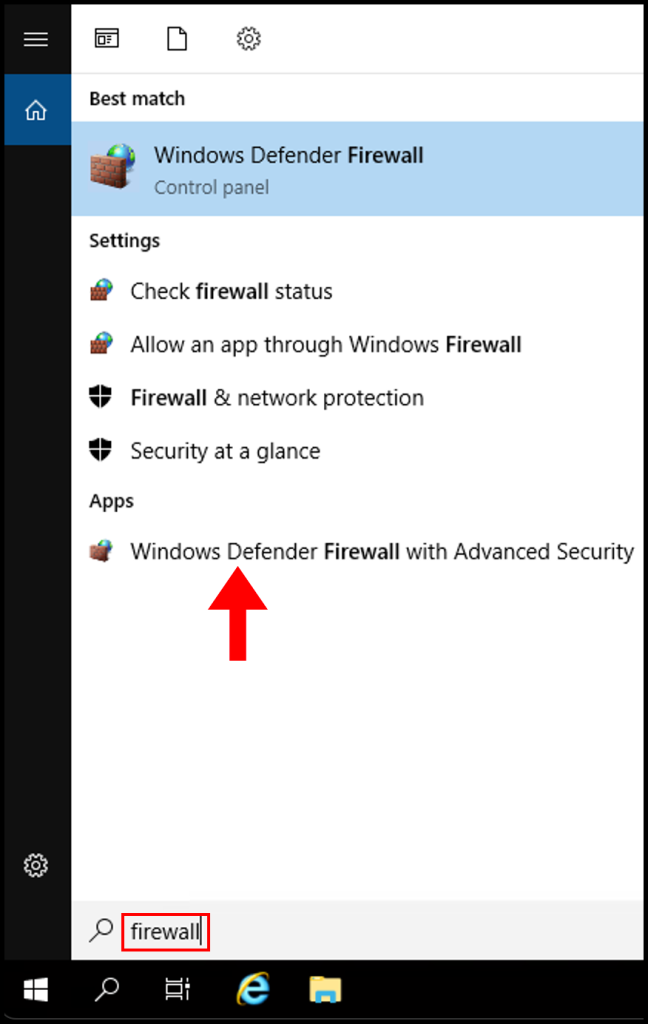
1. To start off, log in to your Windows VPS then search and open Windows Firewall with Advanced Security.
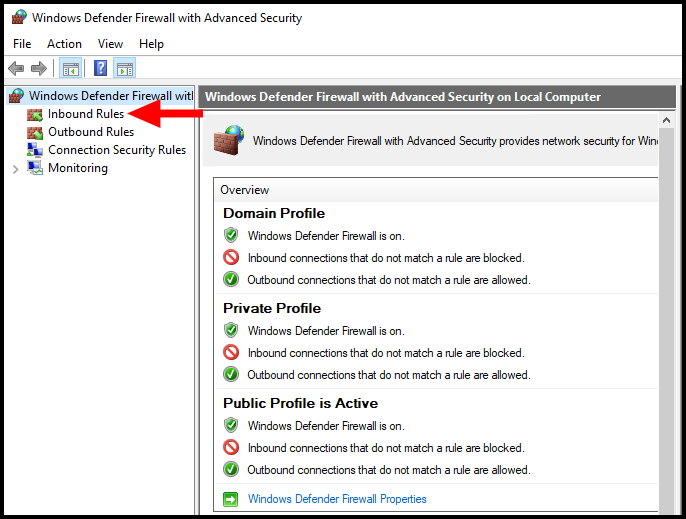
2. Next, navigate to Inbound rules on the left-hand side.
3. Next, click New Rule on the right-hand side.

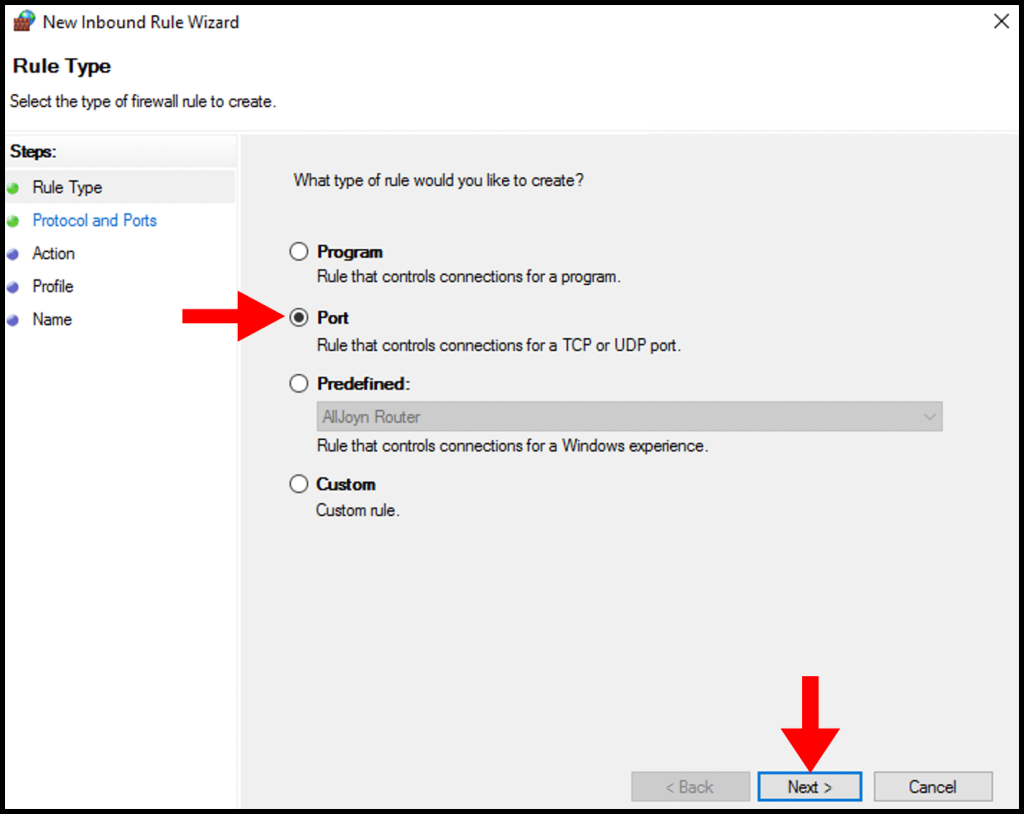
4. In the Rule Type section, select Port and click Next.
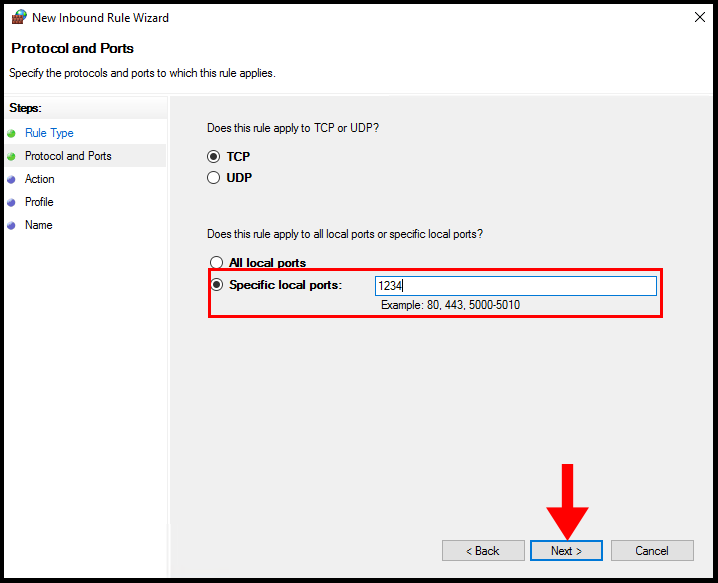
5. In the Protocol and Ports section, select Specific local ports and enter a port in the text box then click Next to move on.
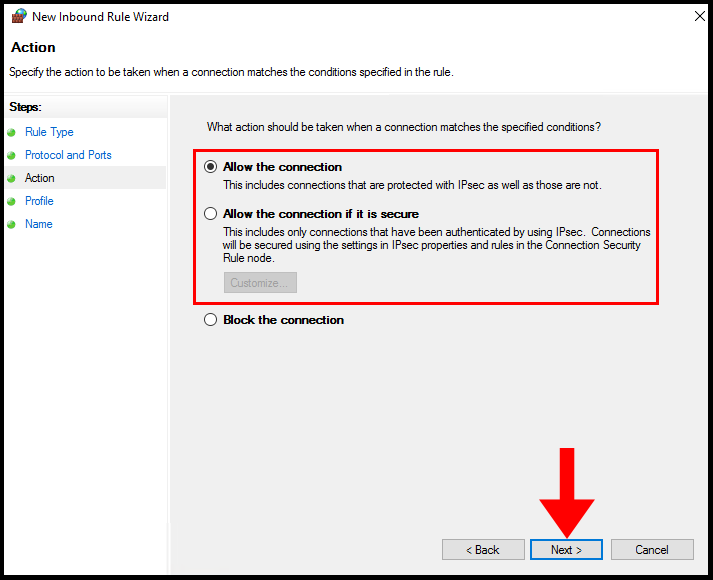
6. In the Action section, select Allow the connection or Allow the connection if it is secured then click Next.
Allow the connection: This includes connections that are protected with IPsec as well as those that are not.
Allow the connection if it is secure: This includes only connections that have been authenticated by using IPsec. Connections will e secured using the settings in IPsec properties and rules in the Connection Security Rule node.
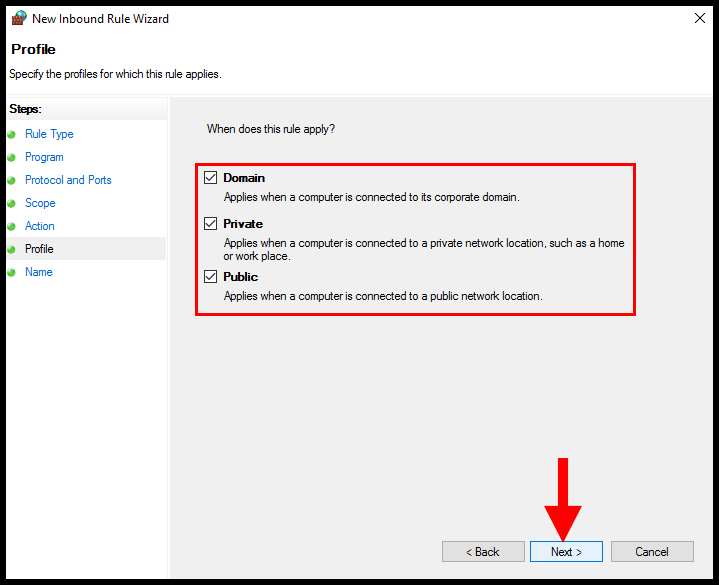
7. In the Profile section, you need to select the below options and click Next.
Domain: This applies when the server is connected to the corporate domain.
Private: This applies when the server is connected to a private network.
Public: This applies when the server is connected to a public network.
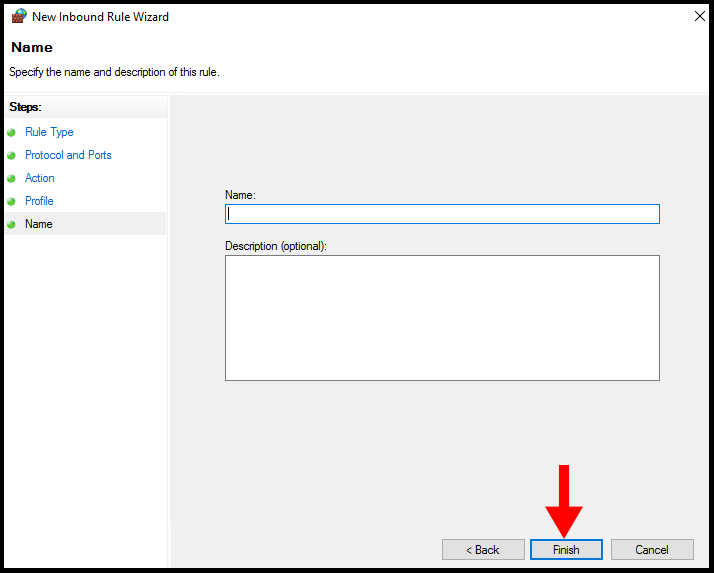
8. In the Name section, you must specify the Name for your Custom Rule and click Finish.
Allow Outbound Rules
1. To start off, log in to your Windows VPS then search and open Windows Firewall with Advanced Security.
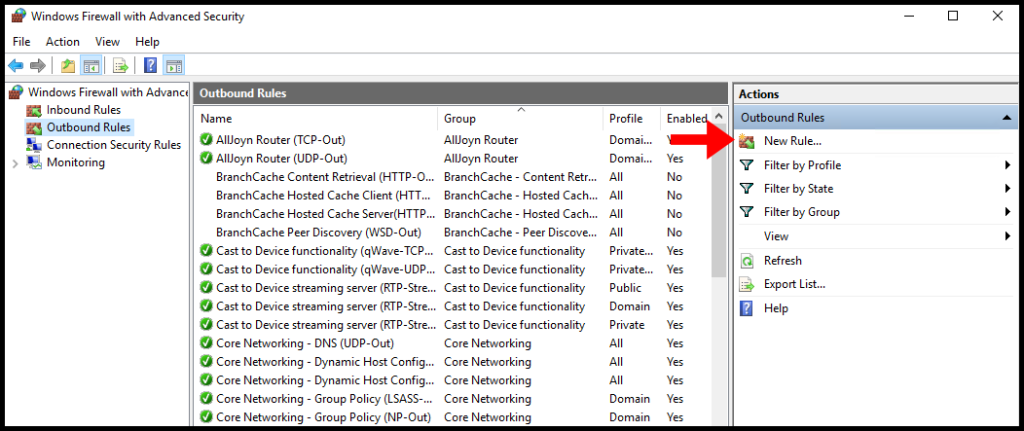
2. Next, navigate to Outbound Rules on the left-hand side.
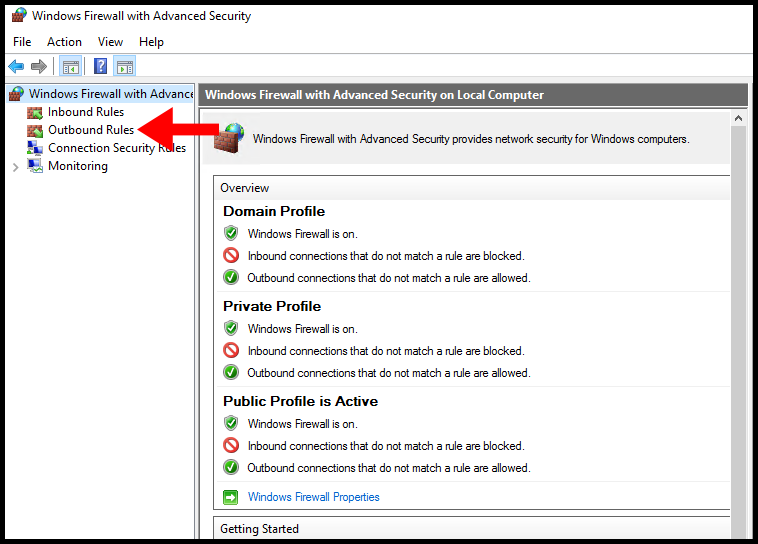
3. Next, click New Rule on the right-hand side.
4. In the Rule Type section, select Port then click Next.
5. In the Protocol and Ports section, select Specific local ports and enter a port in the text box then click Next to move on.
6. In the Action section, select Allow the connection or Allow the connection if it is secured then click Next.
Allow the connection: This includes connections that are protected with IPsec as well as those that are not.
Allow the connection if it is secure: This includes only connections that have been authenticated by using IPsec. Connections will e secured using the settings in IPsec properties and rules in the Connection Security Rule node.
7. In the Profile section, you need to select the below options and click Next.
Domain: This applies when the server is connected to the corporate domain.
Private: This applies when the server is connected to a private network.
Public: This applies when the server is connected to a public network.
8. In the Name section, you must specify the Name for your Custom Rule and click Finish.