In some cases, you may need to run a program as an administrator to utilize the program’s full functionality. Although remembering to run a program as an administrator each and every time can be a tedious task luckily in Windows, we are able to set specific programs to always run as administrator.
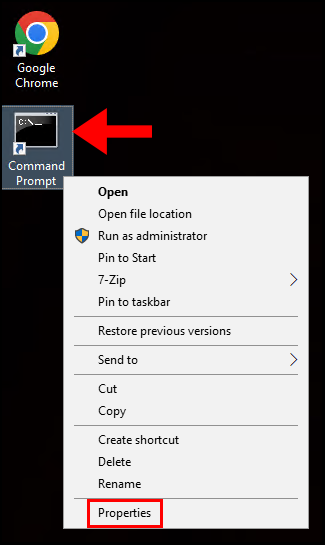
1. First, navigate to the application you’d like to set to always run as an administrator. In this guide, we will be using Command Prompt. Then, right-click on the program and select Properties.
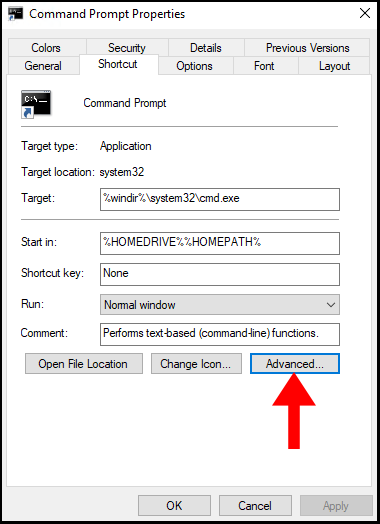
2. Next, in the Properties window of your program select Advanced as seen below.
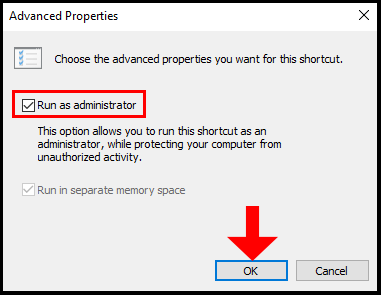
3. Now in the Advanced Properties window, check the box next to Run as administrator and then click OK to close the window.
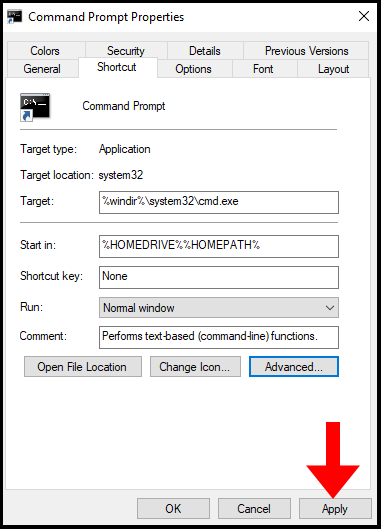
4. Lastly, click Apply in the Properties window to save the changes we’ve made. We’ve successfully set programs to always run as an administrator, now we can utilize the full functionality without any hassle.