Windows especially have fantastic preinstalled Windows Defender Antivirus on their major operating system. Keeping the server secure from the well-known attacks Windows Defender will surely help you. It has a very simplistic mechanism and configuration which you can do as per requirements.
In this article learn: How to use and configure Windows Defender Antivirus on Windows Server?
Check Windows Defender Antivirus & Addons Status
In some OS settings windows defender antivirus is disabled due make the performance better. But we can go ahead and check the status of Windows Defender using the following steps whether it is installed or available to install,
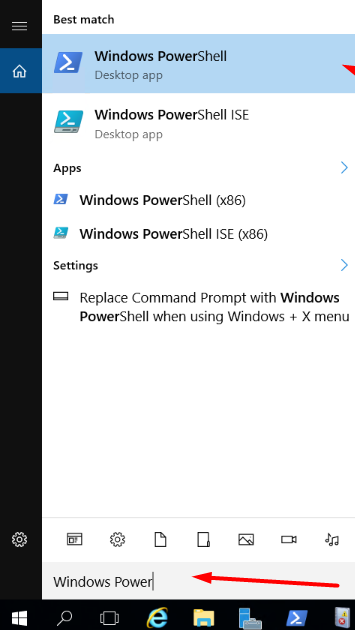
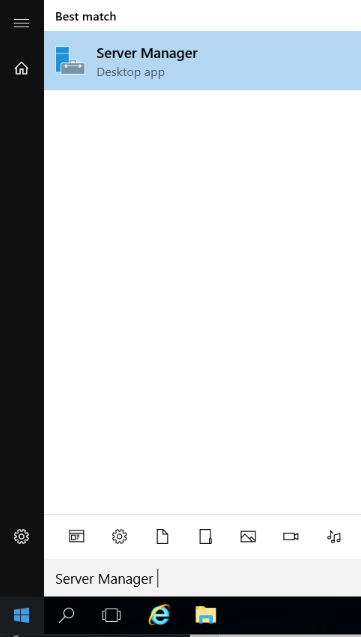
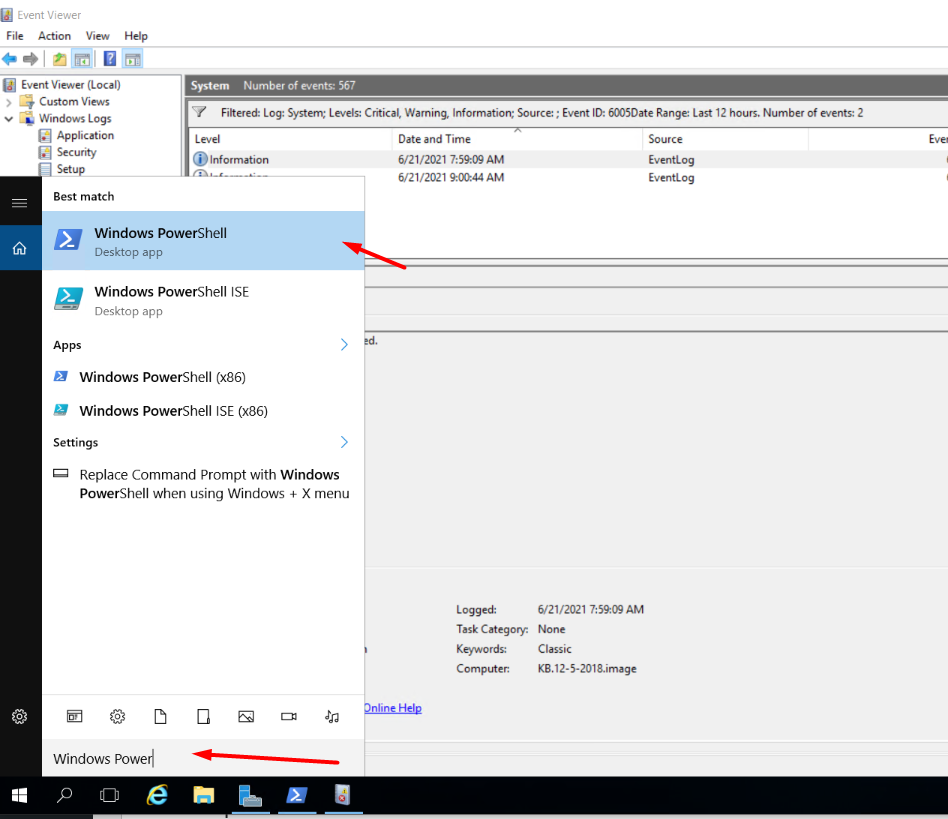
1. Login to Windows Server → Search and Open “Windows Powershell“.
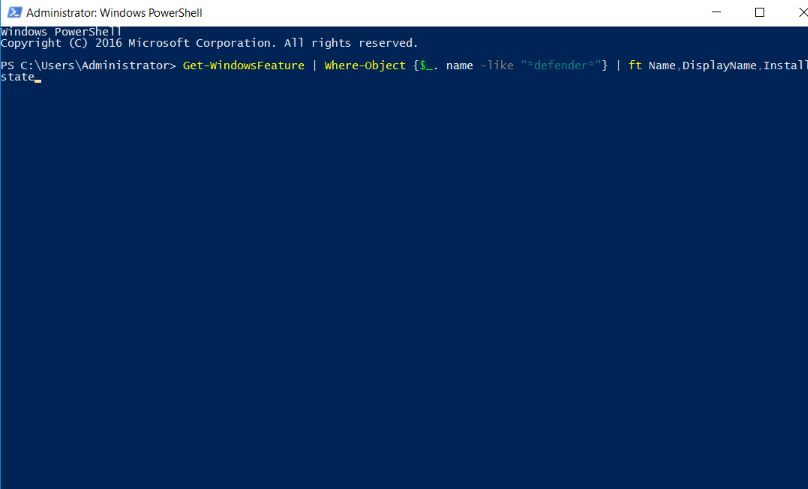
2. Run the following command to enable the Windows Defender Antivirus on the server.
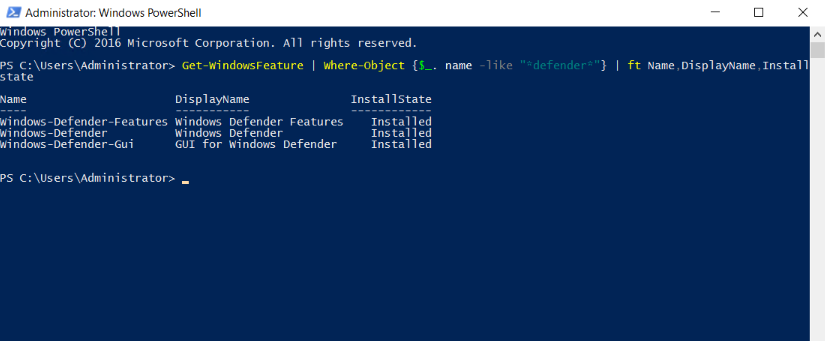
Get-WindowsFeature | Where-Object {$_. name -like "*defender*"} | ft Name,DisplayName,Installstate
3. Now you can see all the available or installed status of windows defender antivirus and modules/addons of the windows defender antivirus. All the items with Available Status you can install using following methods,
Install Windows Defender Antivirus GUI Manually.
In the windows server operating systems (2012, 2016, etc) there is no GUI is installed/enabled by default for Windows Defender Antivirus. But, windows offer us options to install/enable the GUI using server manager or Powershell. If the above command turned output as Available for Windows Defender and its add-on modules, you can install it from server manager or Powershell.
Using Server Manager.
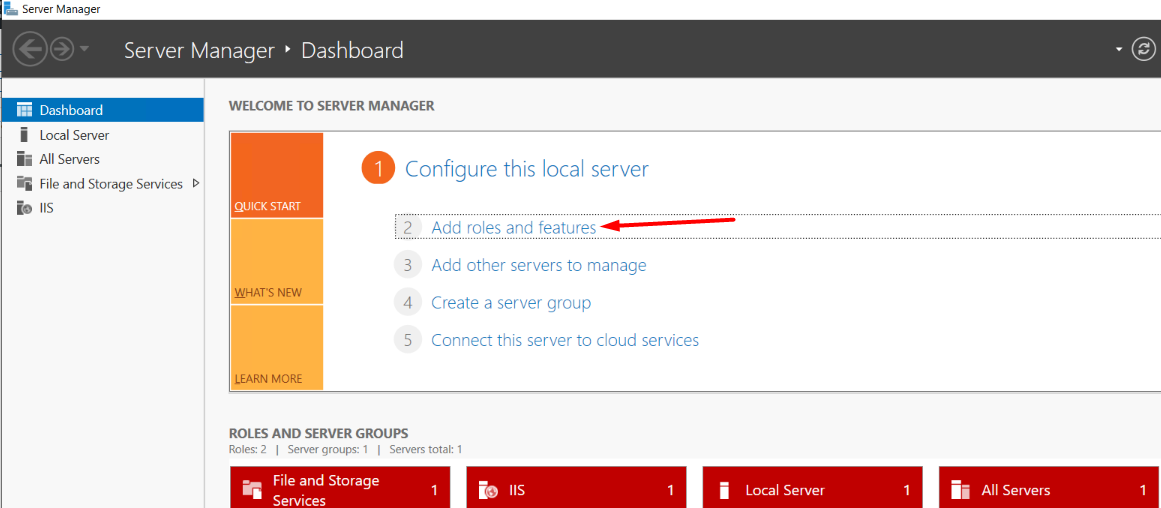
1. Log in to your Windows Server 2012, 2016, or later → Open Server Manager.
2. Click on “Add Roles and Features“.
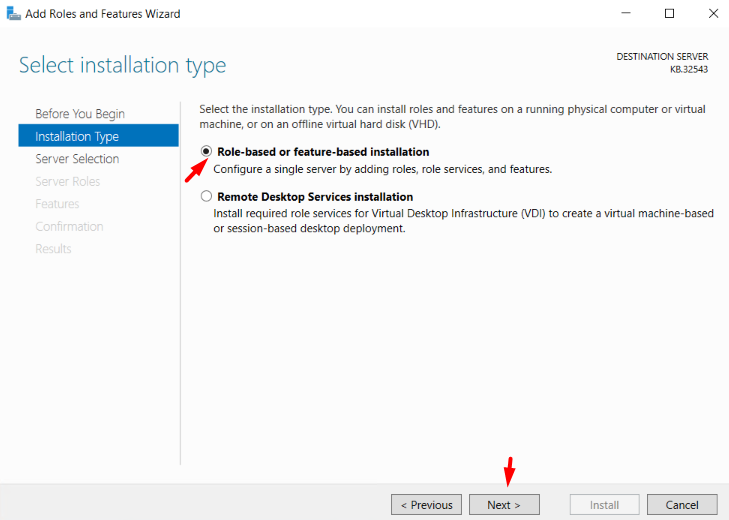
3. In the Installation Type section, select Role-based or feature-based installation → Next.
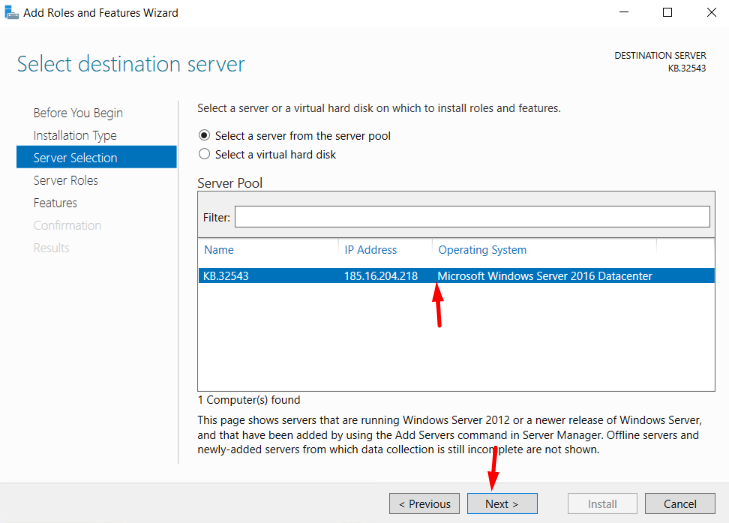
4. In Server Selection, select your Windows Server, if your server is configured in the network, then select the particular server from the list to process the installation → Next.
5. Do not select or Deselect anything in Server Roles Section → Click Next
6. In the Feature Section, click on GUI for Windows Defender as well as Windows Defender (If it is not installed) from under Windows Defender Features.
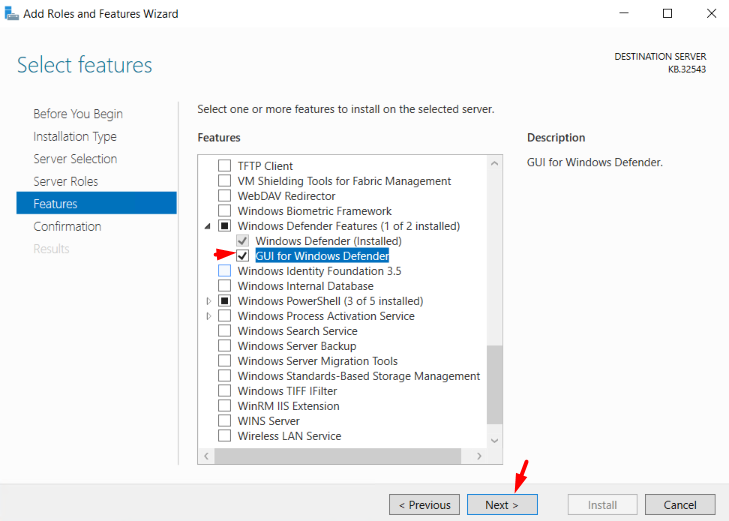
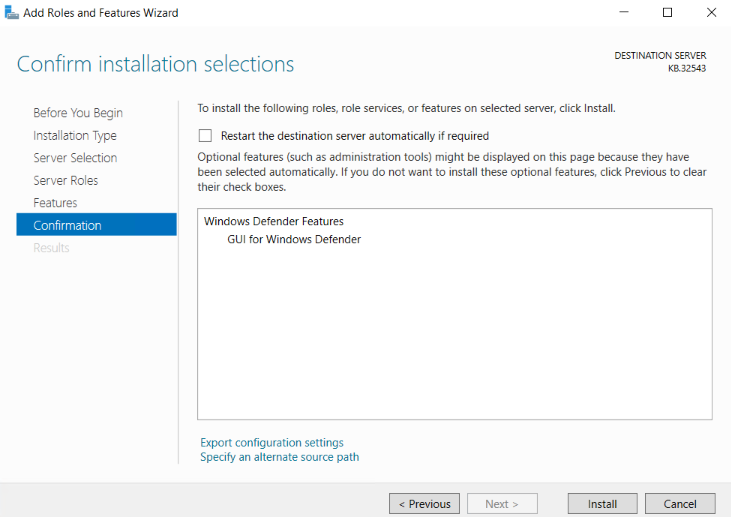
7. In the Confirmation section, click on Install.
Using PowerShell.
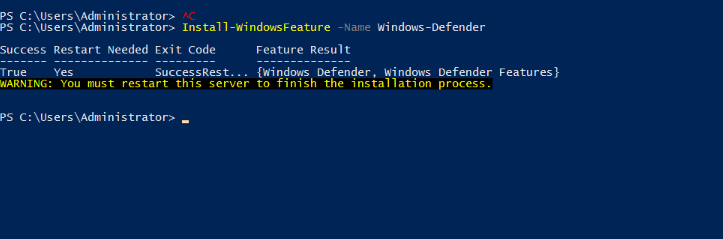
1. Login to Windows Server → Search and Open “Windows Powershell”.
2. Run the below command to install the Windows Defender Antivirus,
Install-WindowsFeature -Name Windows-Defender
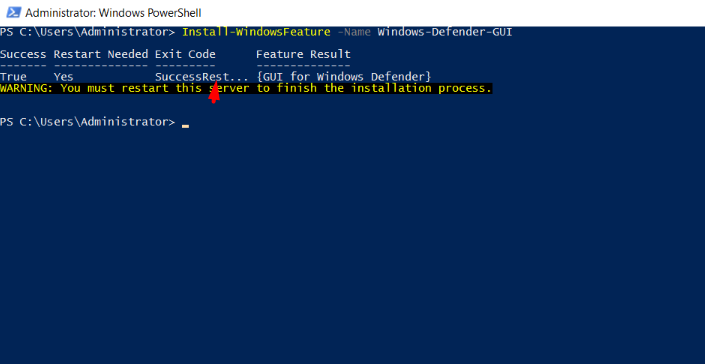
3. Run the following command to install/enable the Windows Defender Antivirus GUI on the server.
Install-WindowsFeature -Name Windows-Defender-GUI
Configure Windows Defender Antivirus.
This is a crucial part of Windows Defender Antivirus working. The default settings offered by windows are quite decent and should work properly as per security concerns but we can take the configuration to next level and make sure to increase server security with manual configuration.
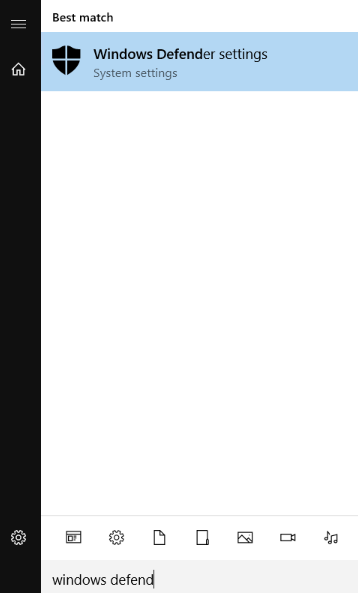
First, log in to Windows Server → Search and Open “Windows Defender Settings“.
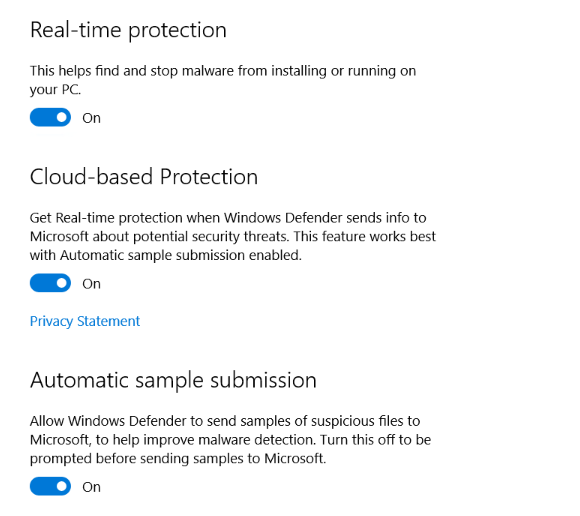
Realtime Protection (Recommended)
This feature provided by windows works in real-time and stops any kind of malware activity running on the server. Enabling this option may cause extra use of hardware resources.
Cloud-based Protection
If any real-time malware activity got detected then its information will be shared with Microsoft, the collectively provided data from other servers as well will help Microsoft to stop or workaround to those potential risks.
Automatic Sample Selection (Optional)
If this option is enabled, windows will share suspicious files with Microsoft and help them investigate them to reduce future attacks.
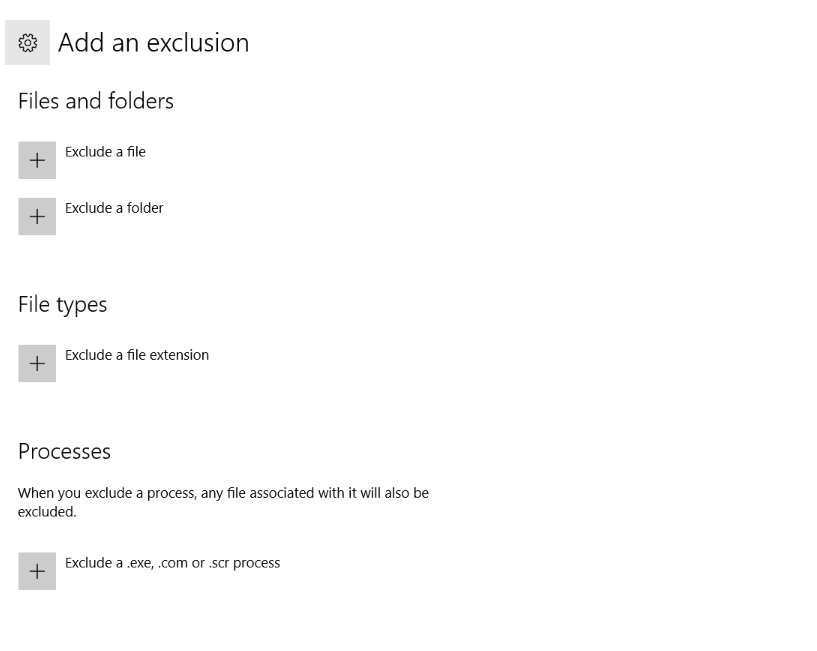
Exclusions
Through this option, you can exclude any program, file, process, and file type from Windows Defender Antivirus Protection.
Operating Windows Defender Antivirus GUI.
First, log in to Windows Server → Search and Open “Windows Defender Settings” → Click on “Windows Defender Settings“.
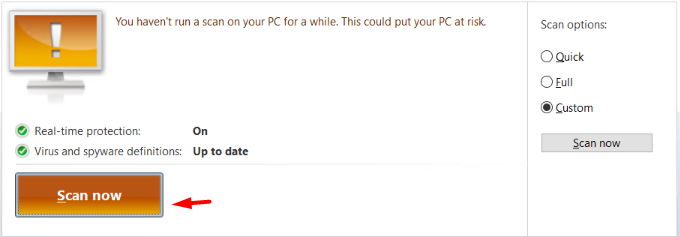
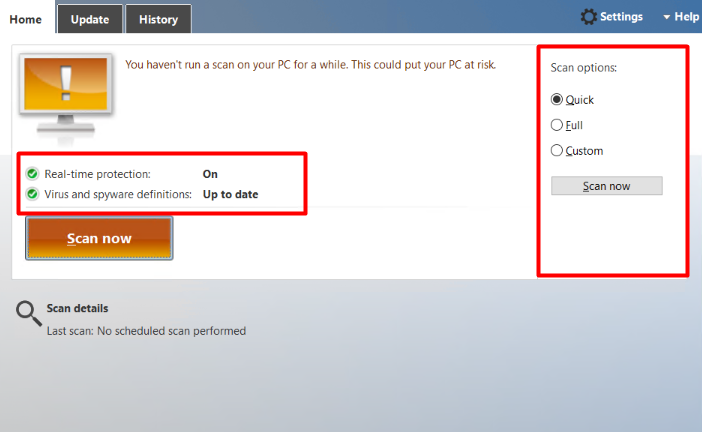
In the “Home” tab you can schedule the scan. Also, can customize scan with the help of scan options.
Quick: This option scans the area which is most likely to be get infected with malware, spyware, viruses.
Full: This option scans all the files available on the hard drive of the system as well as running programs for any kind of threat.
Custom: This option only checks the specified location for the infected files.
Also, if you enabled the Real-time protection as per the above instructions you can check its status on the GUI interface.
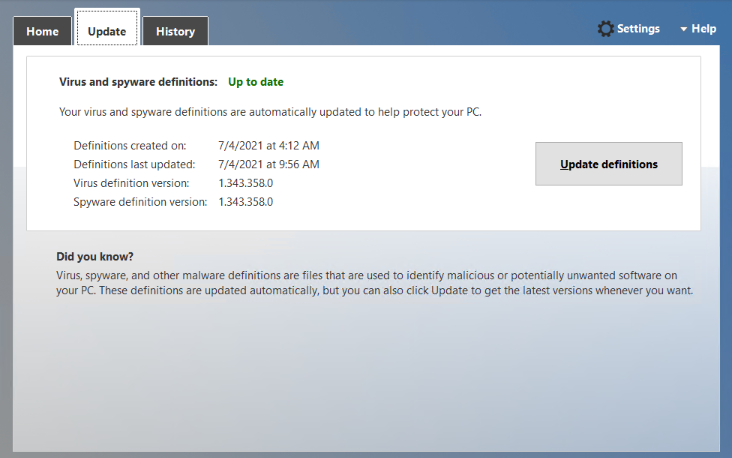
In the “Update” tab, Microsoft provides regular updates over newly developed malware, spyware; you should keep the Windows Defender Antimalware up to the date. All the last update and new update-related information you can find under the “Update” section.
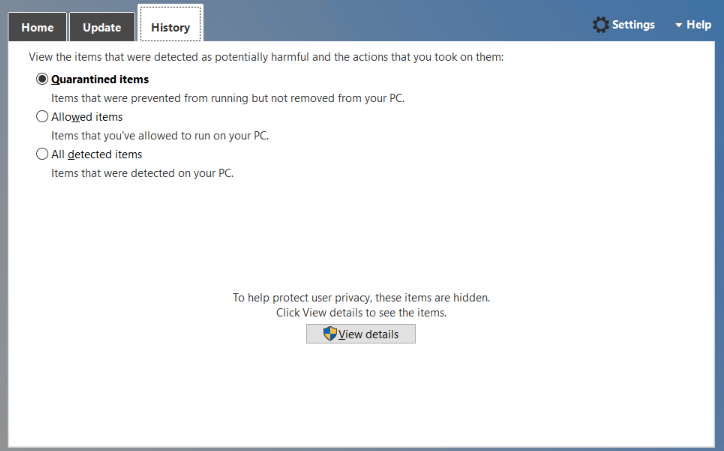
In the “History” tab you can find the following event history,
Quarantine Items: These are items that are prevented from running by the windows but not yet removed.
Allowed Items: These are items that are manually allowed by you.
All detected items: These are items detected on the server.
Once you configure all the above options, you can click on the “Scan Now” button to start the scanning.