Terminating an RDP connection or session is simple when done through a local computer. You can easily disconnect by closing the RDP window and clicking on the X at the top, or by restarting your computer. However, it’s important to note that if the connection is left idle and running in the background, unauthorized access may occur and potentially lead to abusive use of RDP. To secure the RDP session, you must set up certain Timeout Limits. If the configured timeout is exceeded, the RDP session will be automatically closed. In this article, you will learn about how to setup an RDP Sessions Timeout Limit.
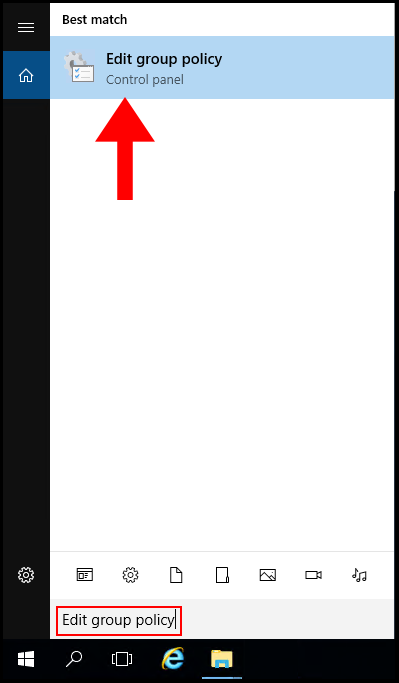
1. To start, log into your Windows Server and use the Windows search function to search and open Edit group policy.
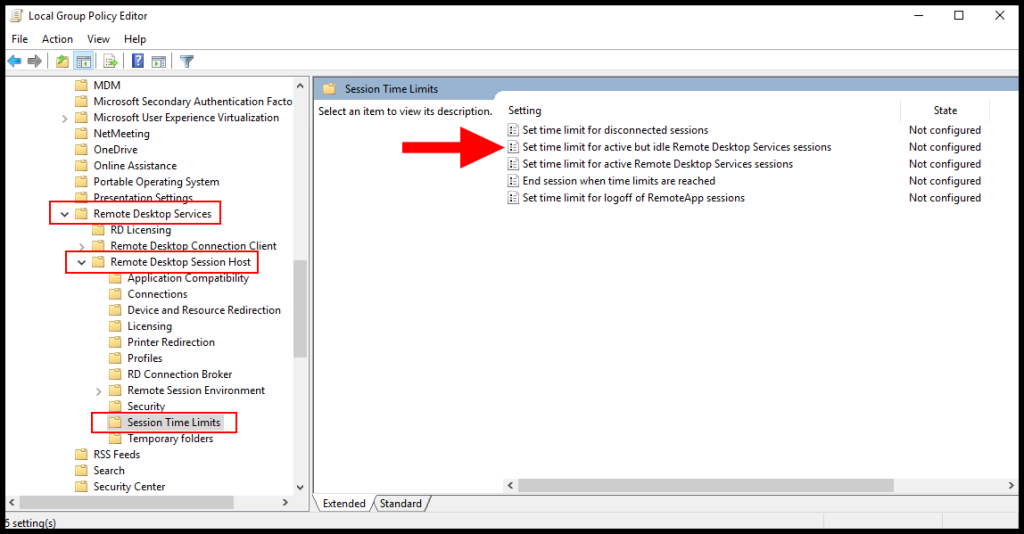
2. In the Local Group Policy Editor window, open the drop-down for Computer Configuration and Administrative Templates on the left-hand menu, then click Windows Components. Next, in the middle of the screen scroll down and locate Remote Desktop Services, and double-click it.

3. Then, open the drop-down for Remote Desktop Services and Remote Desktop Session Host on the left-hand menu. Next, click Session Time Limits and then locate Set time limit for active but idle Remote Desktop Services sessions.
4. Now right-click on Set time limit for active but idle Remote Desktop Services sessions, then click on Edit.

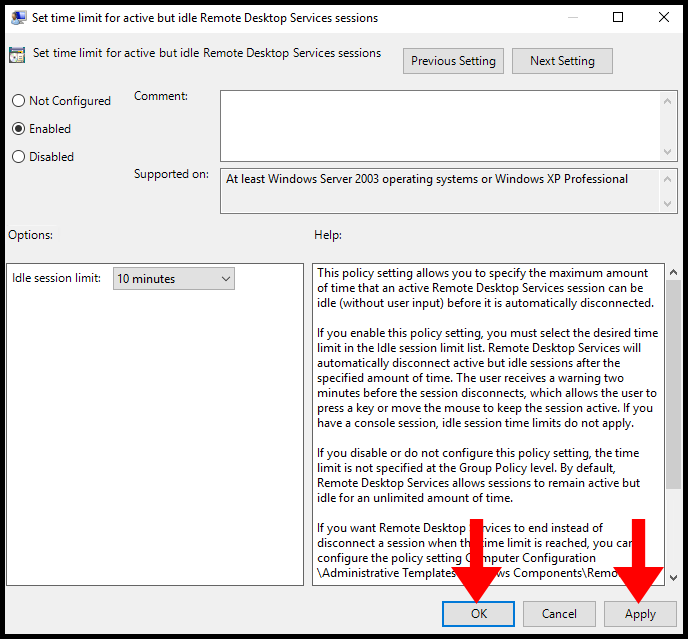
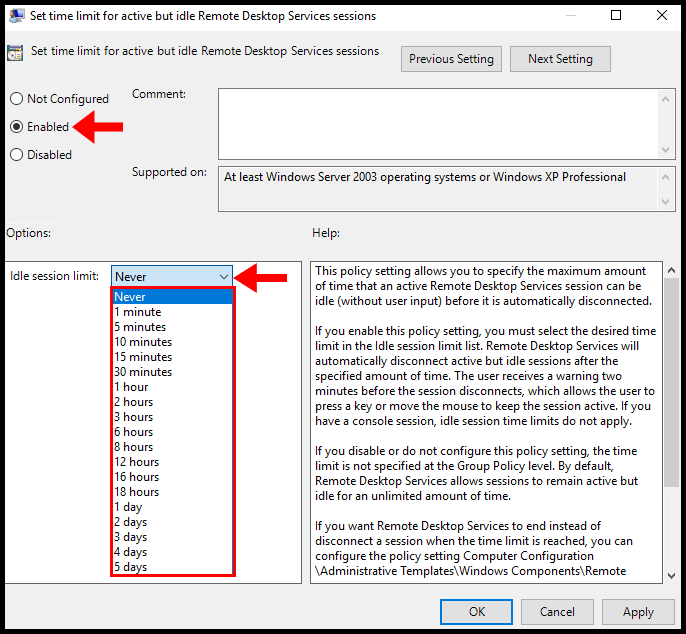
5. Then click the button next to Enabled, open the drop-down for Idle session limit and select a time from the menu presented.
6. To save the configuration, click Apply and then click OK to close out of the window. We have successfully gone over how to setup RDP sessions timeout limit on our Windows VPS.