You can set up a personal proxy server and can use it for many purposes. This article will set up the proxy setup with the squid proxy on the windows server. In this guide, we will go over how to set up and configure a Squid Proxy on Windows Server.
Download & Install Squid Proxy
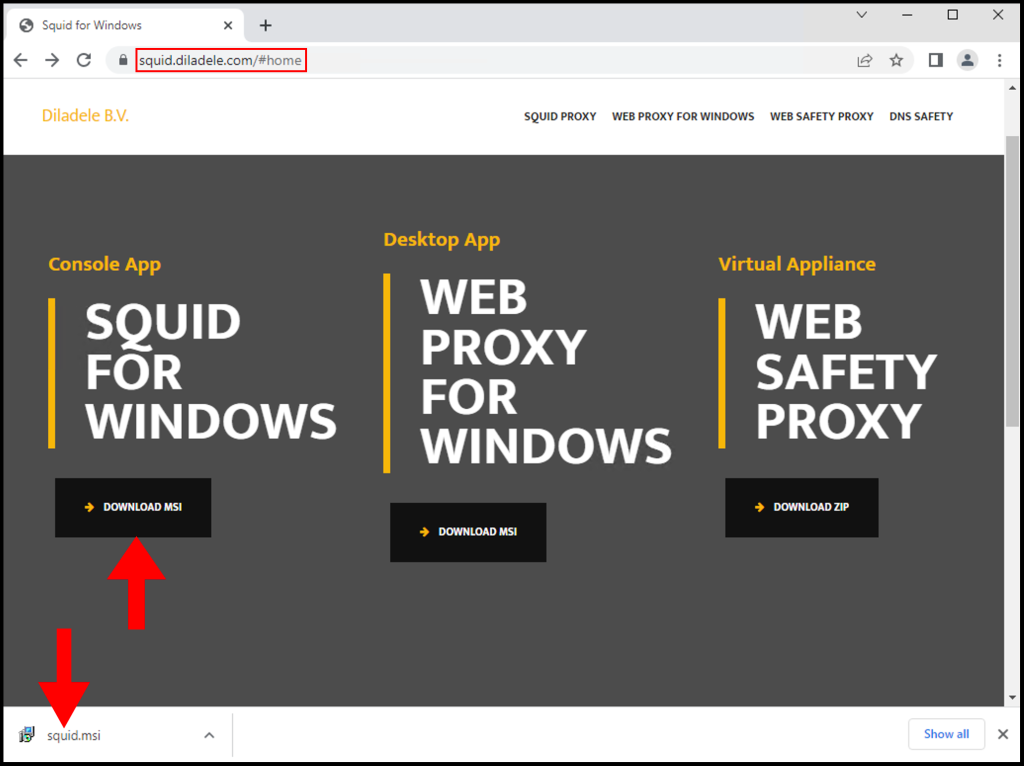
Download the Squid Proxy Installer from the following URL:
https://squid.diladele.com/#home
1. First, download the Squid Proxy application on your Windows server and open the .msi file to install Squid Proxy.
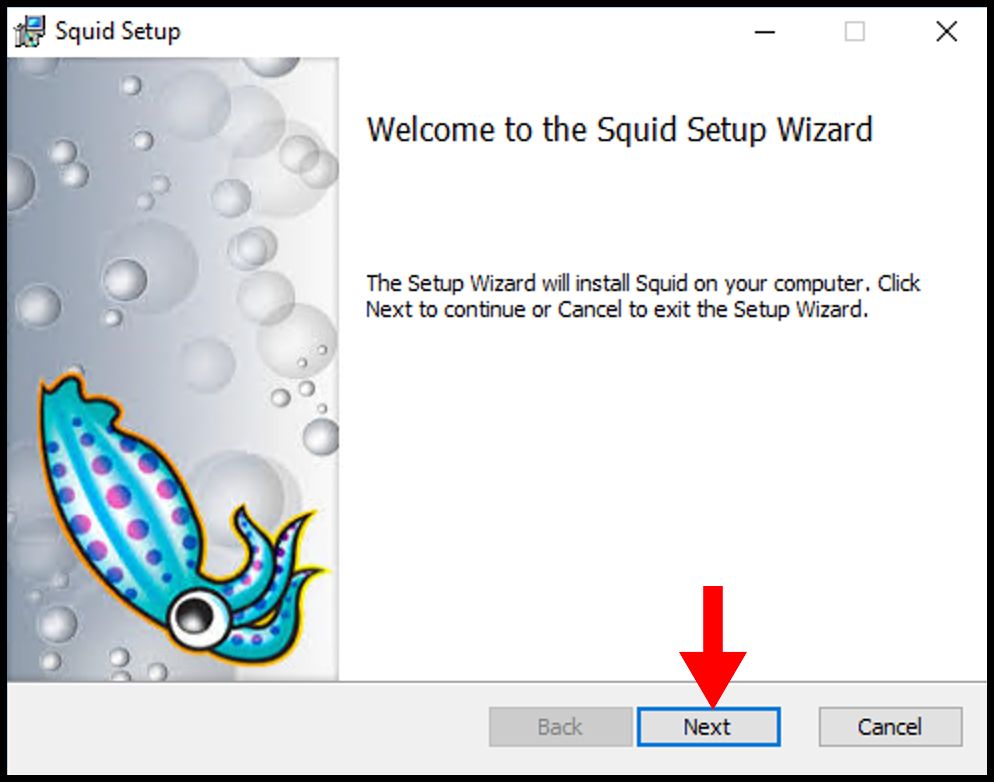
2. Once the Squid Setup window opens, click Next to begin the installation.
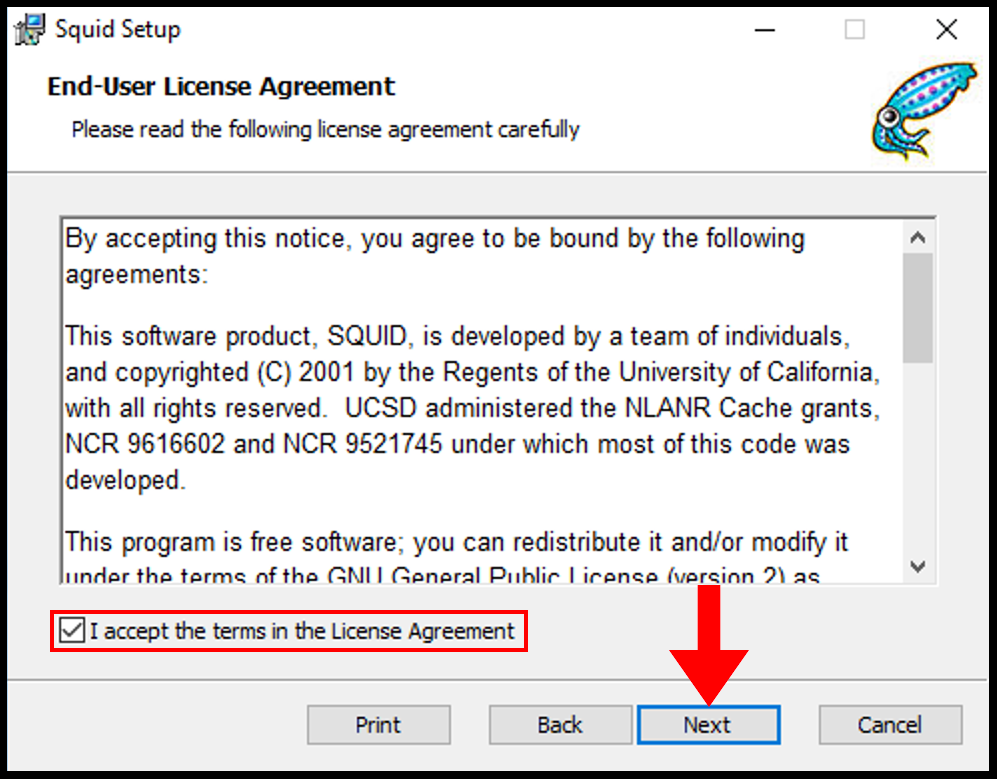
3. Next on the End-User License Agreement page, accept the terms and then click Next.
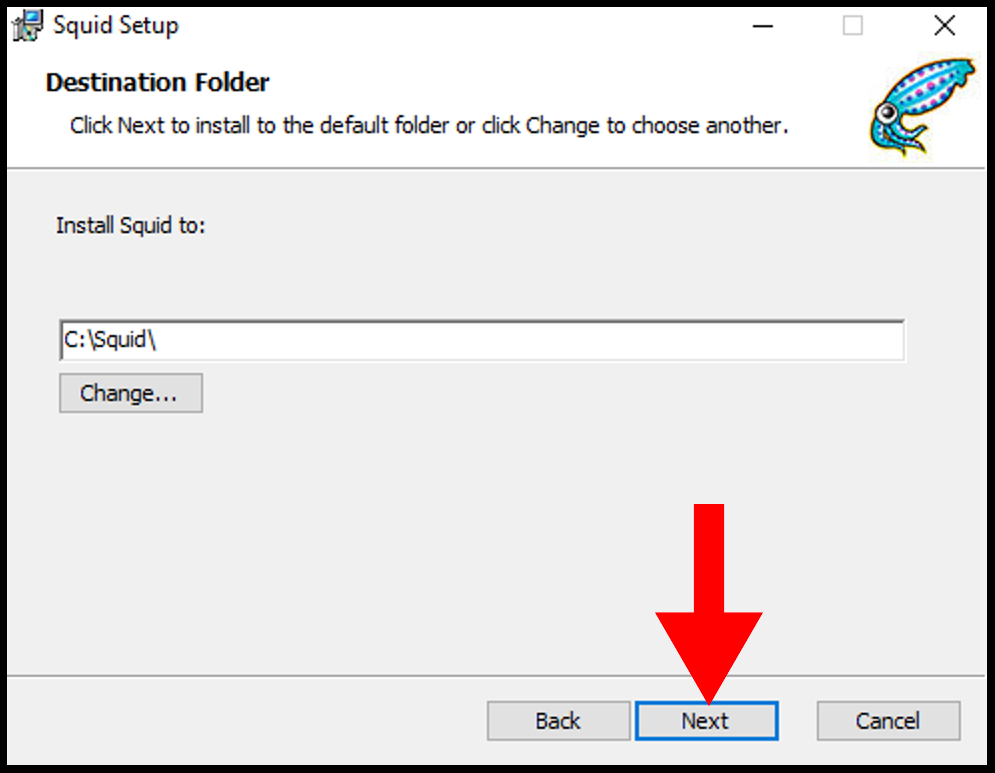
4. Then on the Destination Folder page, you can select the directory you want to install and once you are done click Next.
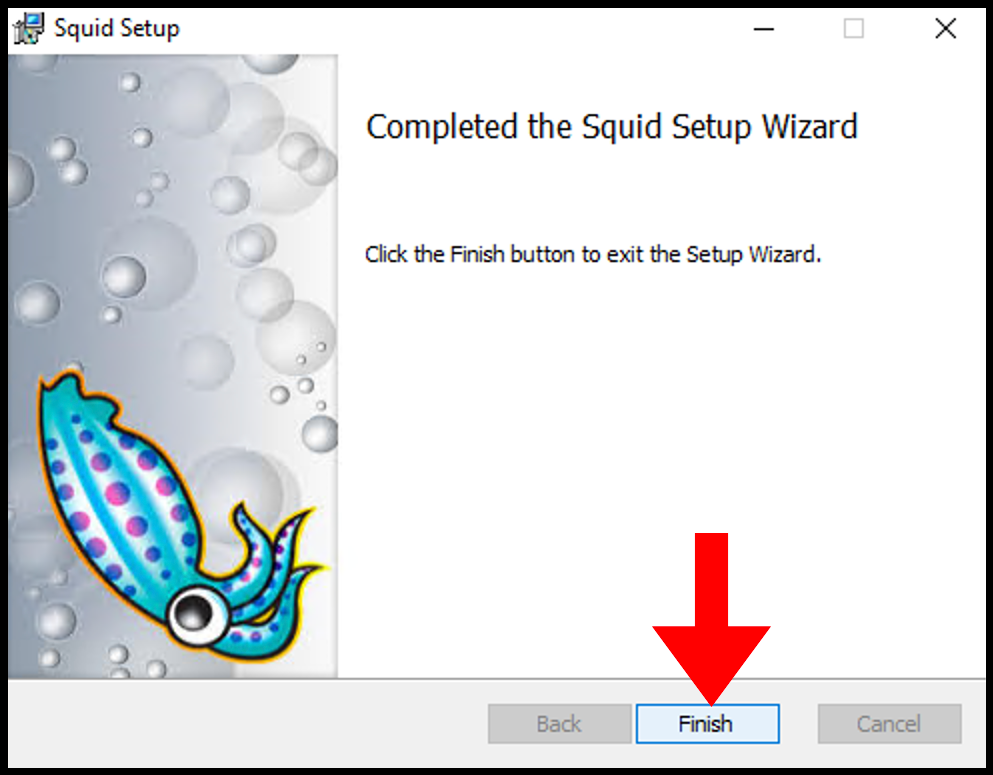
5. Then on the next page, click Install to begin the installation of Squid.

6. Once it’s done, you can close out of the setup window.
Allow Squid Port Through Firewall
Local network usage 3128 TCP port to connect through Squid Proxy. Let us first allow the 3128 TCP port in the firewall inbound rules.
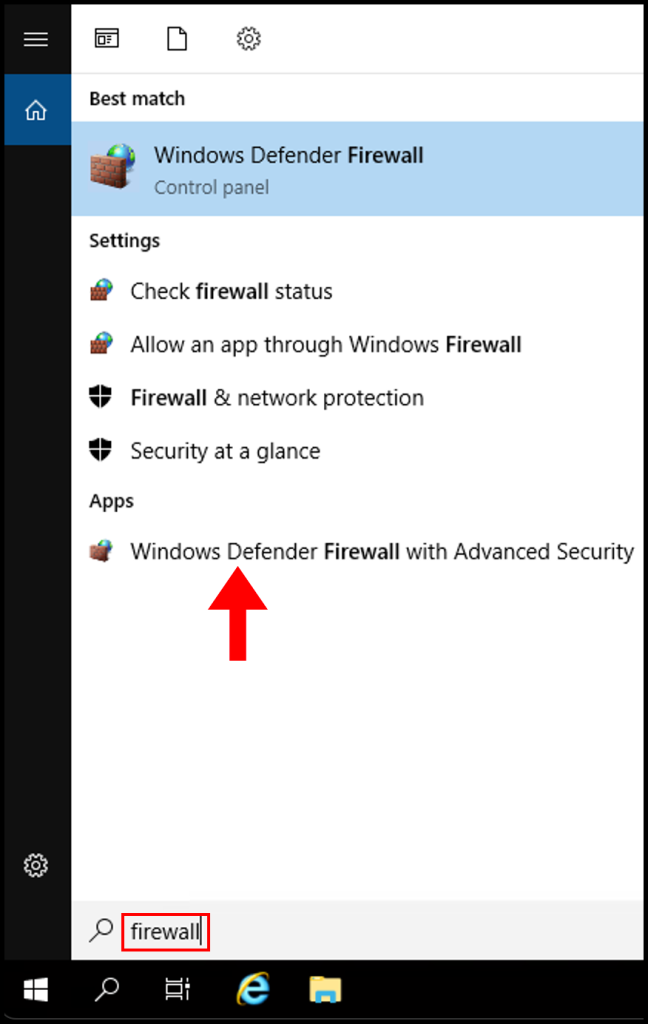
1. Log in to your Windows server, then search and open Windows Firewall with Advanced Security.
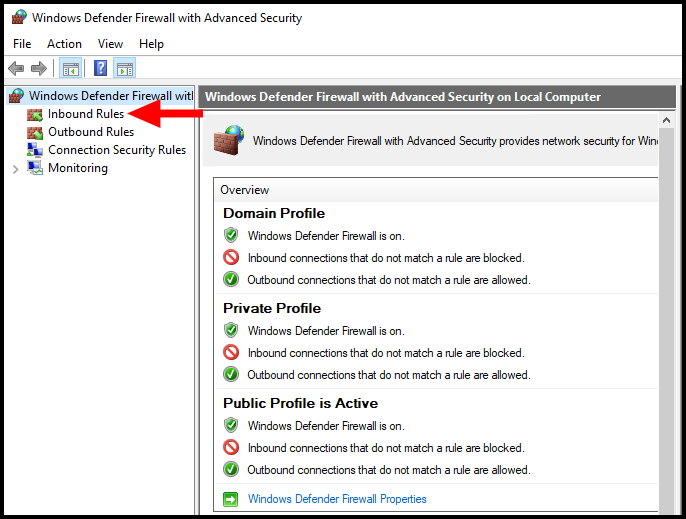
2. Then navigate to Inbound Rules on the left-side menu.
3. Next click New Rule from the right-hand menu.

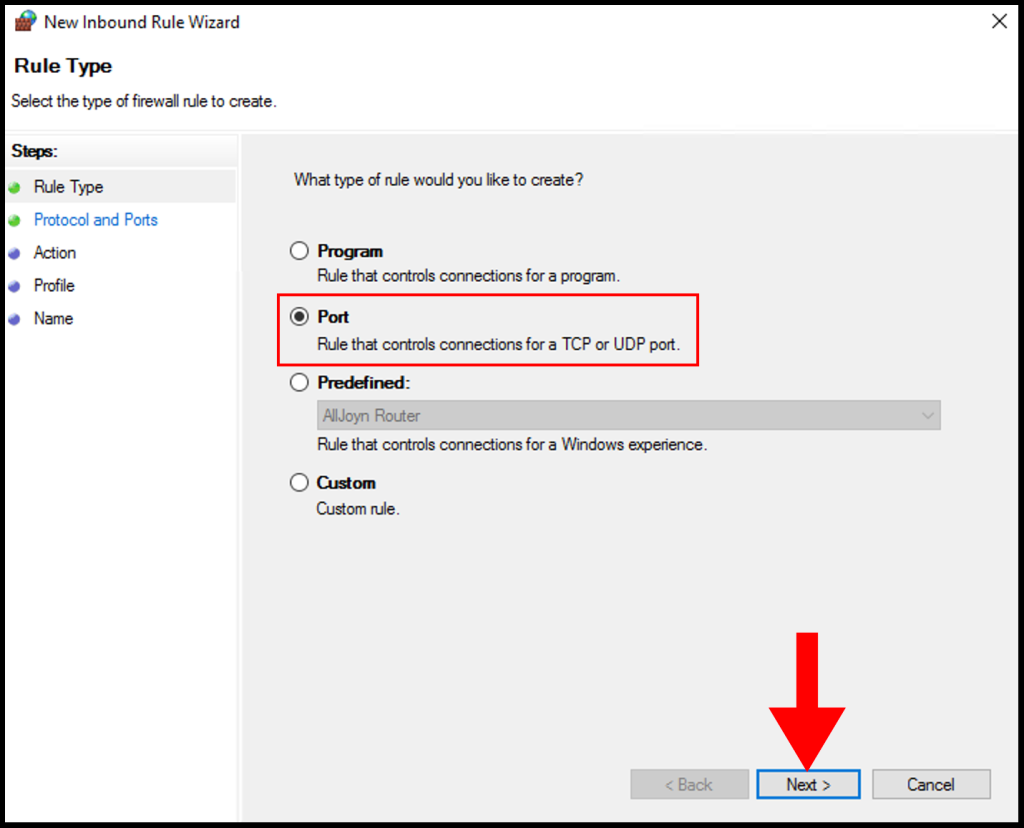
4. On the Rule Type page, select the button next to Port and click Next.
5. On Protocol and Ports, select TCP and select Specific local ports and enter 3128 then click Next.

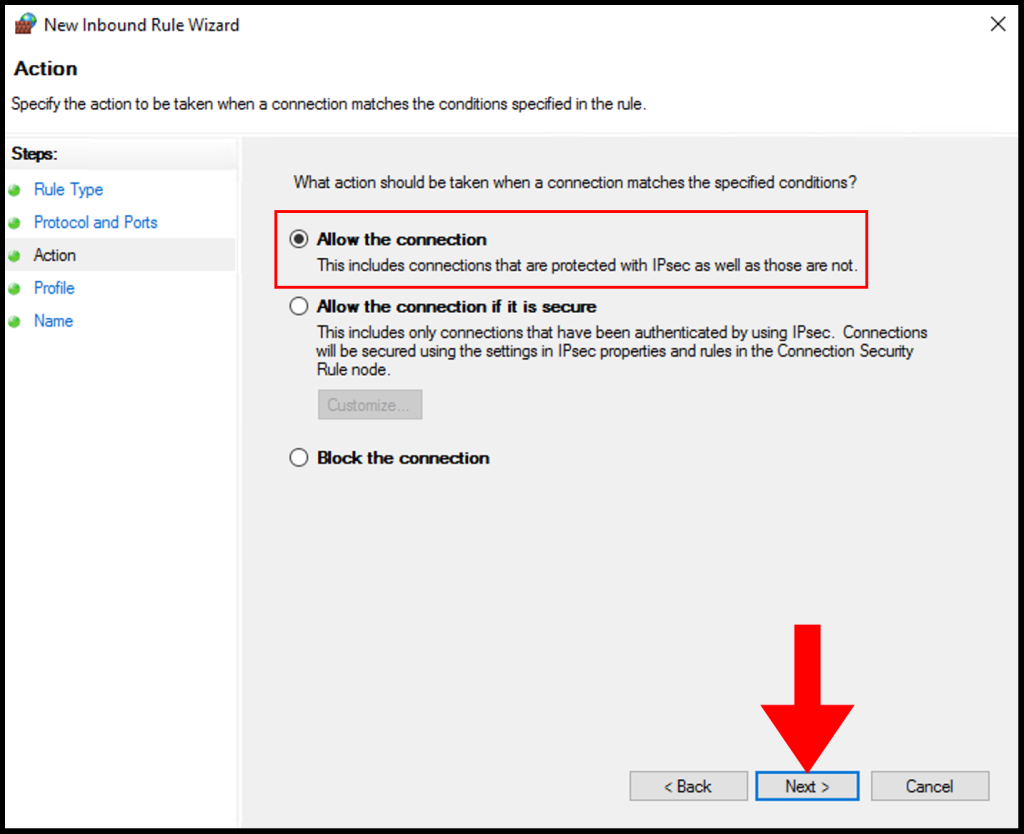
6. Next, click Allow the connection and click Next to move on.
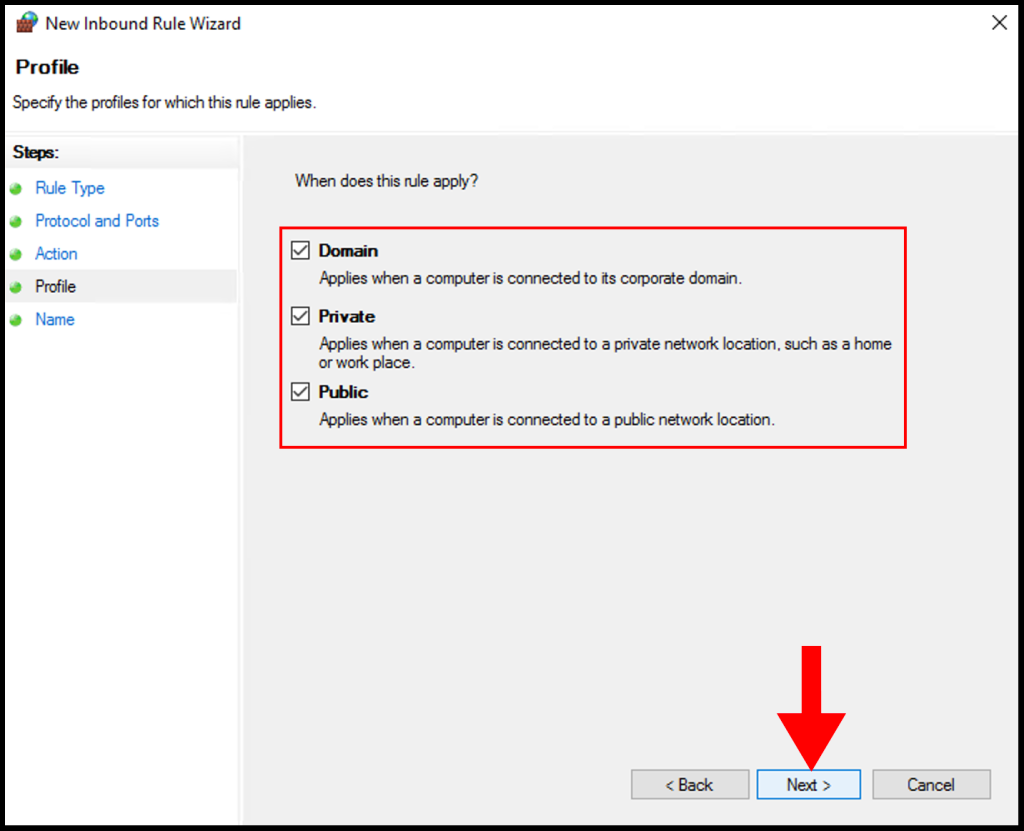
7. In the Profile tab, you need to select the below options and check the boxes for Domain, Private, and Public then click Next to move on.
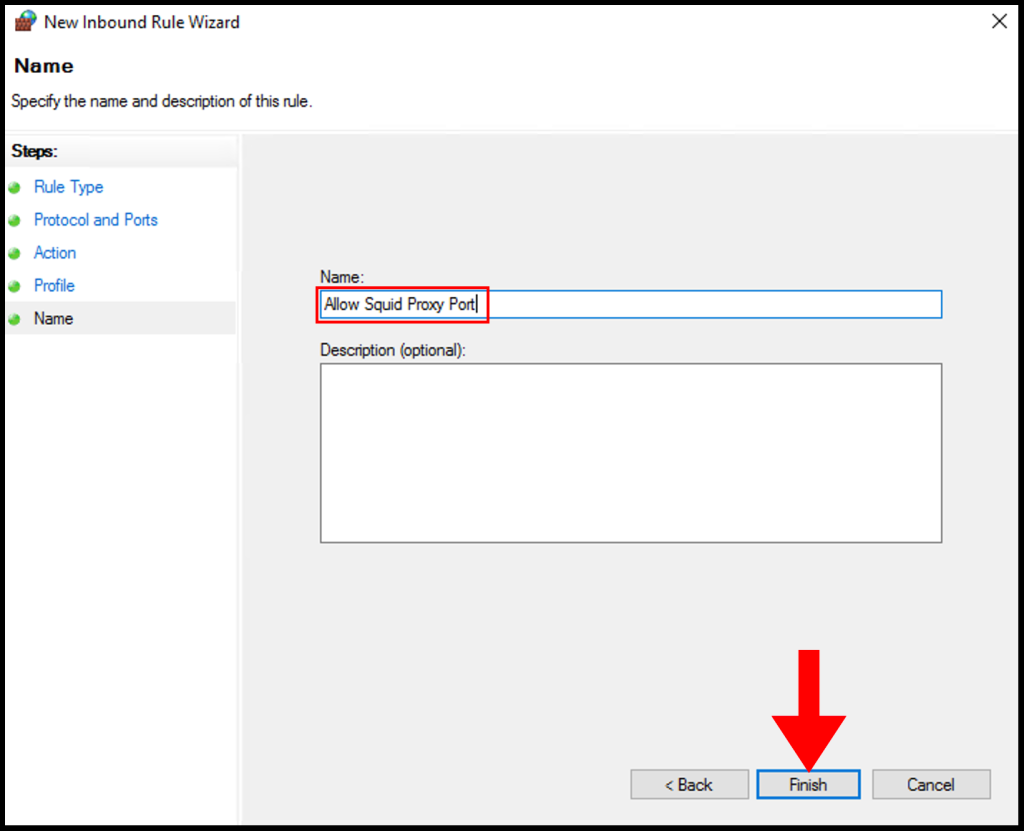
8. In the Name section, you can specify a name that is easily identifiable for the rule, then click Finish. We have successfully setup and configure a Squid Proxy on Windows Server.
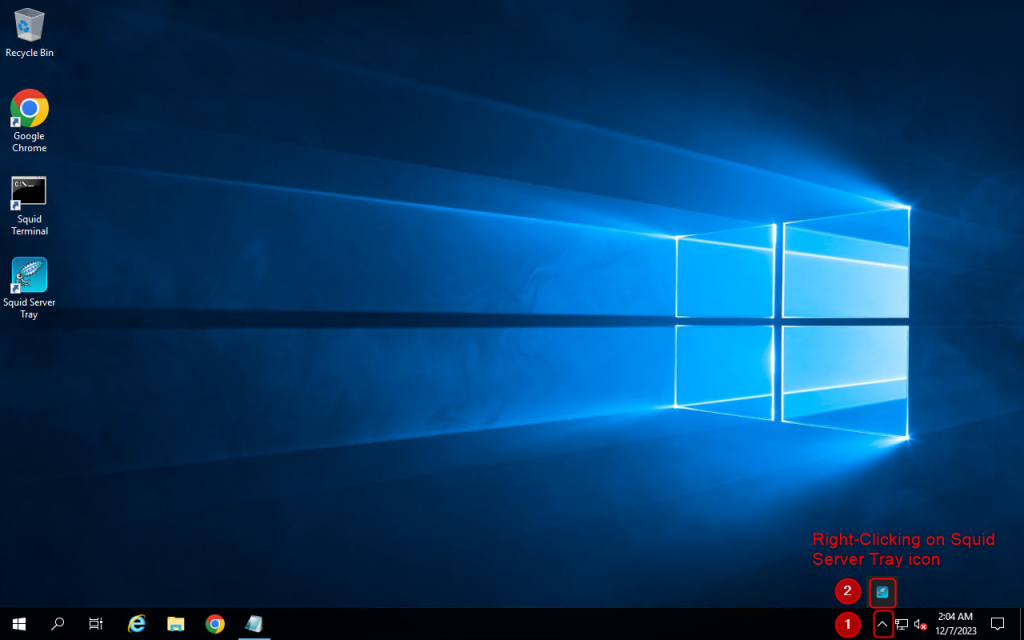
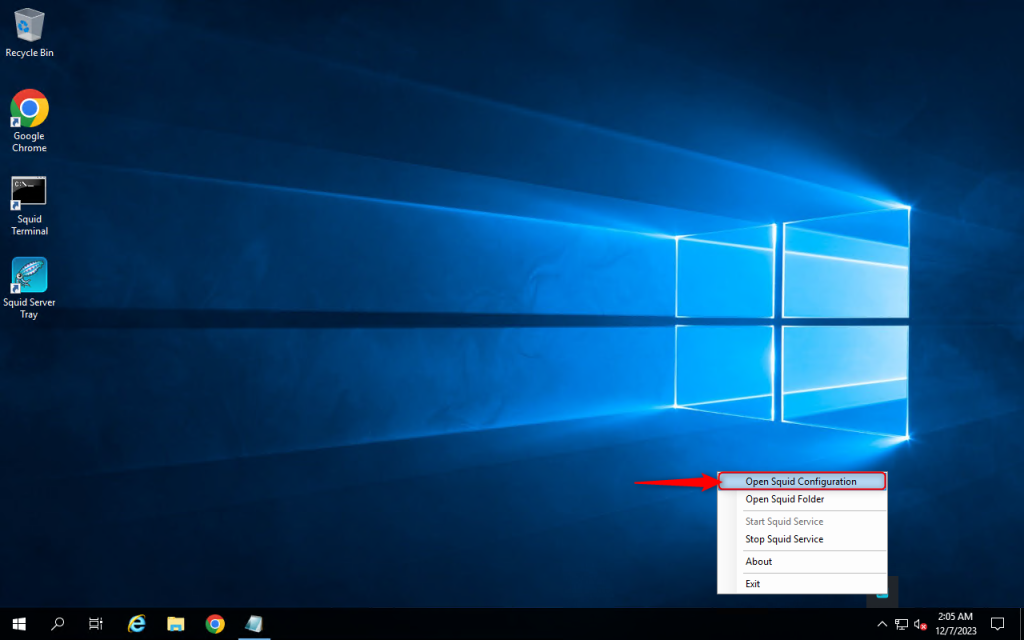
Configure Squid Proxy
1. Configure Squid by following the steps below:
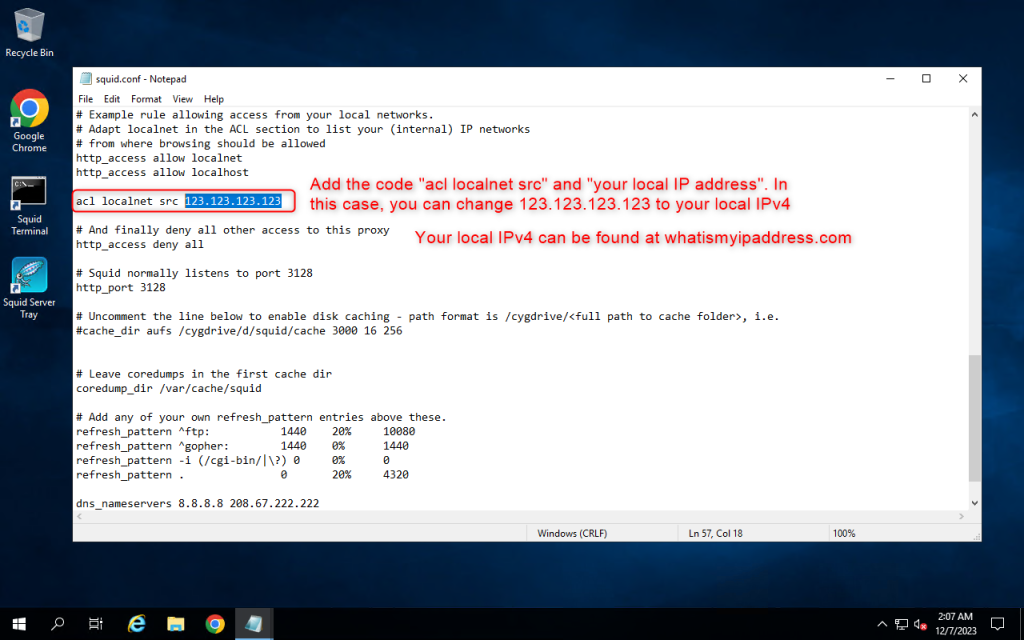
2. Add the code “acl localnet src” and “your local IPv4”. In this case, you can change 123.123.123.123 to your local IPv4. You can find your local IPv4 at https://whatismyipaddress.com/
Then save by pressing Ctrl + S
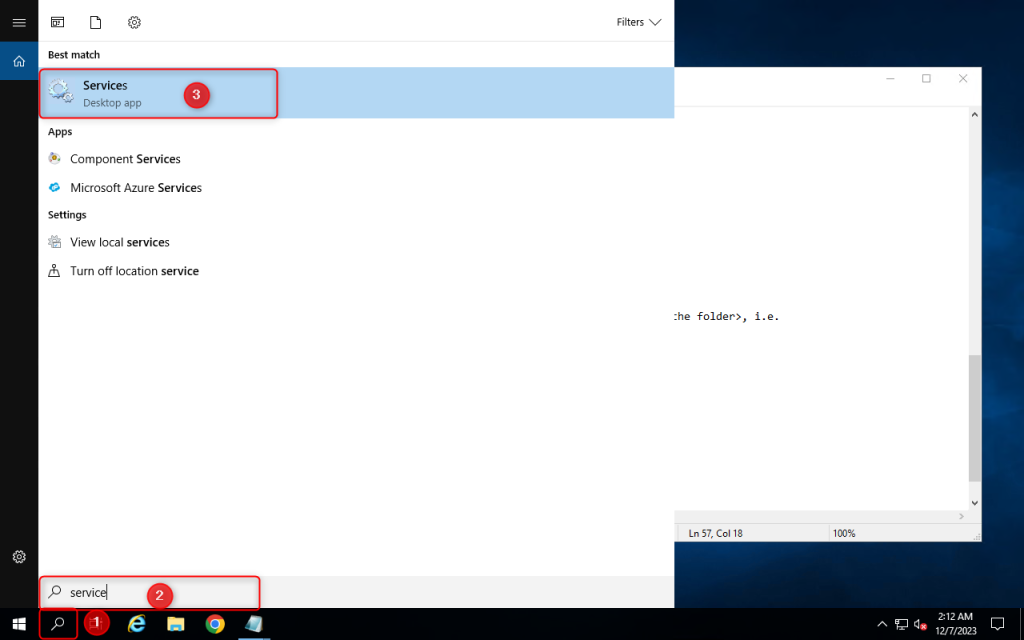
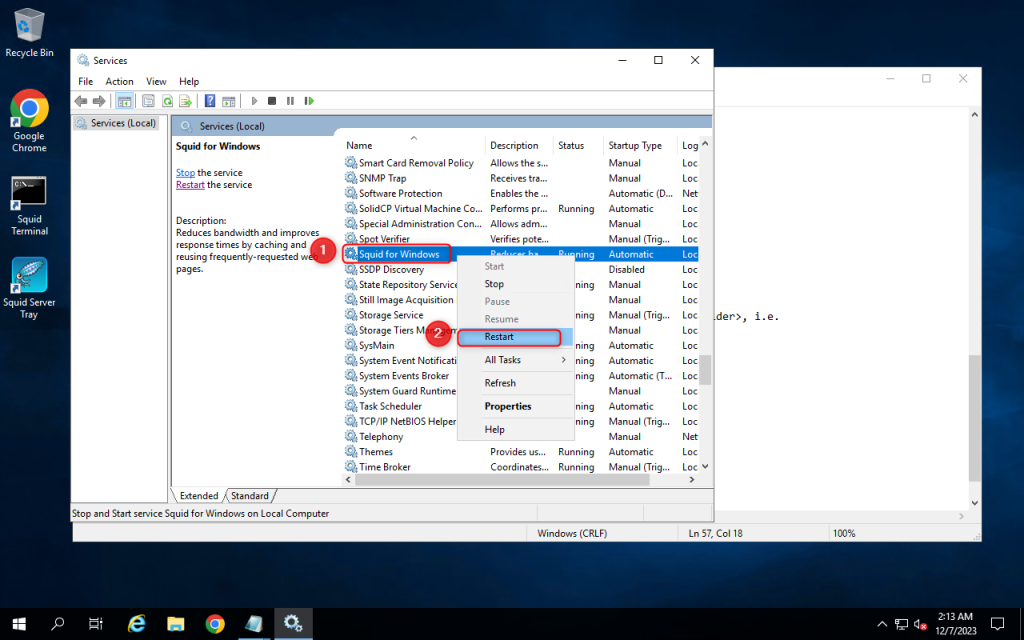
3. Open Services setting and restart the Squid for windows service
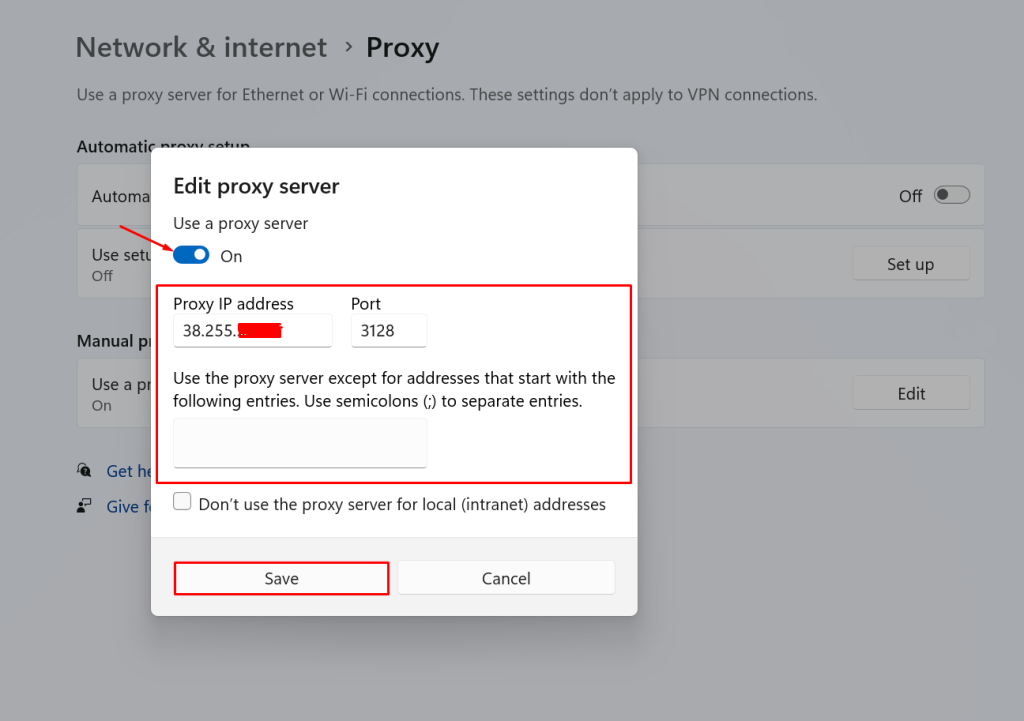
Use proxy on a client
1. Go to your client computer and enter the proxy that has been setted up.

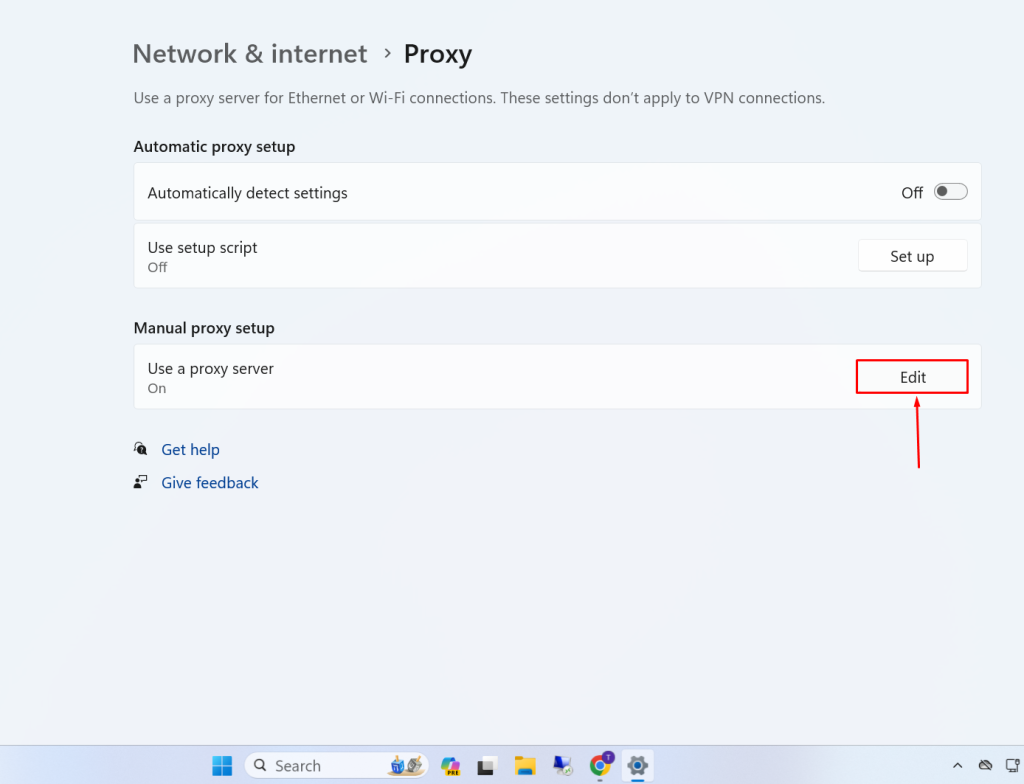
2. Enter Proxy IP address and Port. Now you will be able to use your proxy on a client