Regularly rebooting your computer on a weekly or periodic basis can enhance performance by clearing temporary files, flushing RAM, and closing unnecessary applications. Additionally, a reboot can improve reliability by ensuring that the system is working with its most available resources, free from any unwanted running applications. In this article, you will learn how to schedule a reboot of the Windows Server.
Creating a reboot schedule via Task Scheduler
In our previous article, we covered the process of creating automated tasks using Task Scheduler on Windows. In this article, we will continue to utilize Task Scheduler and demonstrate how to schedule a reboot of a Windows server. You can set up reboot schedules that occur daily, weekly, monthly, or at a specific time and date.
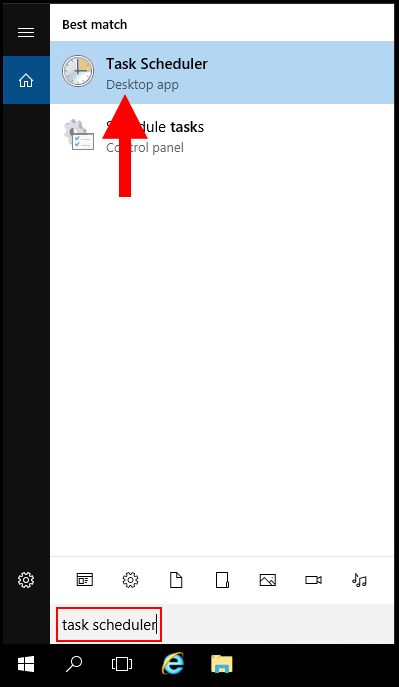
1. To start off, log in to the Windows Server. Then search for the task scheduler in the Windows search and open it.
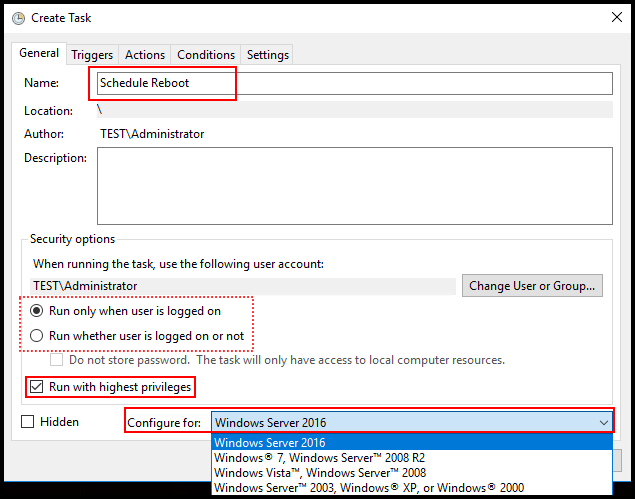
2. Then under Actions on the right-hand side, click Create Task.

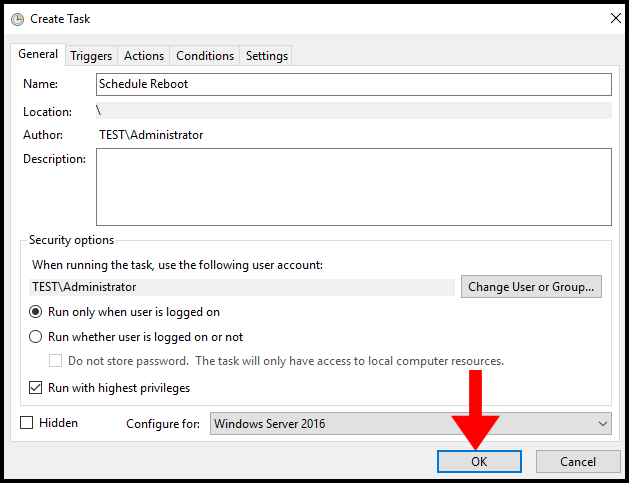
3. Next, we will need to configure the following options:
a) Name the New Task.
b) Check the option Run with the highest privileges.
c) Select the operating system, and select the OS of your VPS, from Configure For dropdown list.
d) Optional: Run whether user is logged on or not this will allow the task to run even when the user is not logged on/connected.
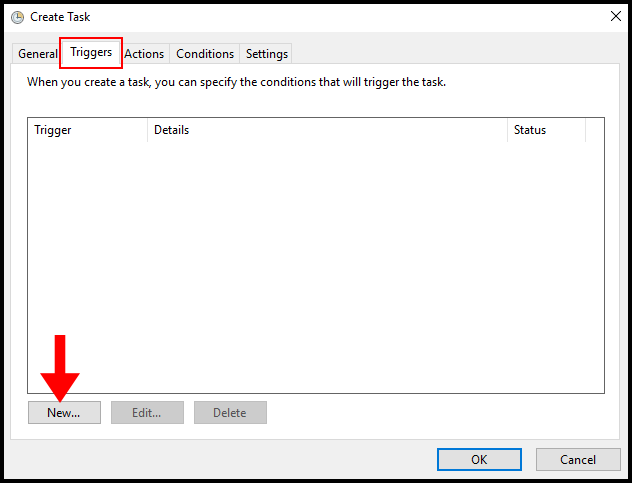
4. Then, navigate to the Triggers tab and click New in the bottom left corner.
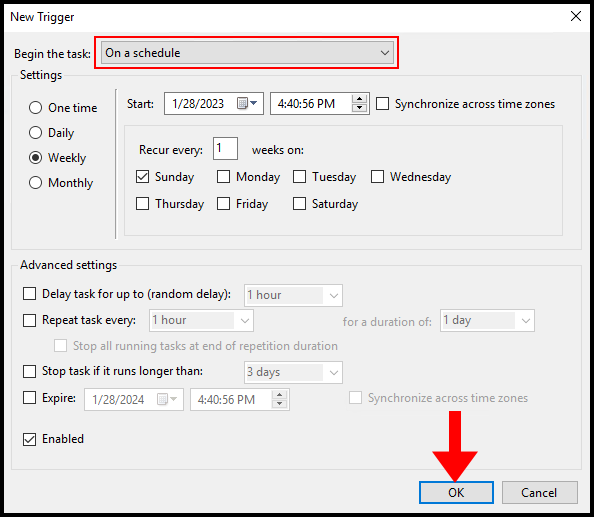
5. Next, on the New Trigger window you will be able to set a schedule for the reboot. In this guide, we will be creating a Weekly trigger every Sunday. Once you’ve configured your trigger to your preferences, click OK to save the trigger.
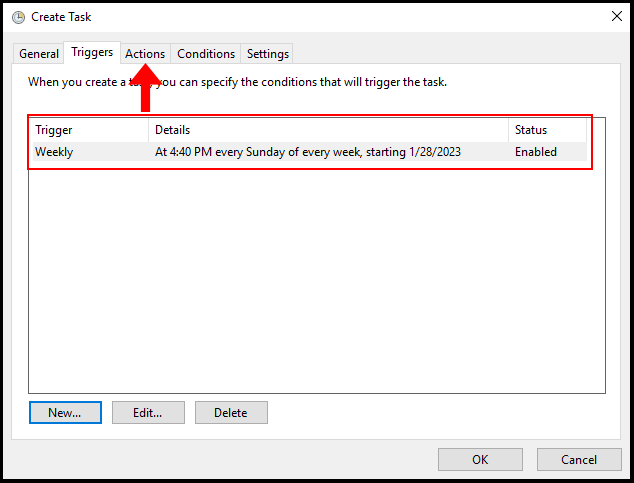
6. You will then see the trigger created on the Triggers tab, as seen below. Then navigate to the Actions tab.
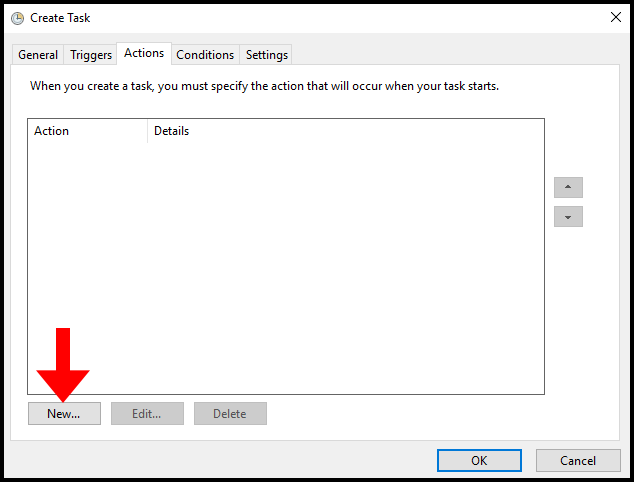
7. On the Actions tab, click New in the bottom left corner.
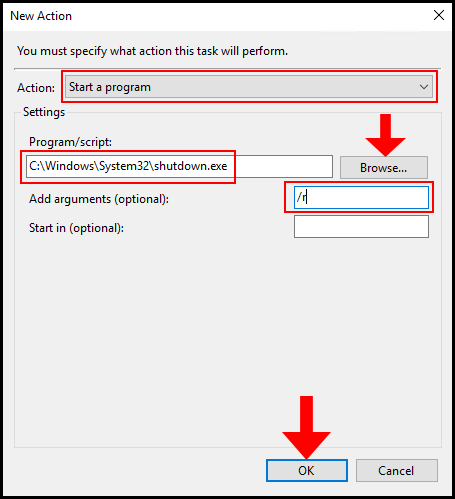
8. On the New Action window, for Action select Start a program. Then for Program/script click Browse and locate C:WindowsSystem32shutdown.exe, and for the Add arguments text field enter /r. Now, click OK to save the action configuration.
9. Finally, click on OK to save this configuration.
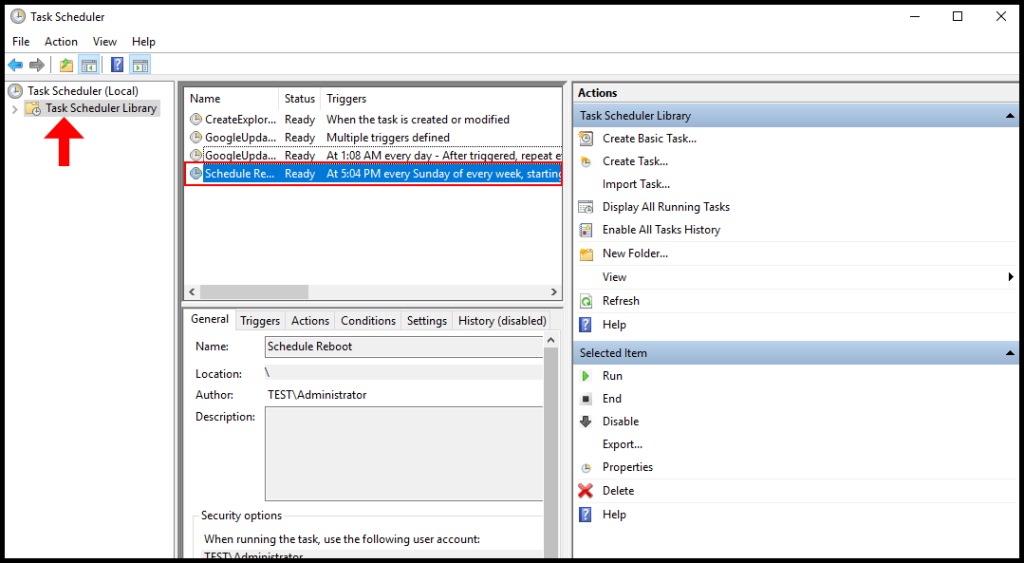
10. To verify that your task has been created, on the Task Scheduler window click Task Scheduler Library on the left menu. You will then see your created task in the middle of the window. You have successfully configured the scheduled reboot for Windows Server.