Port forwarding, also known as port mapping, is a networking process that directs incoming and outgoing communication to a specific path. It’s a crucial component of ensuring proper communication between your servers and other devices. In this guide, we’ll walk through the process of setting up port forwarding on a Windows Server.
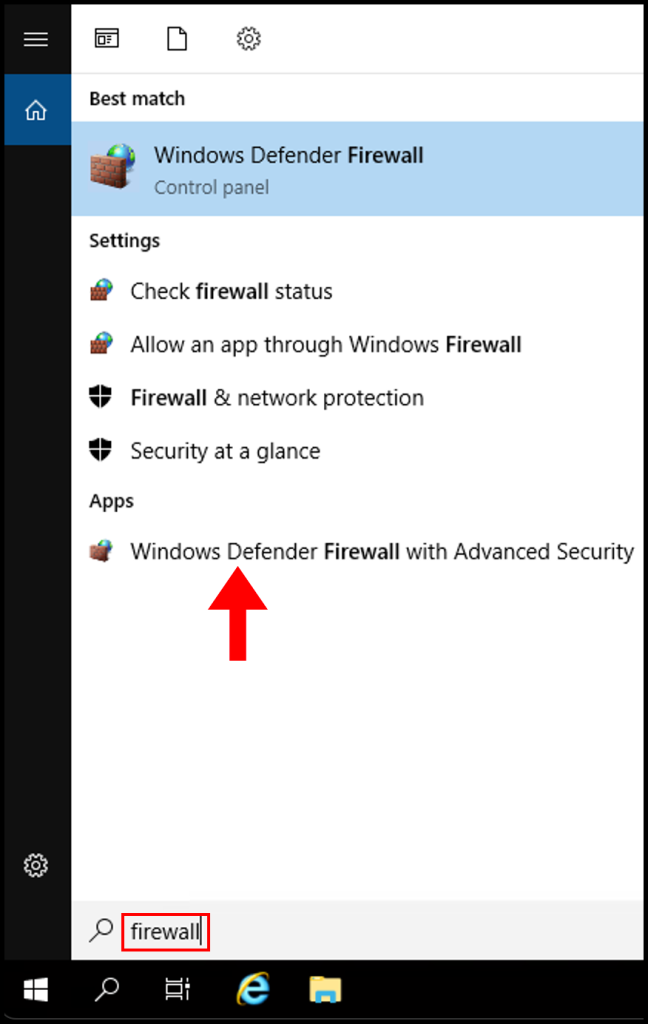
1. To start off, log in to your Windows Server machine. Then search for and open Windows Firewall with Advanced Security.
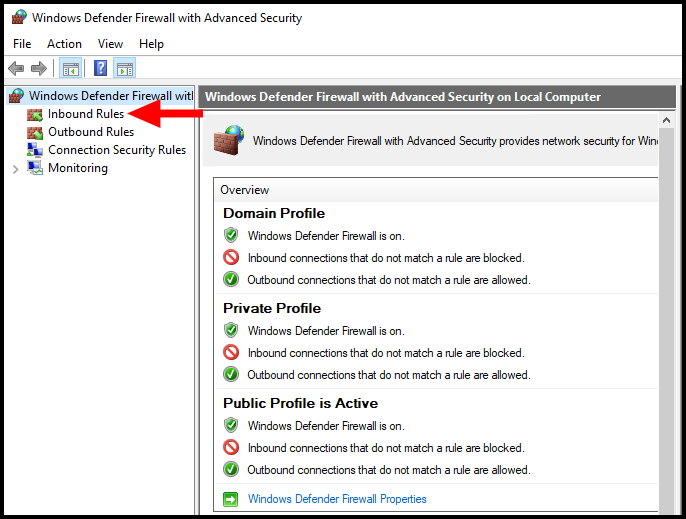
2. In the Windows Firewall with Advanced Security window, you’ll see an overview of your firewall settings. On the left side, click on Inbound Rules to set up port forwarding rules for incoming traffic.
3. Then, on the right-hand side under the Actions panel, click on New Rule….

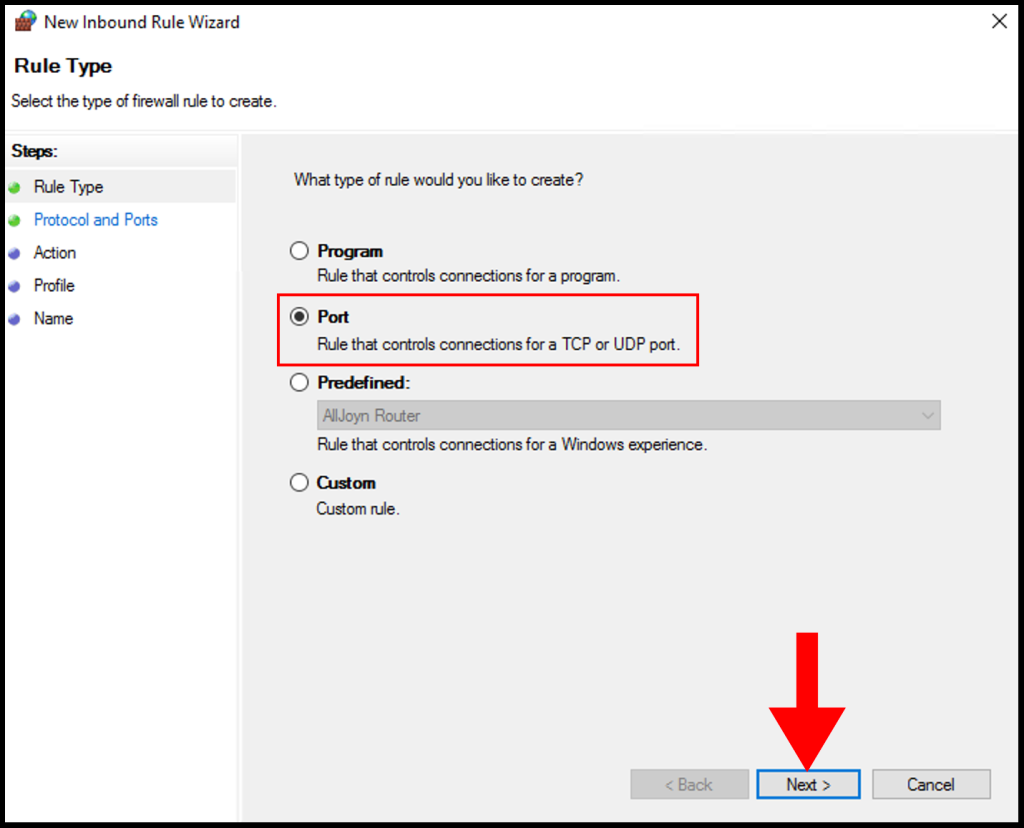
4. A New Inbound Rule Wizard window will pop up. Here, select the Port option, then click Next.
5. In the next window, make sure TCP is selected. Then, in the Specific local ports: field, type in the port number you want to forward. Click Next when you’re done. (In this example, we are using port 3128)

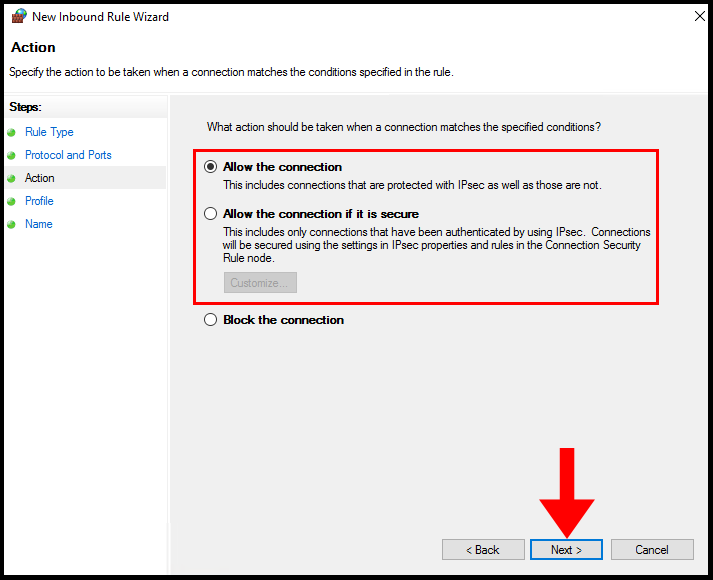
6. The wizard will then ask you what action to take when a connection matches the specified conditions. Select Allow the connection, and then click Next.
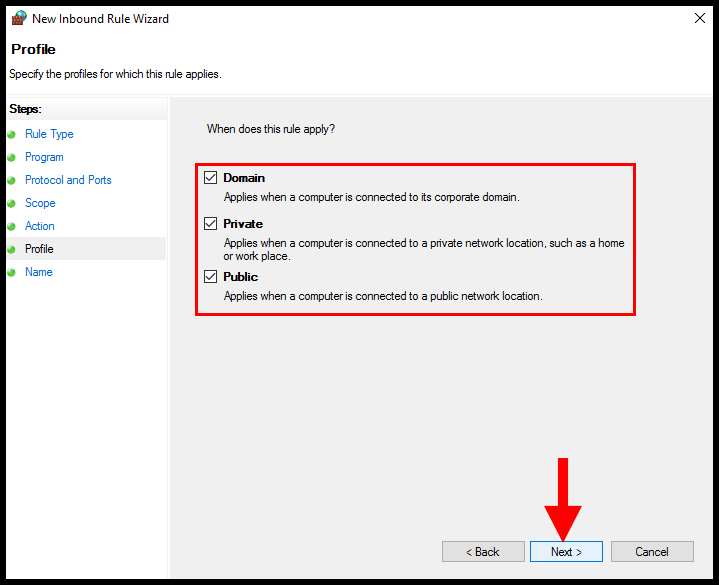
7. On the next screen, you’ll be asked when this rule applies. Tick the boxes for Domain, Private, and Public networks, according to your needs. Once you’ve made your selections, click Next.
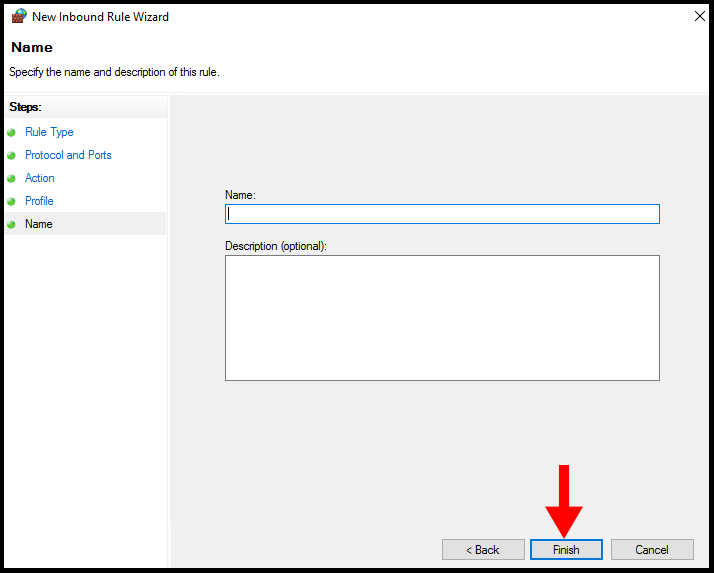
8. Finally, you will be asked to name and describe your rule. Provide a recognizable name and a brief description of the rule for future reference. Once done, click Finish to finalize the rule.
Your new inbound rule is now created and active in the Windows Firewall. Any incoming connections on the port you specified will be forwarded as per your configuration. Remember, port forwarding is a critical function that helps your server communicate correctly with other devices, so use it wisely! Always ensure that your server is secure and that you’re forwarding ports for trusted applications only. And there you have it! You’ve successfully set up port forwarding on your Windows Server 2016 machine. Feel free to repeat this process for any other ports you wish to forward.