If you want to mount a local drive to your Windows VPS, please follow the following steps.
Using Windows’ Remote Desktop Connection
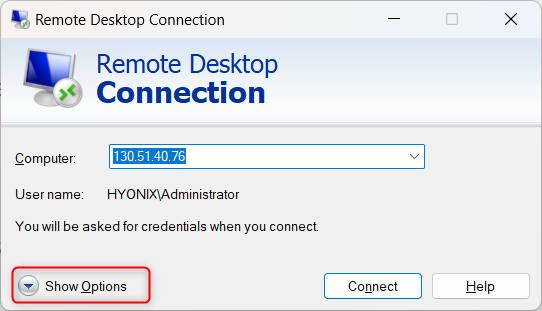
Step 1: Open mstsc (Remote Desktop Connection) on your local computer and click Show Options.
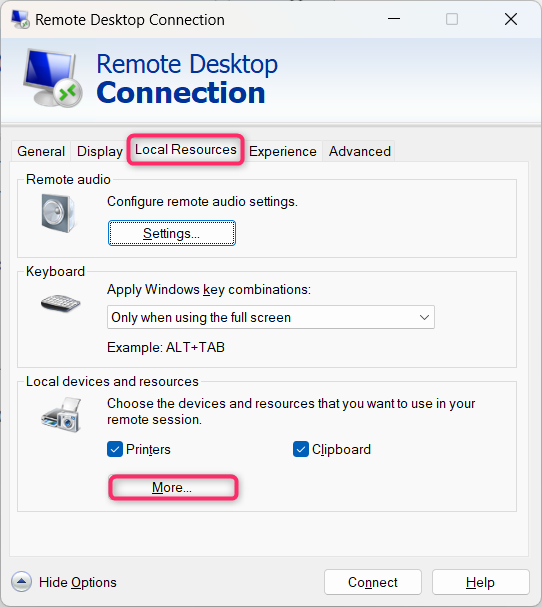
Step 2: Navigate to the Local Resources and Click Mores under Local devices and resources tab
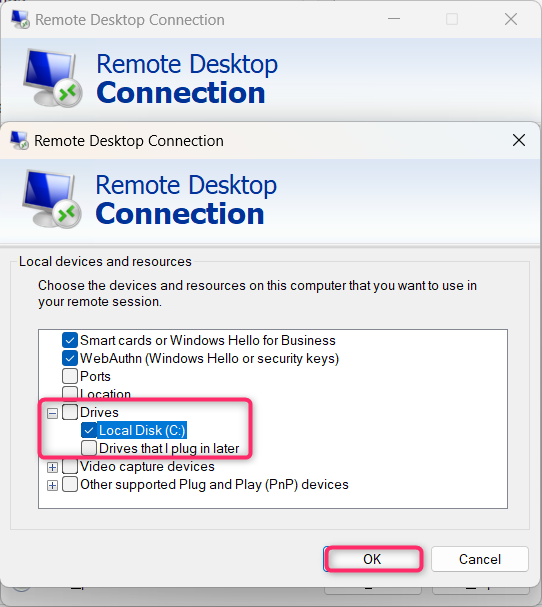
Step 3: Expand Drives and select the disk you would like to mount and Click OK. For this demonstration, I will select Disk C
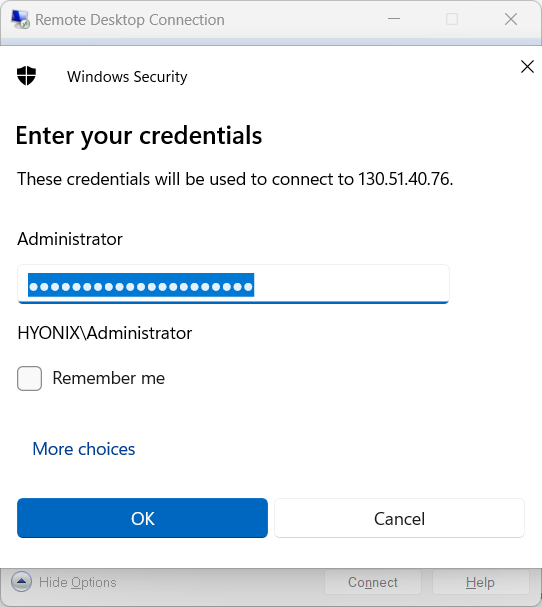
Step 4: Connect to your server and you will notice that the Disk has been mounted to your Windows server
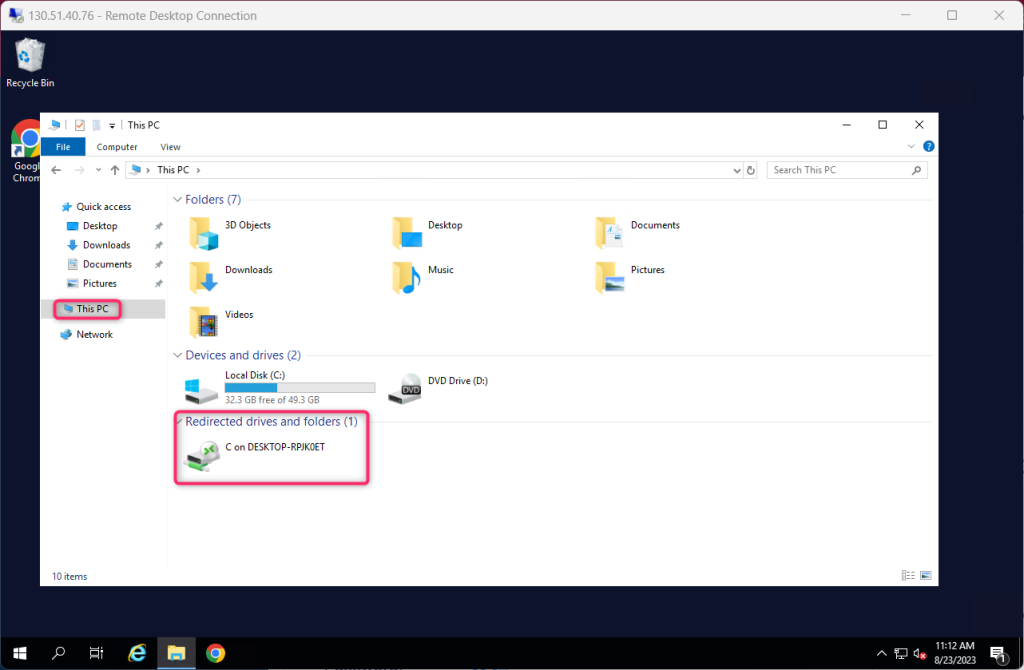
Please note that mounted disks/folders will only work if you keep the RDP connection active
Using MacOS’ Remote Desktop Client
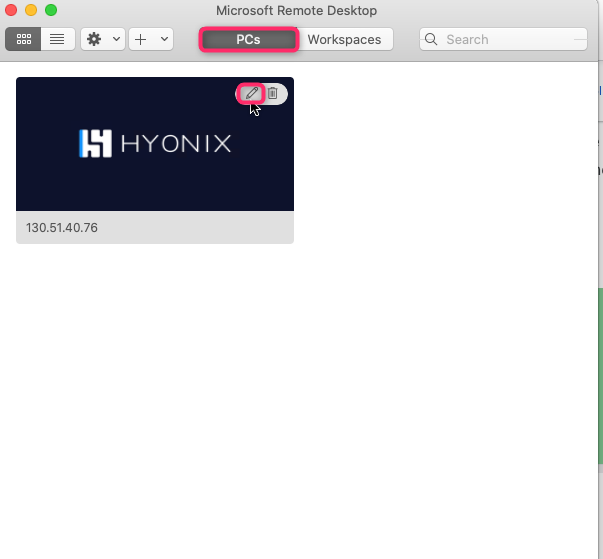
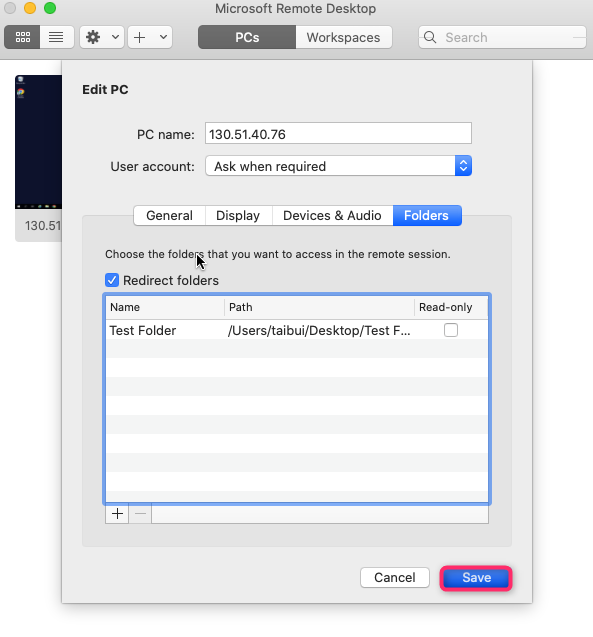
Step 1: Open Microsoft Remote Desktop and click the “Edit” button on the server where you want to mount the folder.
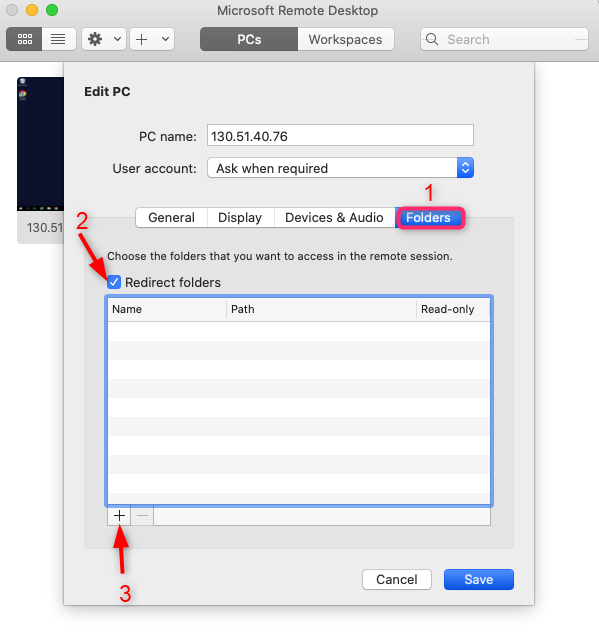
Step 2: Click on the “Folders” tab, and then click the “Redirect folders” checkbox. Click the plus (“+“) button in the lower-left corner to select the folder for sharing.
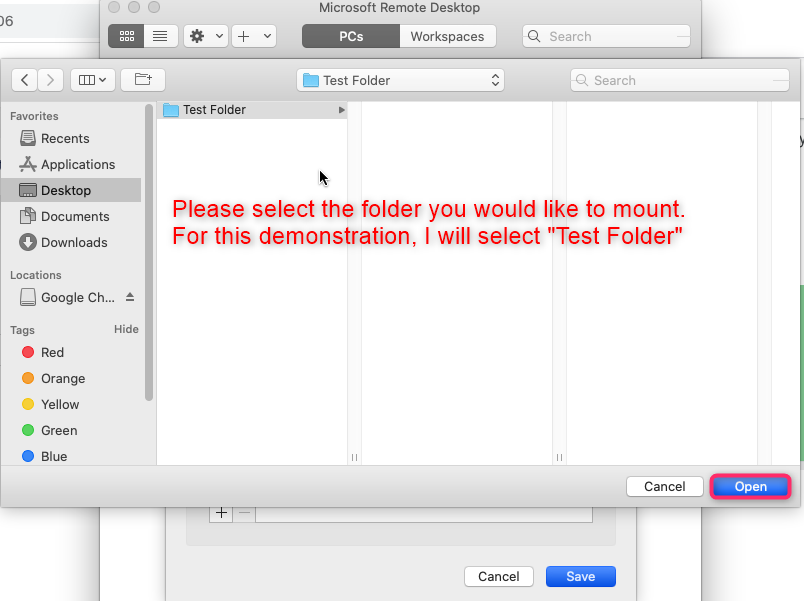
Step 3: Please select the folder you would like to mount. For this demonstration, I will select “Test Folder”
Step 4: Click Save
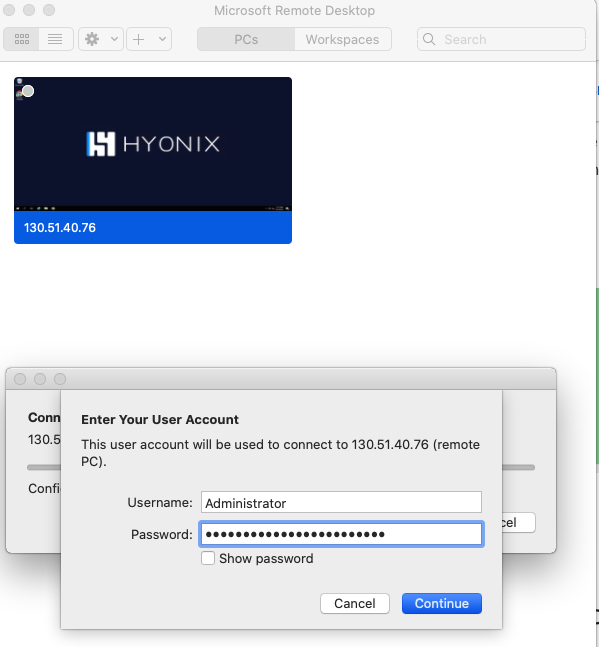
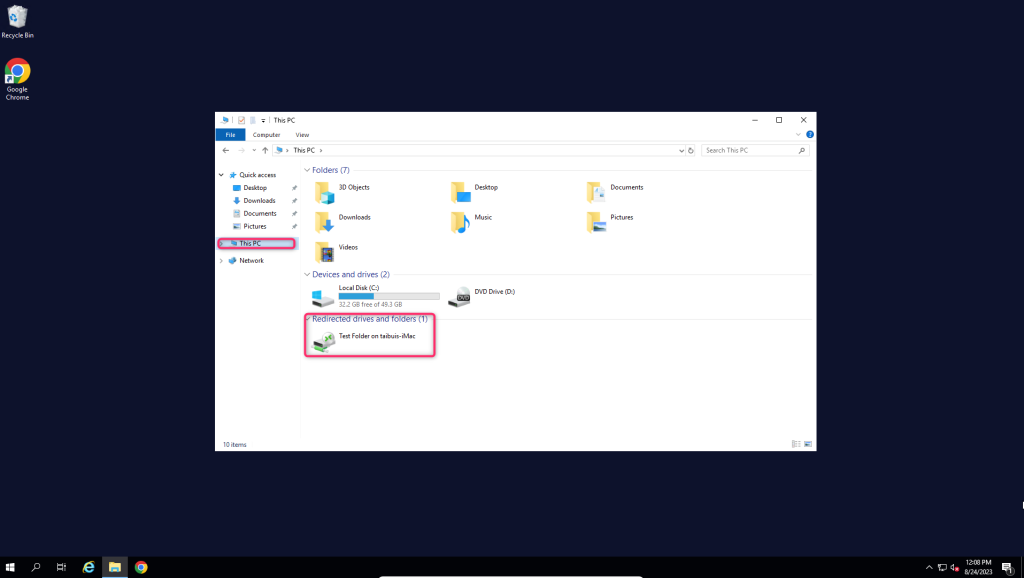
Step 5: Connect to your server and you will notice that the folder has been mounted to your Windows server
Please note that mounted disks/folders will only work if you keep the RDP connection active
Using Android’s Windows Remote Desktop App
Step 1: Open Windows Remote Desktop App, click the 3 dot button and click Edit.
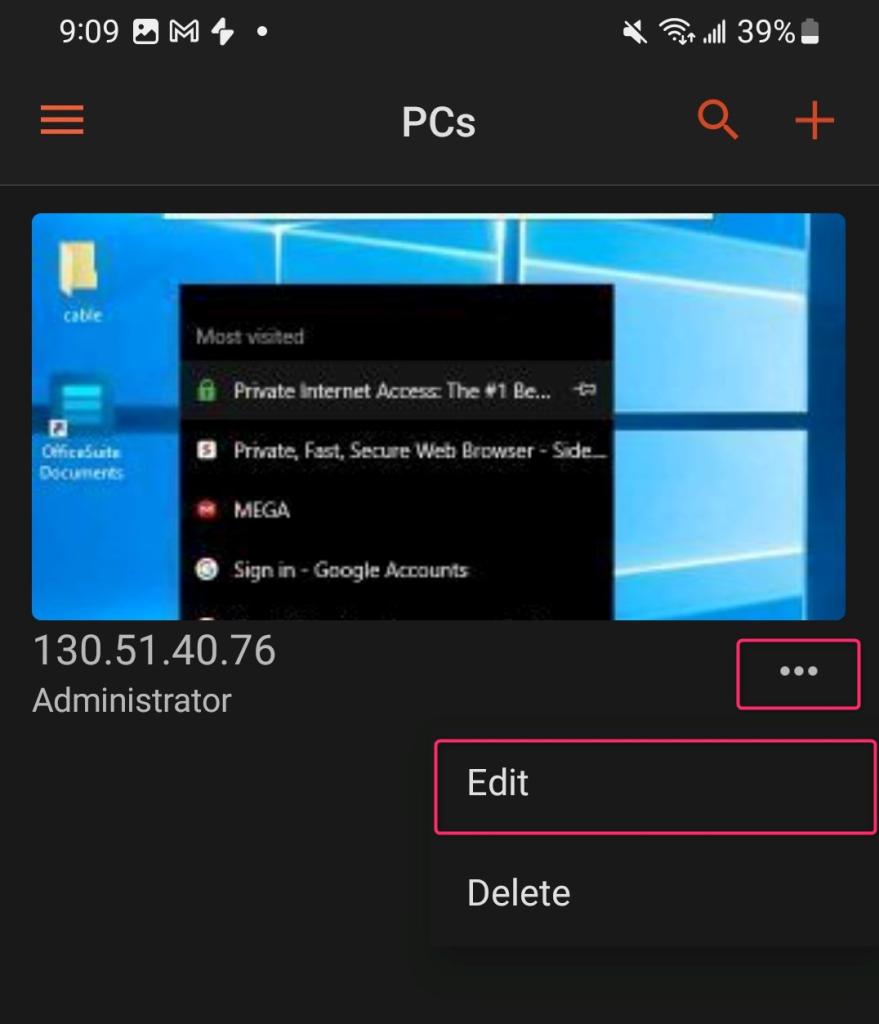
Step 2: Enable Storage and Click Save
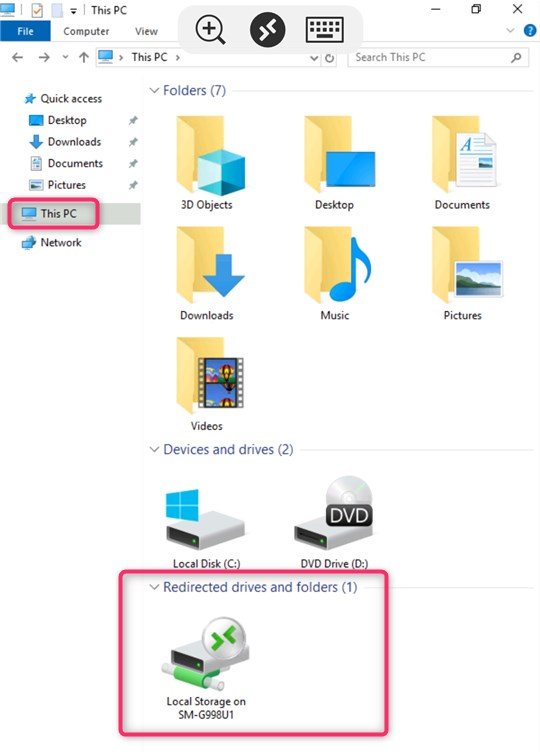
Step 3: Login to your server and you will see the mounted disk
Using IOS RD Client
Step 1: Open RD Client and long press on the server
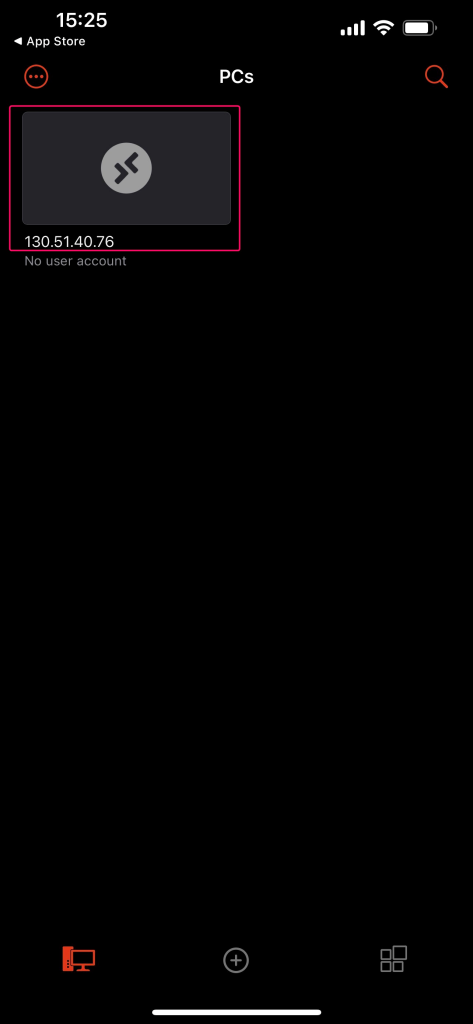
Step 2: Click Edit

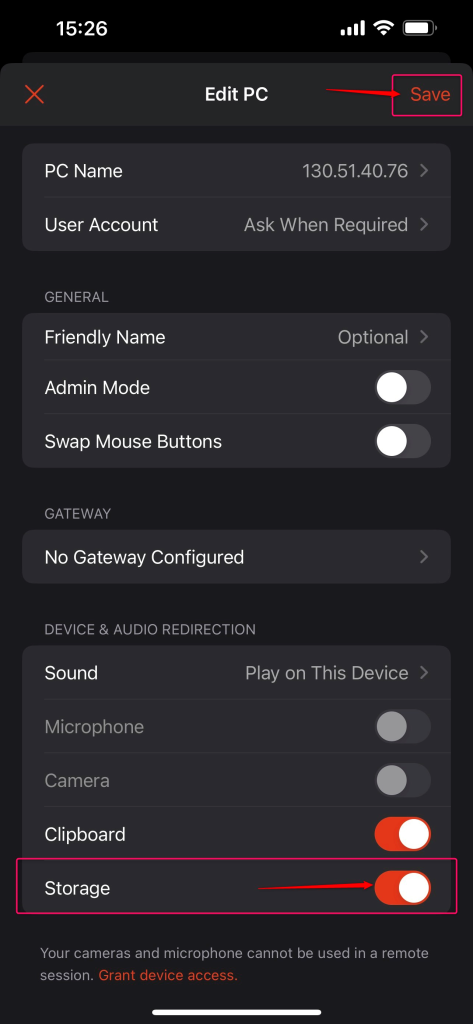
Step 3: Enable Storage and click Save
Step 4: Login to your server and you will see the mounted disk