Dynamic Host Configuration Protocol (DHCP) is an essential part of any network. It helps assign IP addresses to devices, making network management smoother and more efficient. This guide will walk you through the steps to install the DHCP role on your Windows Server. Let’s get started below.
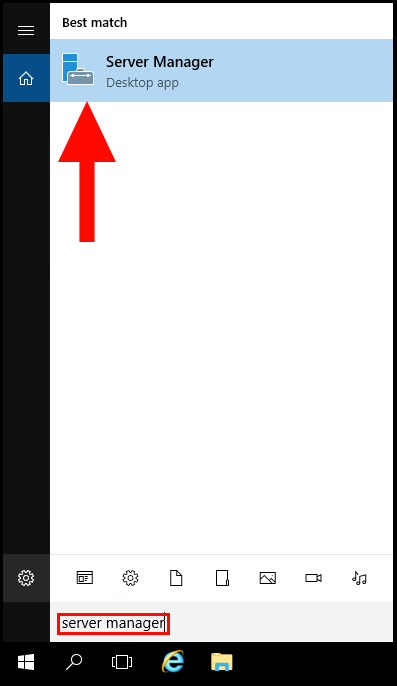
1. Begin by opening the Server Manager. You can do this by clicking on the Server Manager icon on the taskbar or by searching for it in the Start Menu.
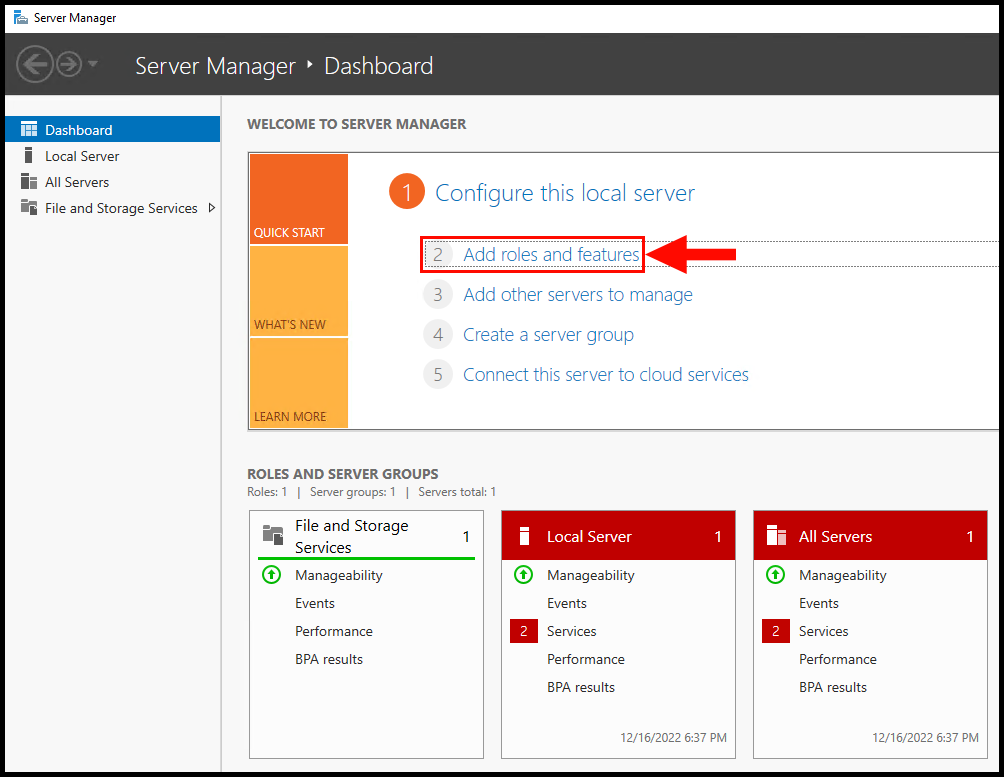
2. In the Server Manager dashboard, click on the Add roles and features option. This will open the Add Roles and Features Wizard, which will guide you through the installation process.
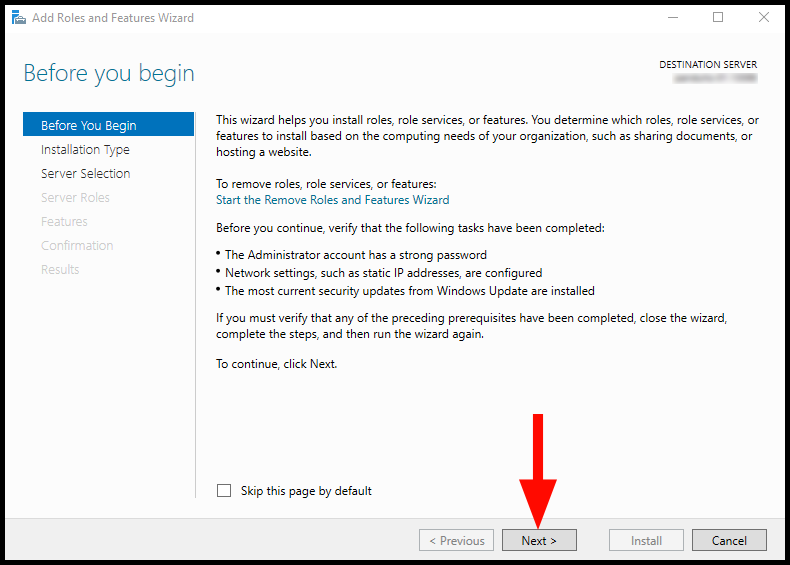
3. Once the Add Roles and Features Wizard opens, click Next on the Before you begin page.
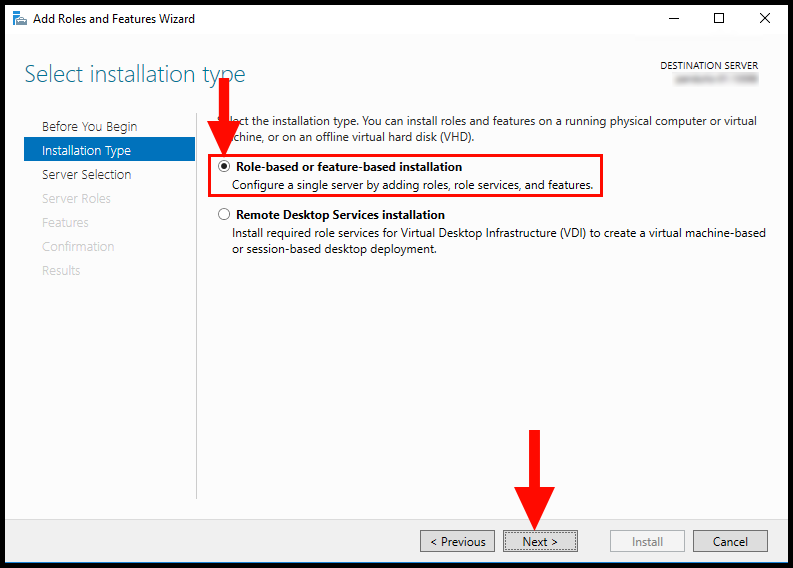
4. On the Select installation type page, choose the Role-based or feature-based installation option. Then, click “Next”.
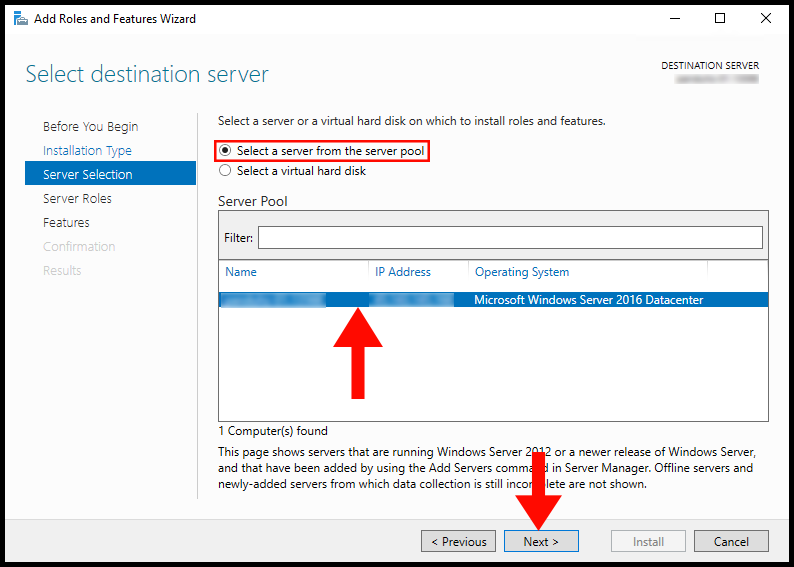
5. The next page, Select destination server, asks you to pick the server where you want to install DHCP. Choose your server from the list and click Next.
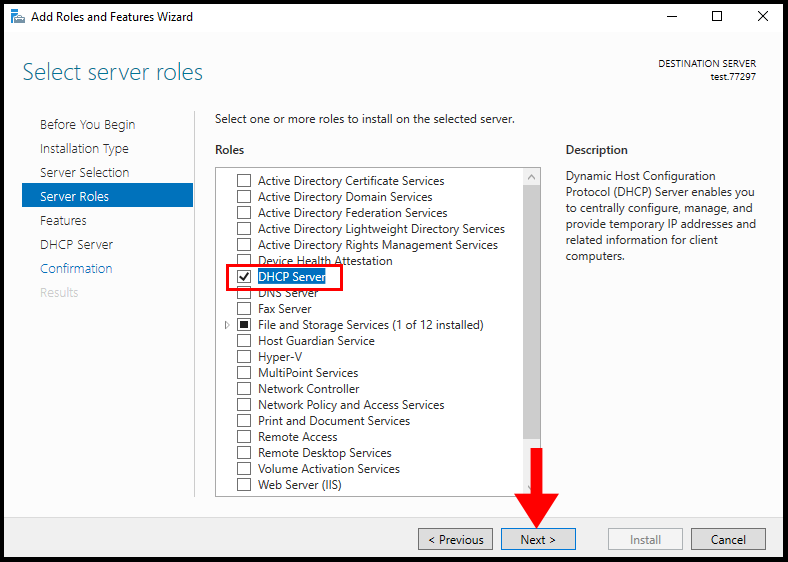
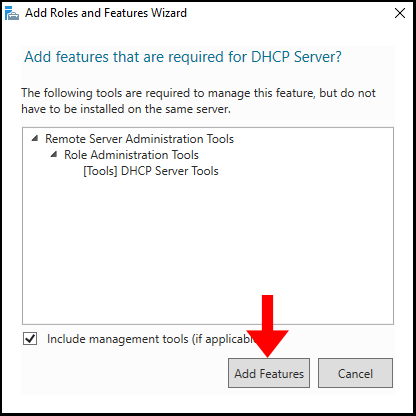
6. You will then arrive at the Select server roles page. Here, scroll down to find DHCP Server, and check the box next to it. A window will pop up with additional features needed for the DHCP Server role. Click Add Features, then click Next.
7. Next, skip the Select features and DHCP Server page.
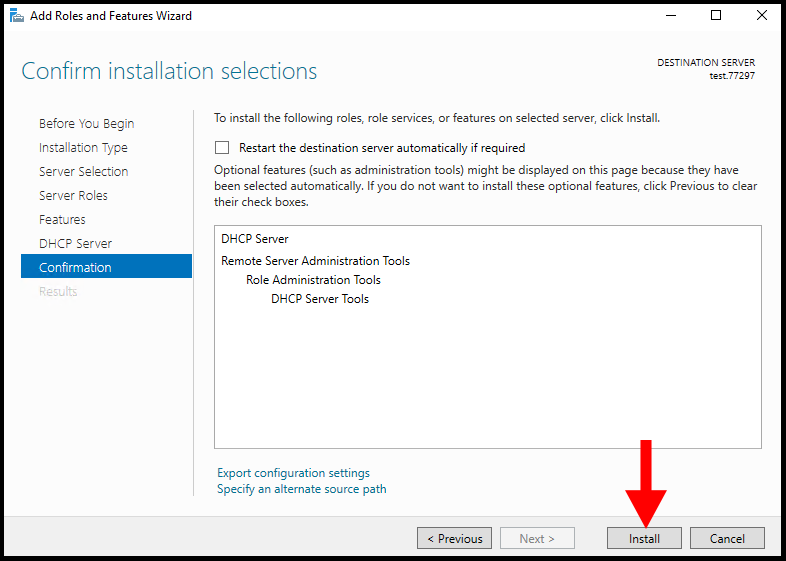
8. Next, you will see the Confirm installation selections page. Review the roles and features to be installed and click Install to start the process. You don’t need to check the box for restarting the server as the DHCP Server role doesn’t require a reboot.
9. Finally, you will see the installation progress. Once the installation is complete, click Close to exit the wizard.
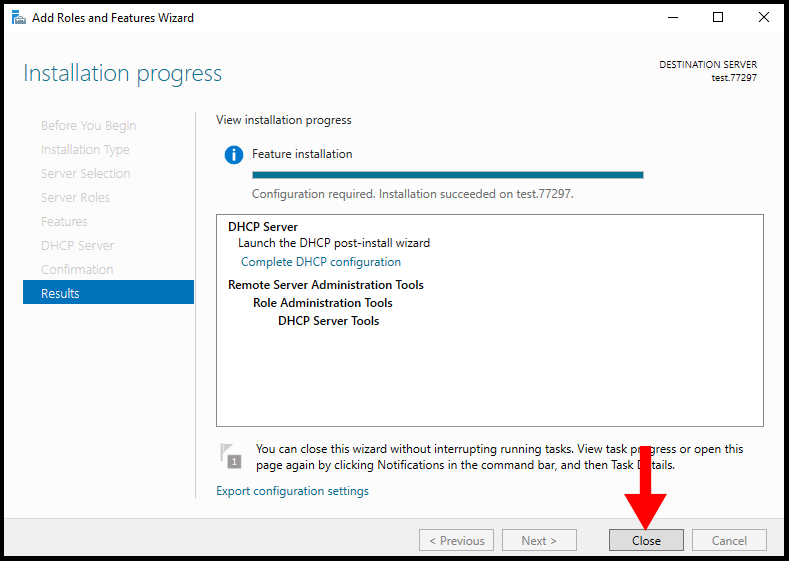
Congratulations! You’ve successfully installed the DHCP role on your Windows Server. Now you can configure your DHCP server according to your network needs, create scopes, and manage IP address assignments.
