Internet Information Services, i.e. IIS, is extensive useful software developed by Microsoft to deploy web projects, and you can install/enable the services from the Server Manager utility. IIS is mainly used to host ASP.NET-based projects and static websites on the windows server. IIS supports HTTP, HTTP/2, HTTPS, FTP, FTPS, SMTP, and NNTP. If your windows server image has IIS pre-enabled or not yet enabled and also not yet installed the required components of the IIS, then you can find this article useful. In this article, we will go over how to enable IIS and IIS Required Components on your Windows server.
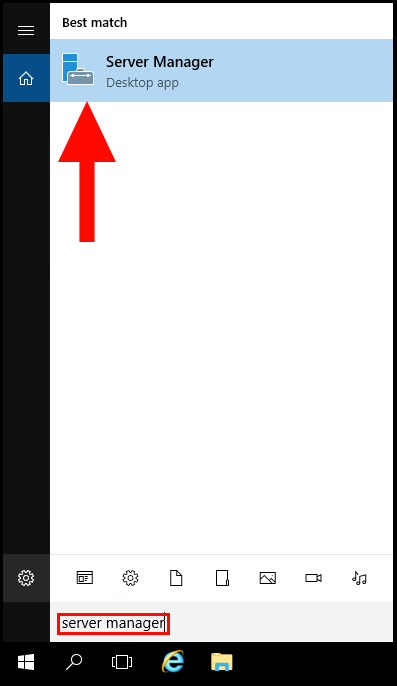
1. To start off, log in to your Windows search then search and open Server Manager.
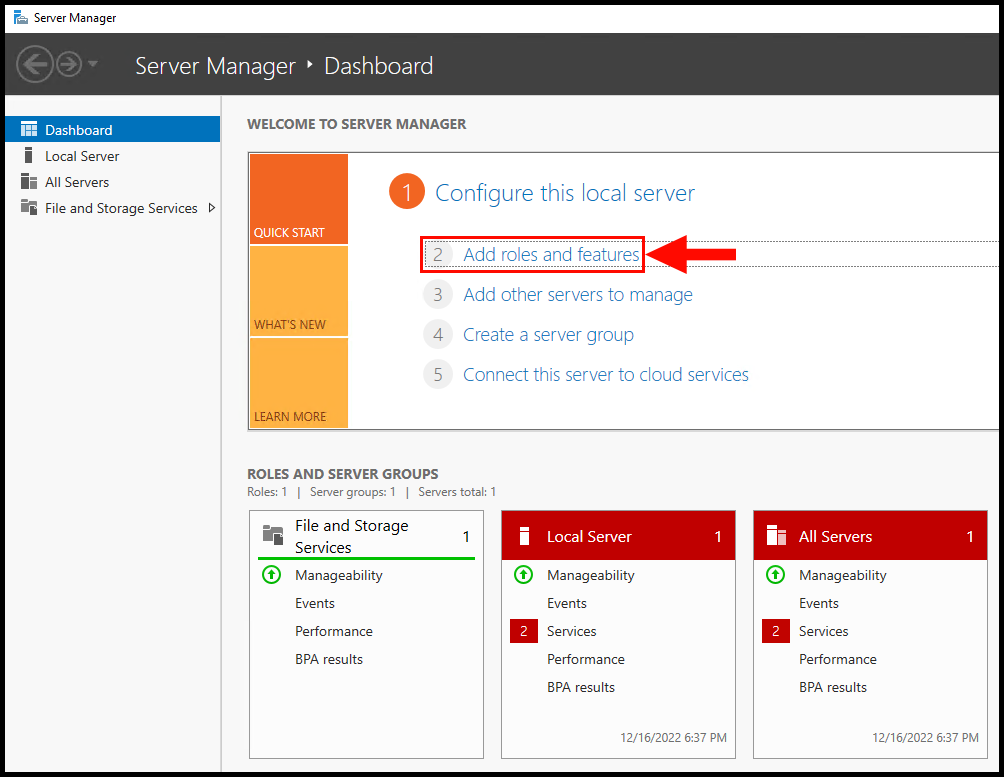
2. Now, click on Add Roles and Features.
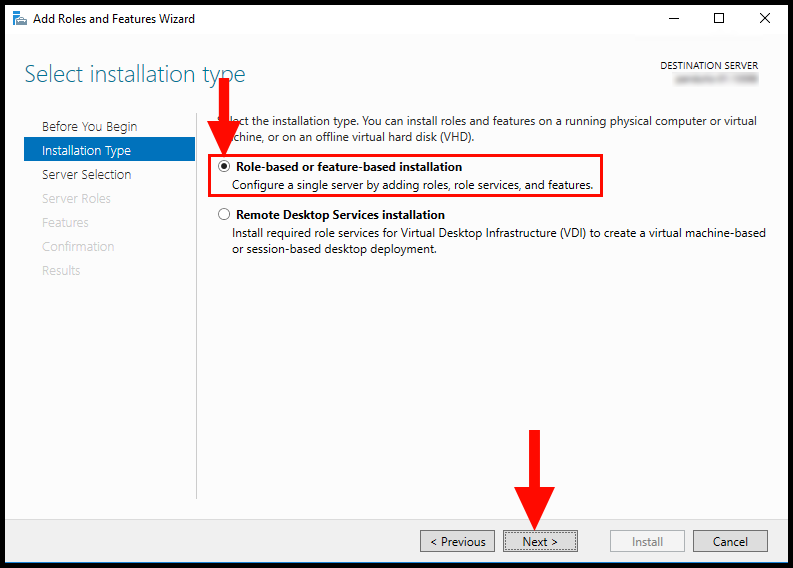
3. Next, in the Installation Type tab, select Role-based or feature-based installation. Then, click Next to continue.
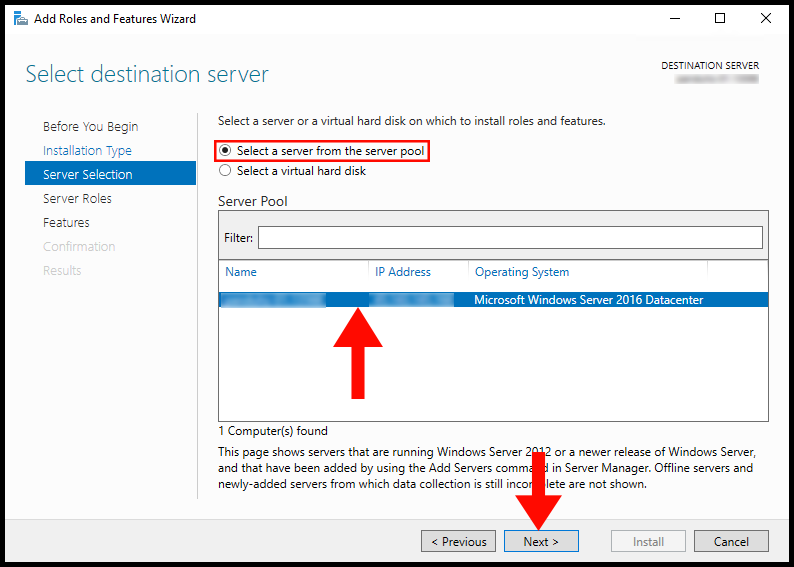
4. Now in the Server Selection tab, select your Windows Server and then click Next to continue.
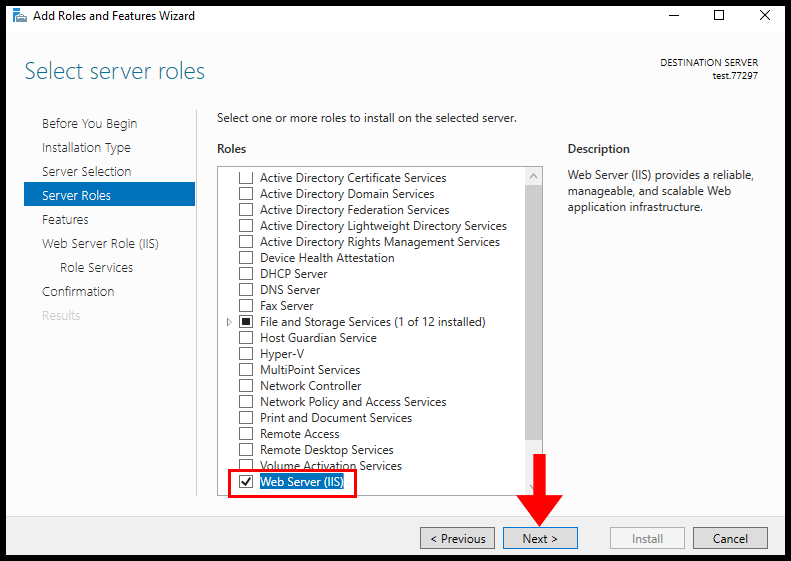
5. In the Server Roles tab, select Web Server (IIS). Then, click on Next to continue setting up Web Server (IIS).
6. Ignore the Features page and click Next to move forward.
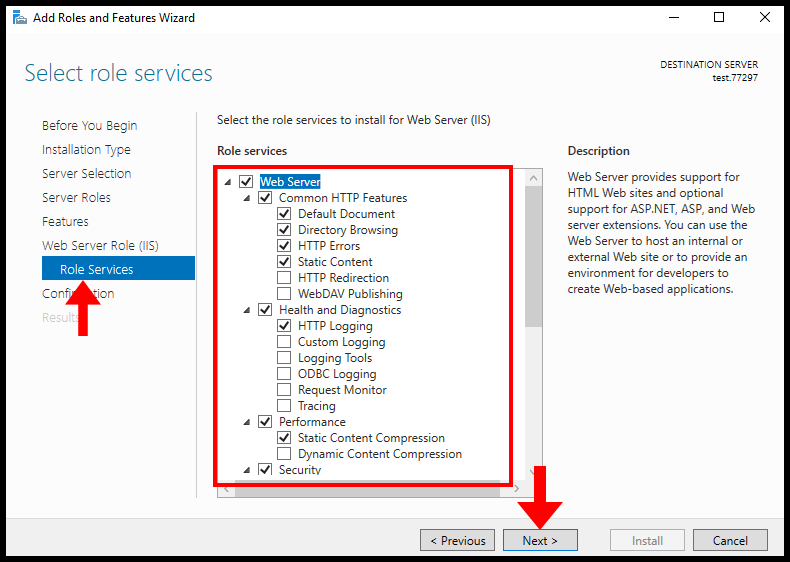
7. Under Web Server Role (IIS) Role Services, select the services that you may require in the center of the screen and click on Next to move on.
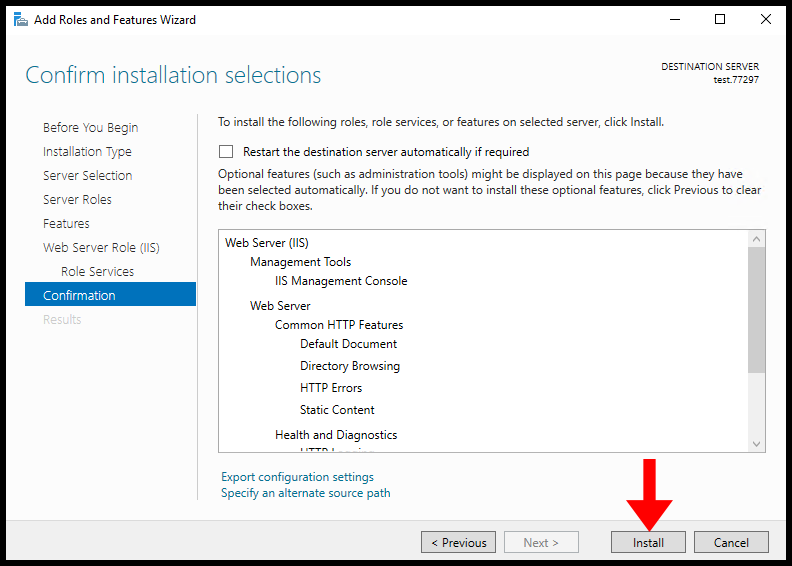
8. In the Confirmation section, click on Install.
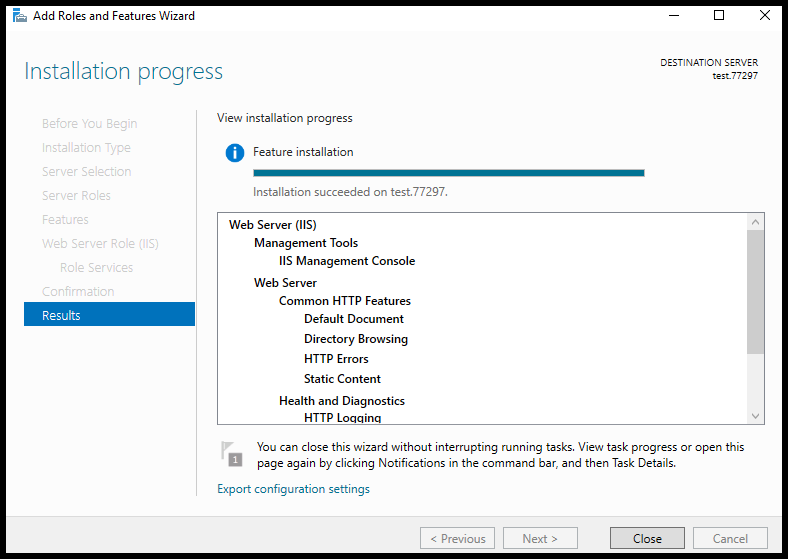
9. We have successfully installed Web Server (IIS) on a Windows server, restart your server to finalize the installation and changes we have made.