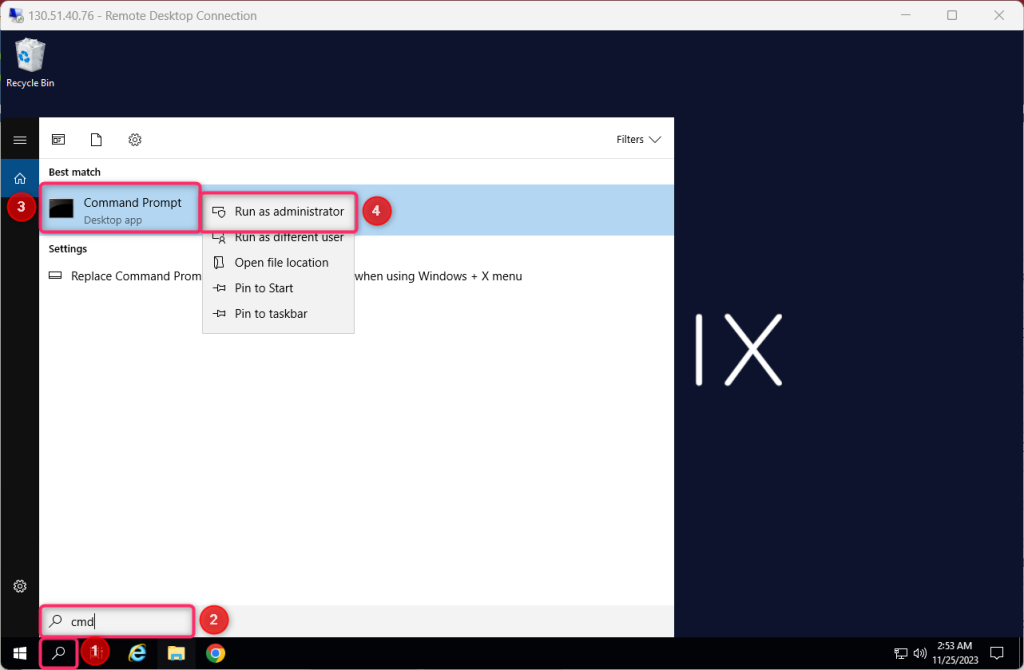
Method 1: Using CMD
Step 1: Run CMD as an Administrator
![](https://howto.hyonix.com/wp-content/uploads/2023/11/image-24-1024x670.png)
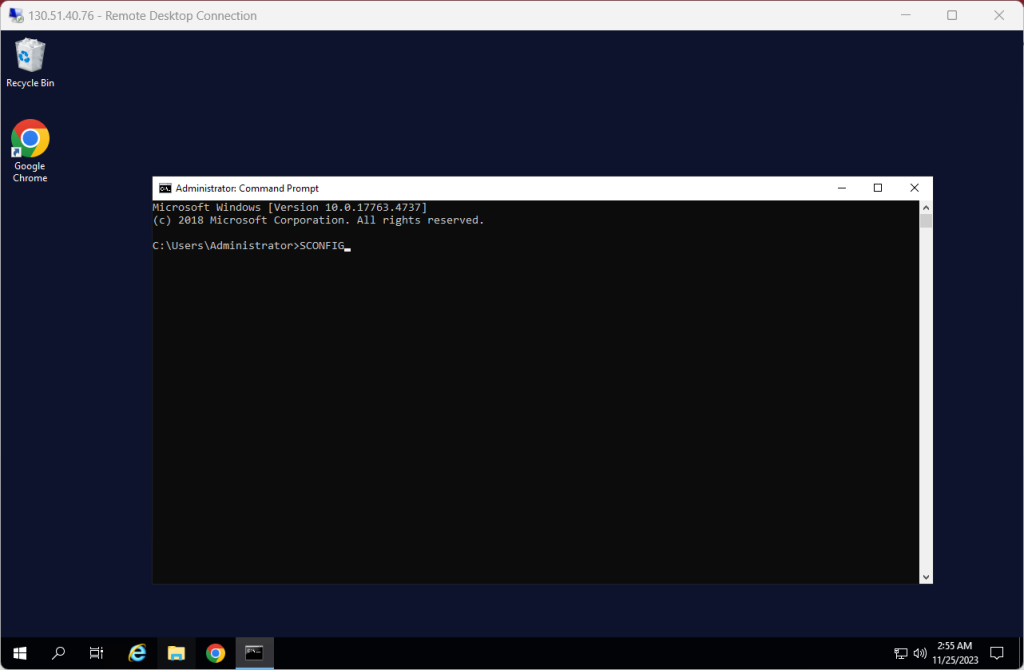
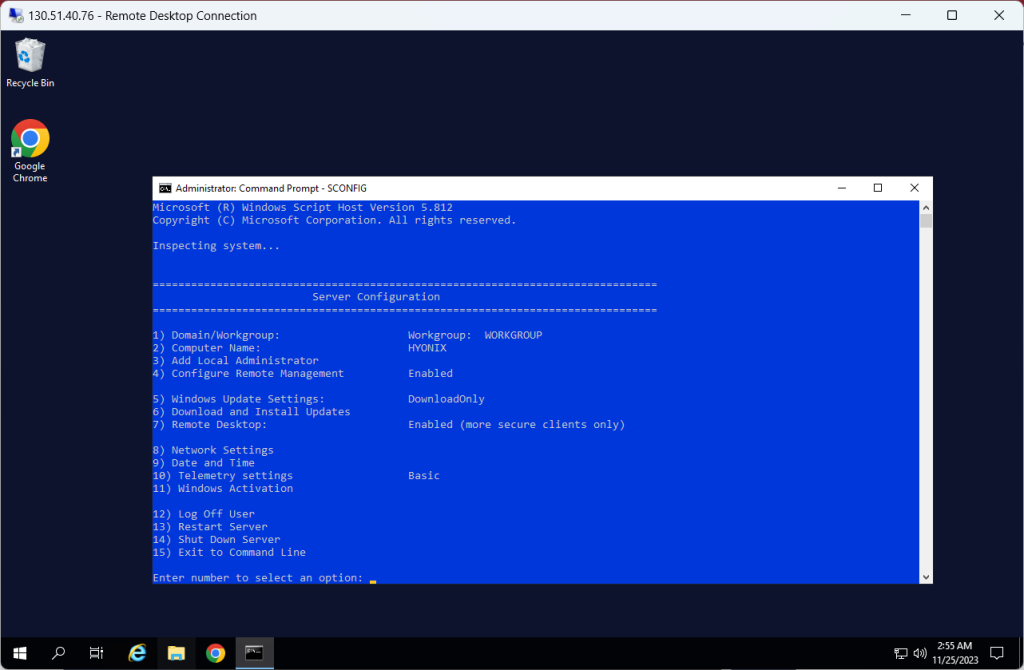
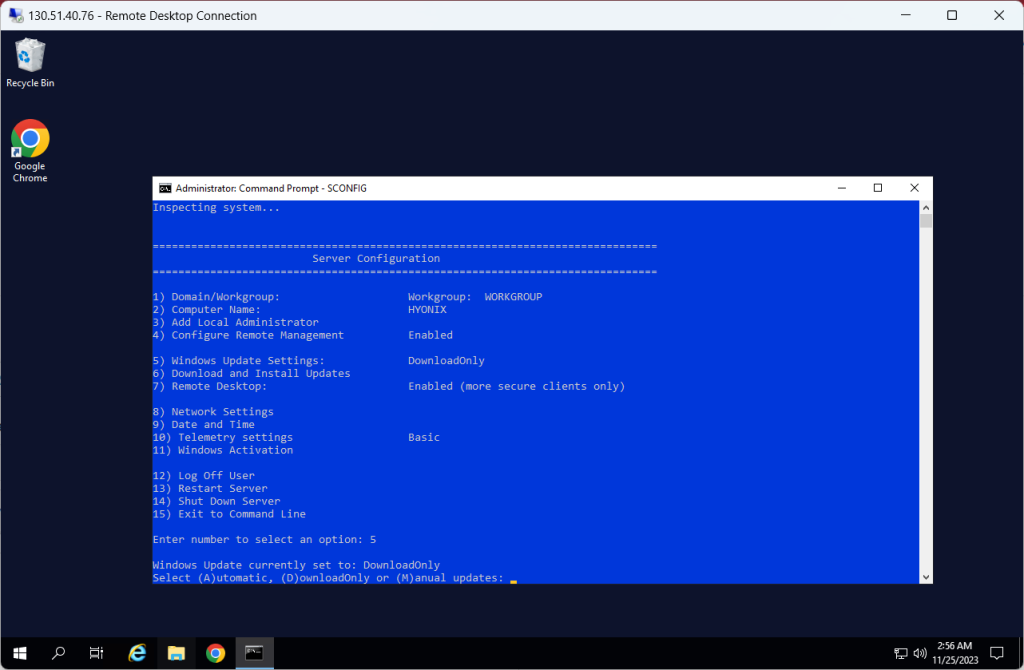
Step 2: Type SCONFIG and press ENTER
![](https://howto.hyonix.com/wp-content/uploads/2023/11/image-25-1024x670.png)
![](https://howto.hyonix.com/wp-content/uploads/2023/11/image-26-1024x670.png)
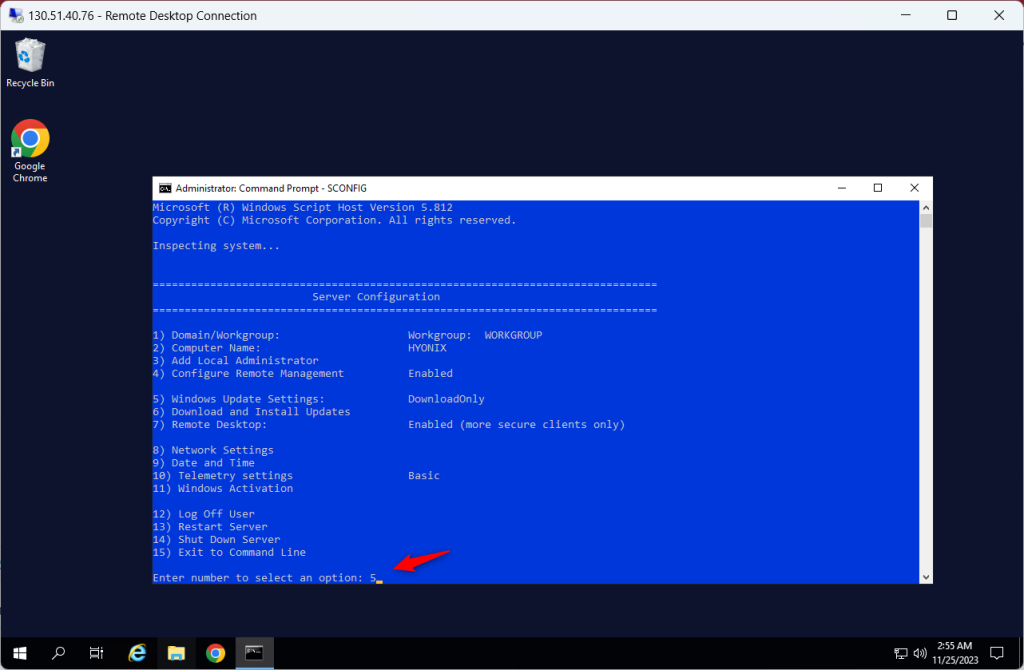
Step 3: Type 5 and press ENTER
![](https://howto.hyonix.com/wp-content/uploads/2023/11/image-27-1024x670.png)
![](https://howto.hyonix.com/wp-content/uploads/2023/11/image-28-1024x670.png)
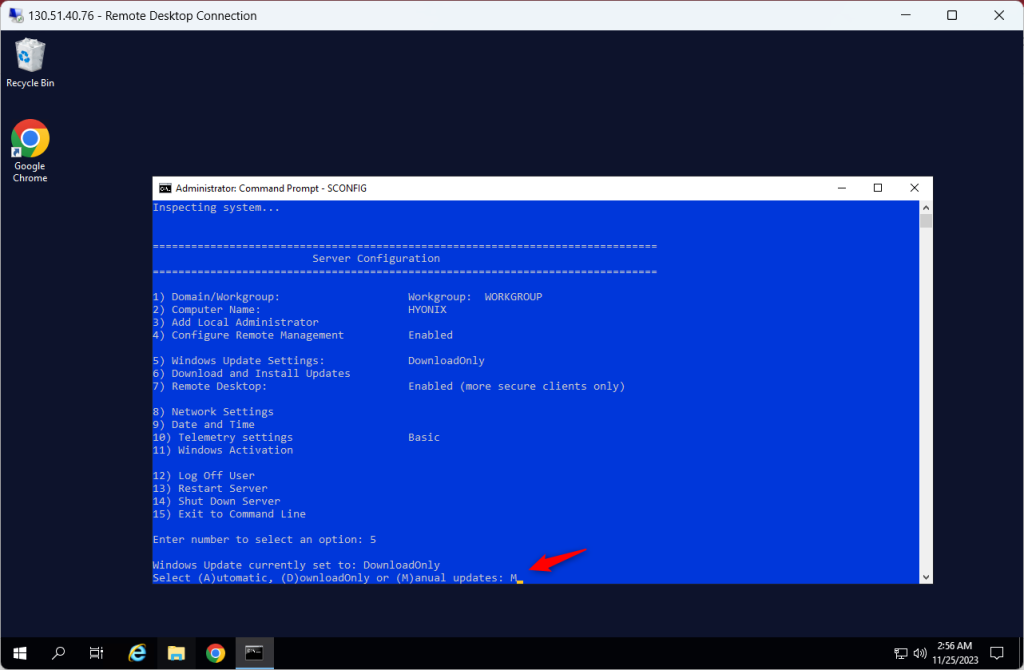
Step 4: Type M and press ENTER.
![](https://howto.hyonix.com/wp-content/uploads/2023/11/image-31-1024x670.png)
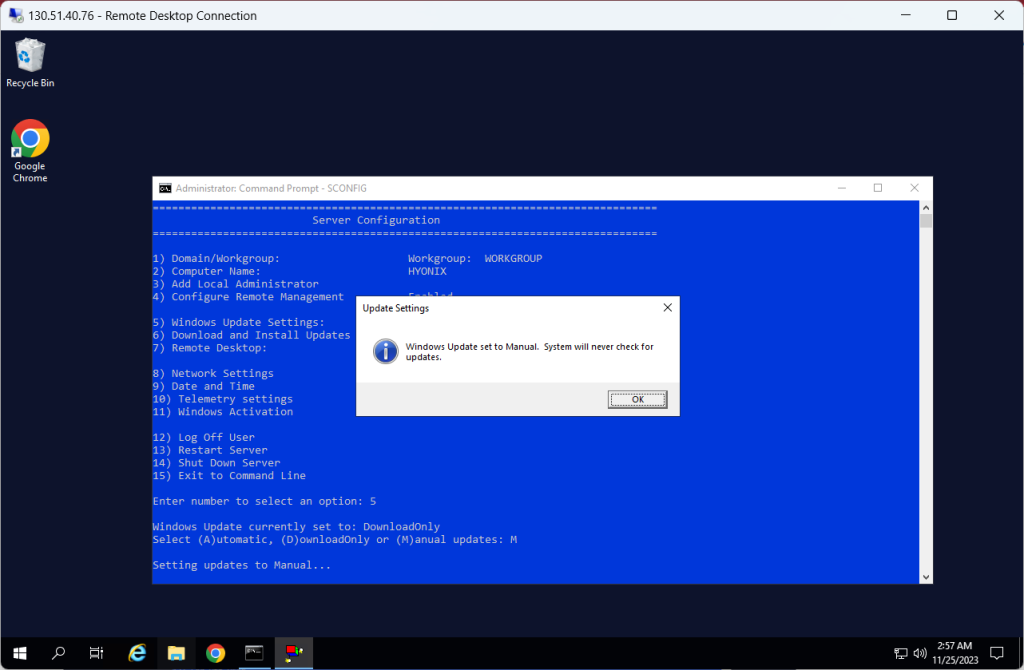
When the computer is finished you will get a prompt saying updates are sent to manual.
![](https://howto.hyonix.com/wp-content/uploads/2023/11/image-30-1024x670.png)
Method 2: Using GROUP POLICY
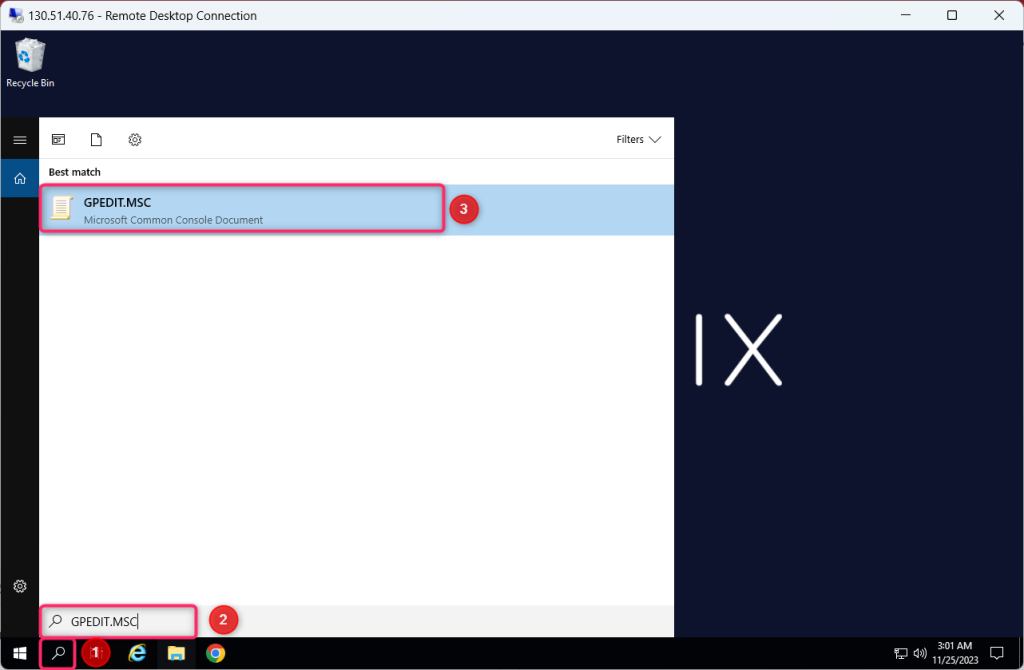
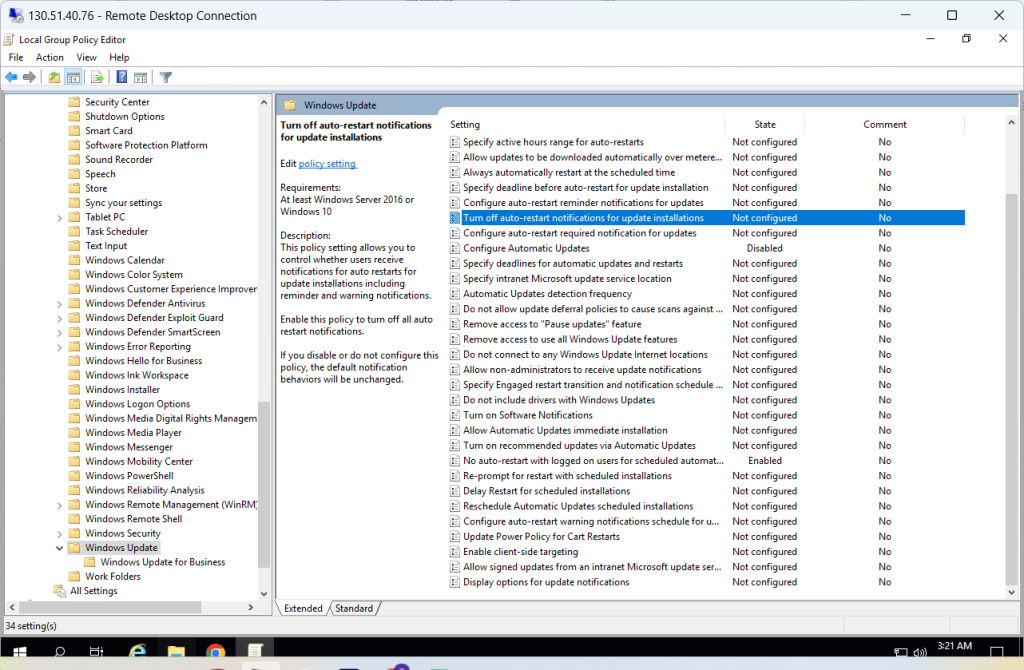
Step 1: Click START and type GPEDIT.MSC and press ENTER (or open the GROUP POLICY MANAGEMENT CONSOLE and open an existing GPO or start a new one)
![](https://howto.hyonix.com/wp-content/uploads/2023/11/image-32-1024x670.png)
Step 2: Expand COMPUTER CONFIGURATION > ADMINISTRATIVE TEMPLATES > WINDOWS COMPONENTS > WINDOWS UPDATE
![](https://howto.hyonix.com/wp-content/uploads/2023/11/image-33-1024x670.png)
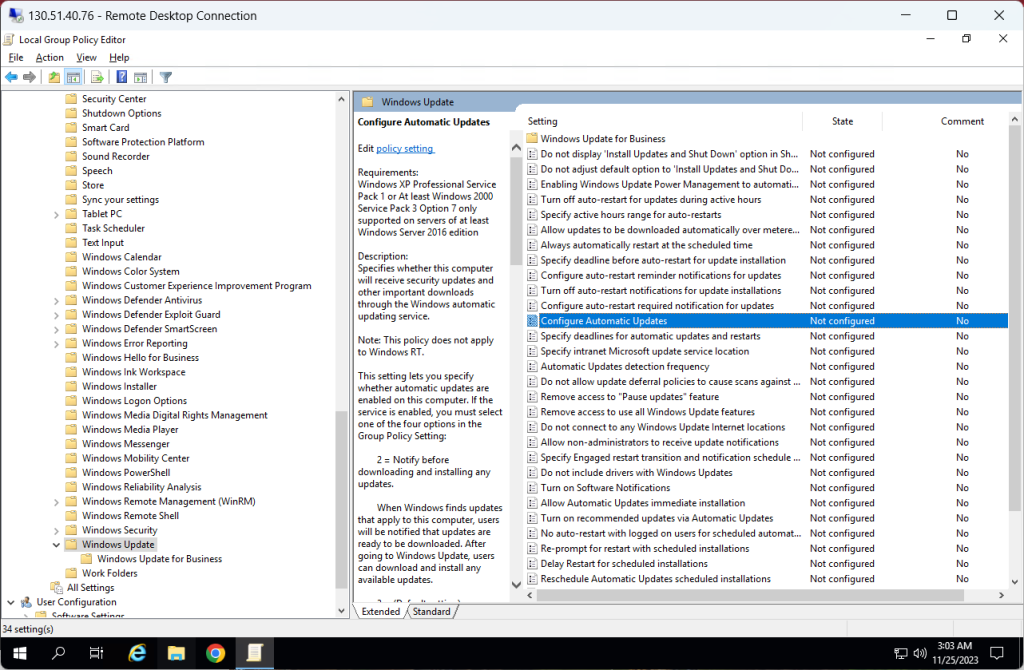
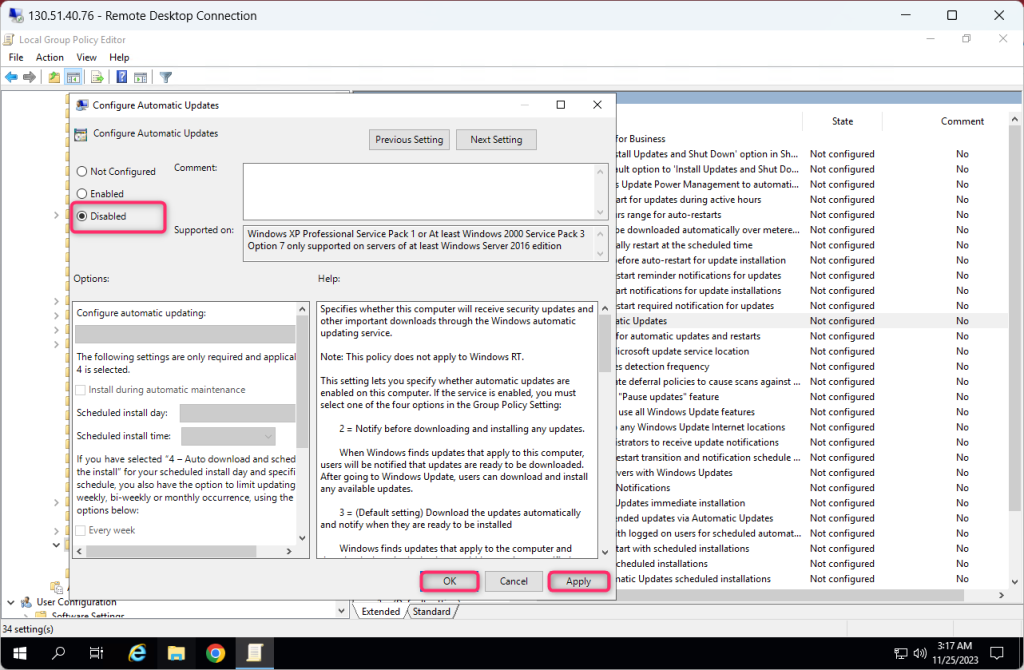
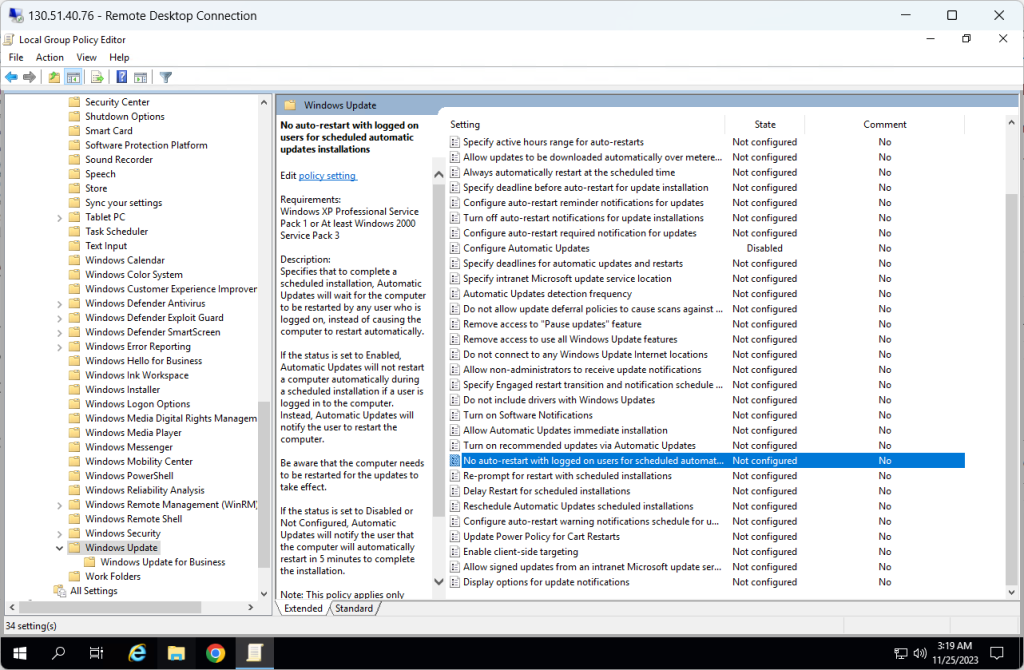
Step 3: Double click on CONFIGURE AUTOMATIC UPDATES and select DISABLED
![](https://howto.hyonix.com/wp-content/uploads/2023/11/image-34-1024x670.png)
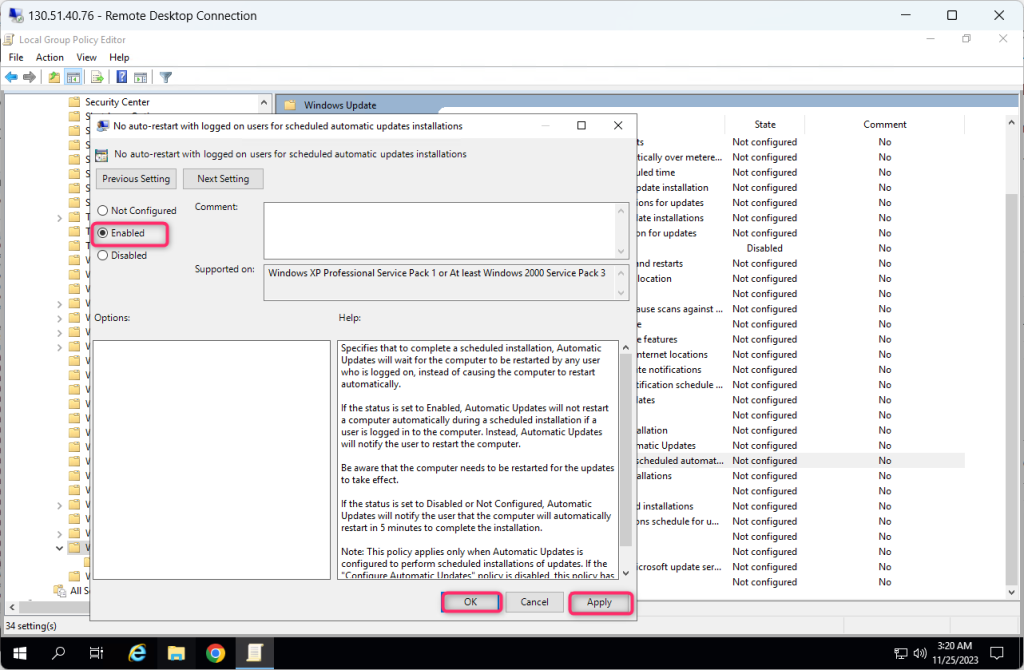
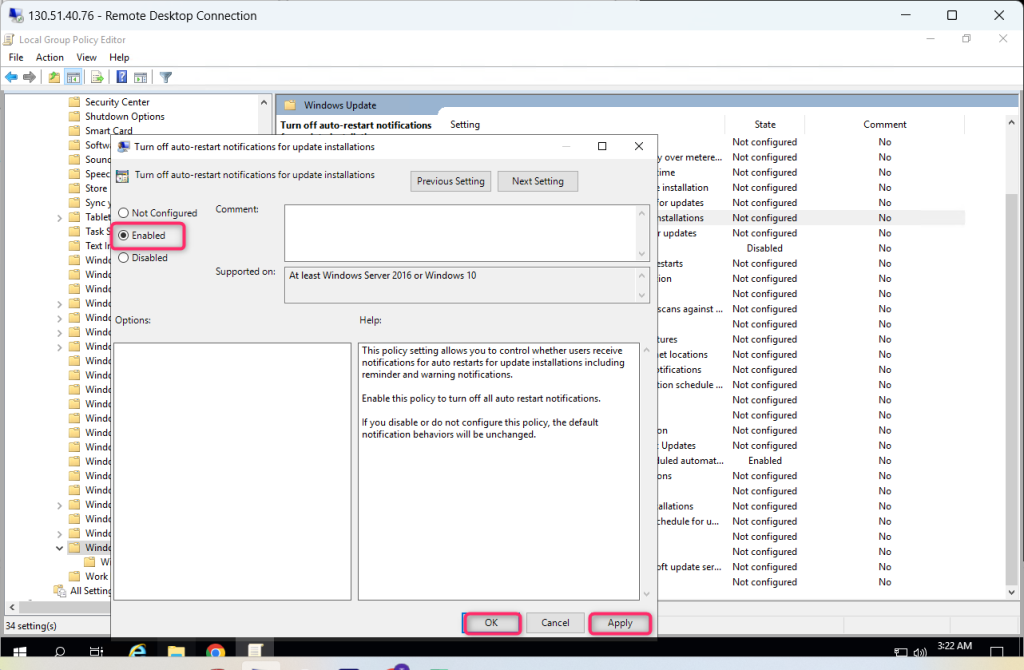
Step 4: Now Double-click “No auto-restart with logged on users for scheduled automatic updates Installation” and Select the Enabled option and click “Apply.”
![](https://howto.hyonix.com/wp-content/uploads/2023/11/image-35-1024x670.png)
![](https://howto.hyonix.com/wp-content/uploads/2023/11/image-36-1024x670.png)
Step 5: Then enable the Turn off auto-restart for updates during active hours
![](https://howto.hyonix.com/wp-content/uploads/2023/11/image-37-1024x670.png)
![](https://howto.hyonix.com/wp-content/uploads/2023/11/image-38-1024x670.png)
That’s it. If you go into your windows update, you should now see the updates are paused.