In this guide, you will learn how to disable SmartScreen on Windows server.
What is Windows SmartScreen? Windows introduce tools or services to protect your privacy and security. SmartScreen is a filter that works as Warning System. If a user visits suspicious websites or malware distribution websites via social engineering tactics SmartScreen filter will display a warning to make users aware of suspicious activity on the website. You can find more about Windows SmartScreen here.
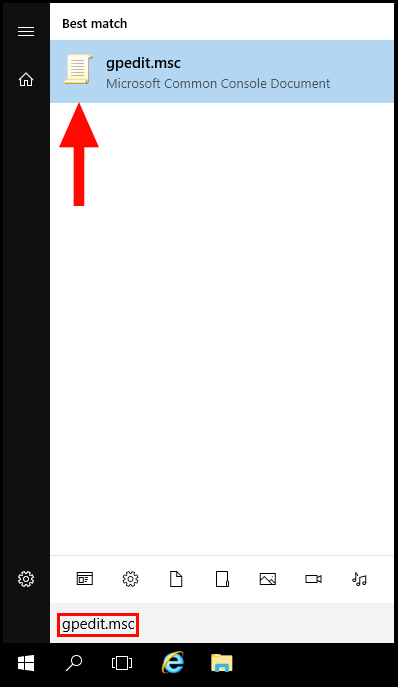
1. To start off, log in to your Windows server and search for gpedit.msc in the server’s search bar.
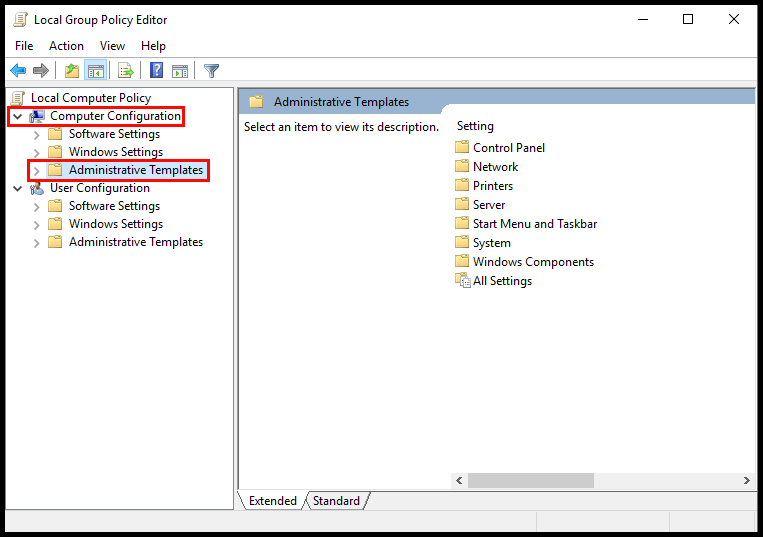
2. Next, open the drop-down menu Computer Configuration on the left-hand side and select the drop-down arrow next to Administrative Templates as seen below.
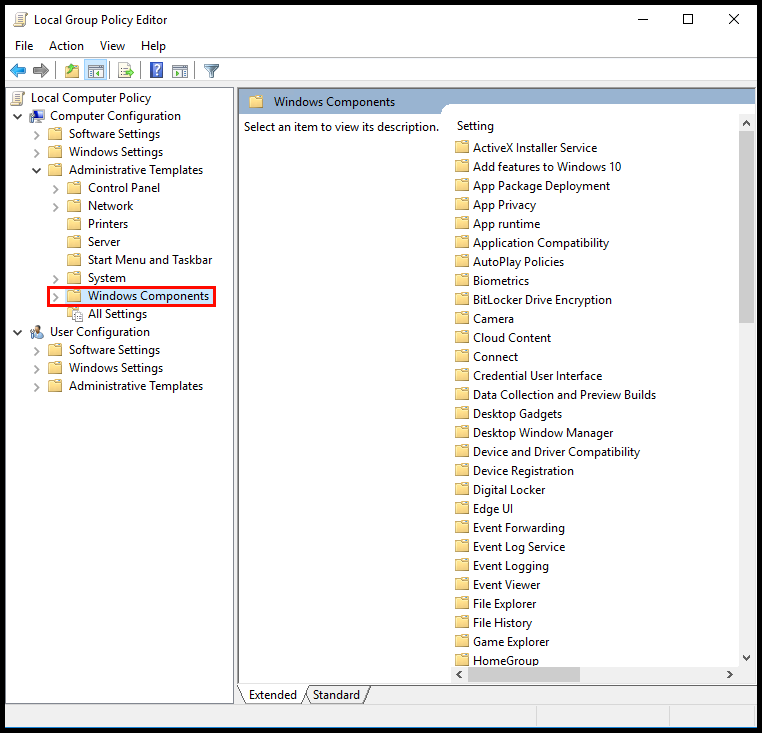
3. Continuing with the menu on the left-hand side, select the drop-down arrow next to Windows Components.
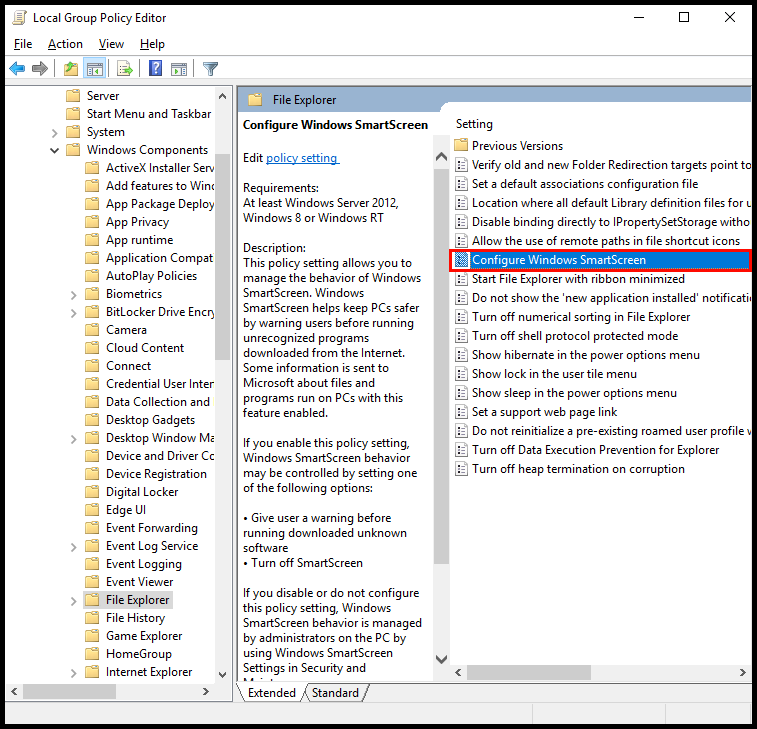
4. Next, in the left-hand menu scroll down until you locate File Explorer and select it.
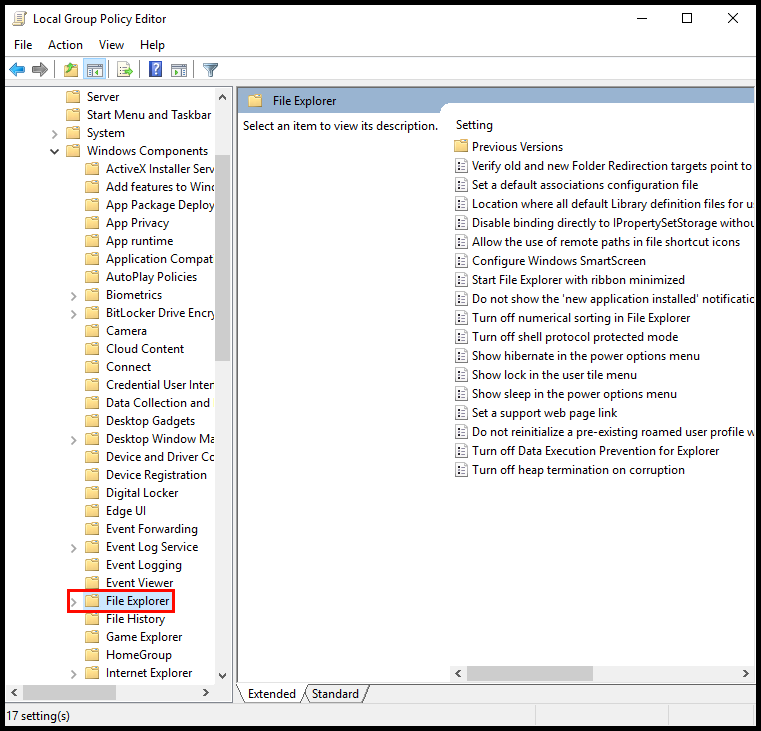
4a. Locate the option Configure Windows Defender SmartScreen on the right-hand side of the screen.
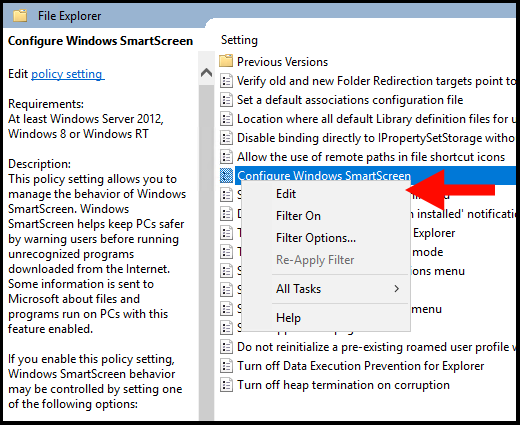
4b. Next, right-click on Configure Windows SmartScreen and select Edit.
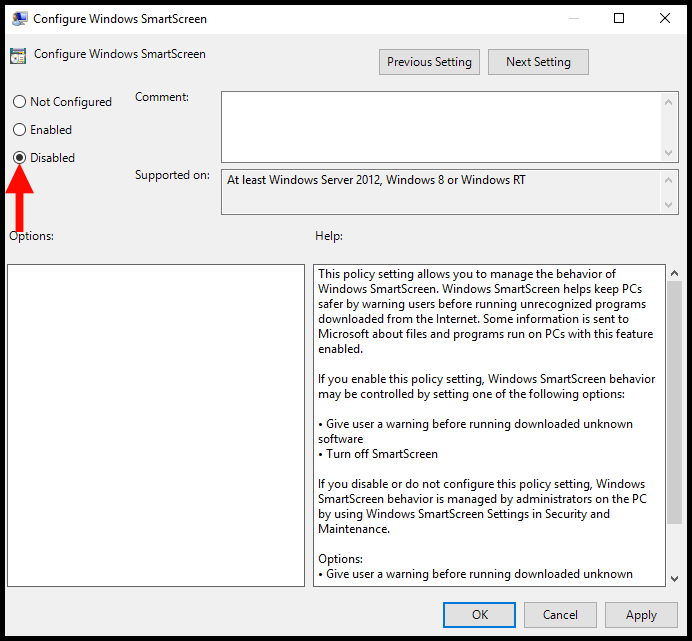
5. The Configure Windows SmartScreen page will appear, please mark the circle next to Disabled.
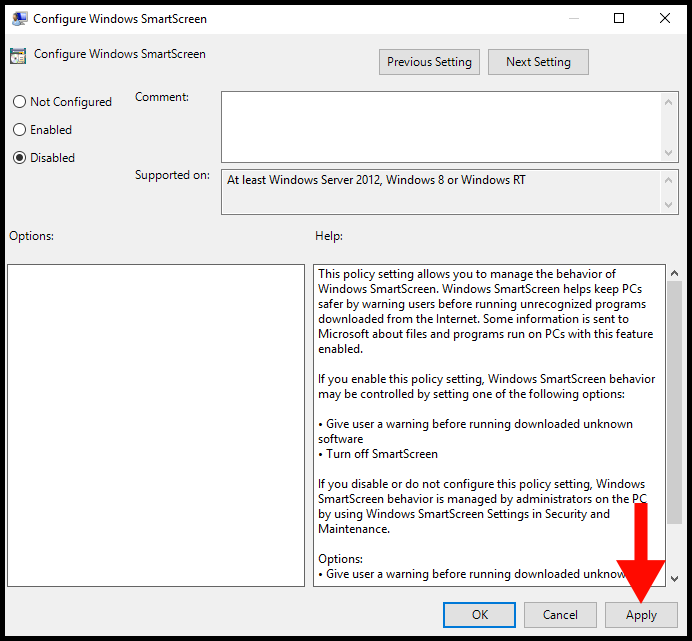
6. Next, click Apply to save the changes you have made. You can close all windows after applying the changes.
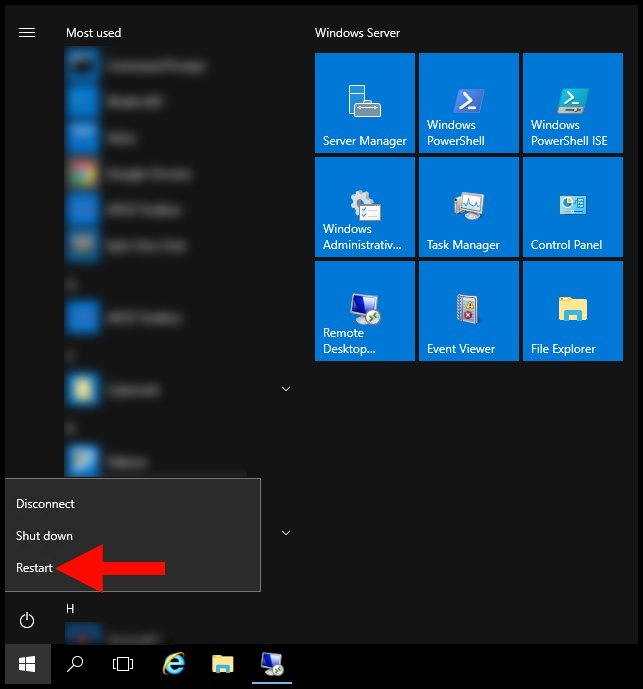
7. Lastly, reboot your server either via the Windows server or the Hyonix Dashboard.
You have now successfully learned how to disable SmartScreen in Windows 2012 & 2016 servers.
