UDP prioritizes speed over reliability, so it can lose or misorder data packets during transmission, which disrupts the consistent data flow RDP needs for seamless screen updates and user interactions, leading to lag or freezing. To ensure reliability, consider disabling UDP and using TCP. Please follow the following steps to disable UDP.
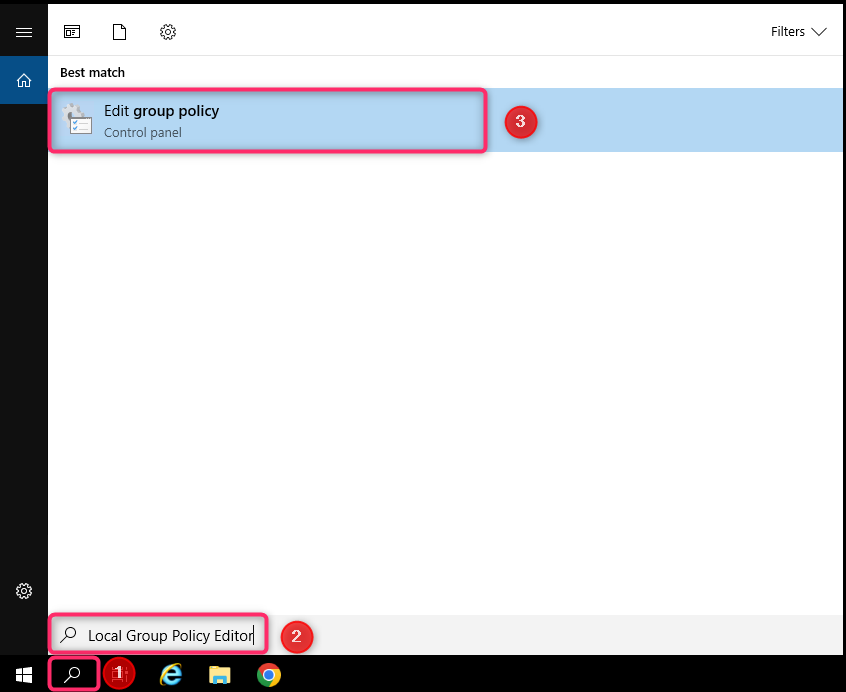
1: Open Local Group Policy Editor in your Windows server
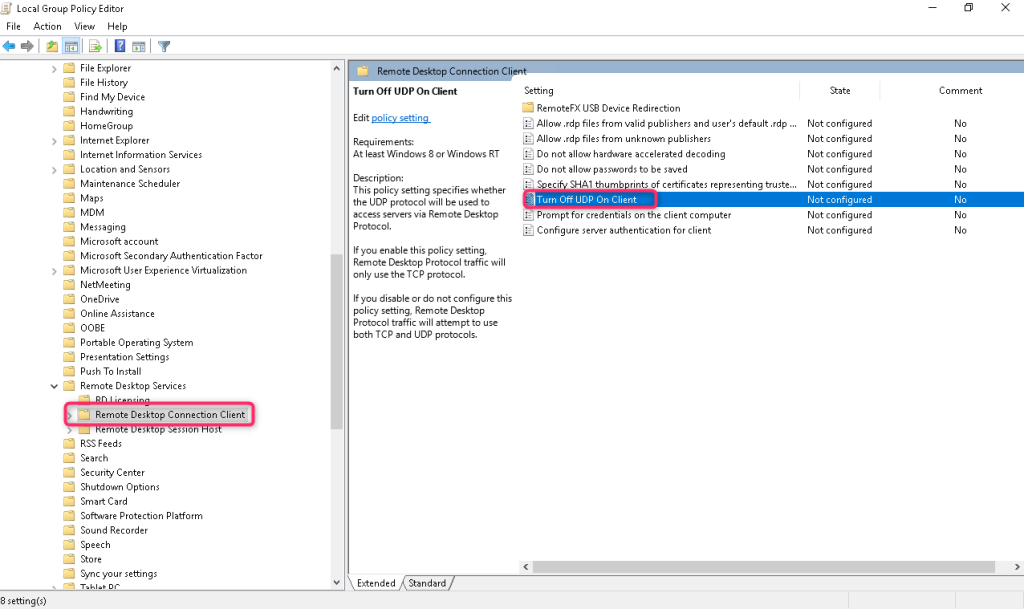
2. Go to Computer Configuration -> Administrative Templates -> Windows Components -> Remote Desktop Services -> Remote Desktop Connection Client.
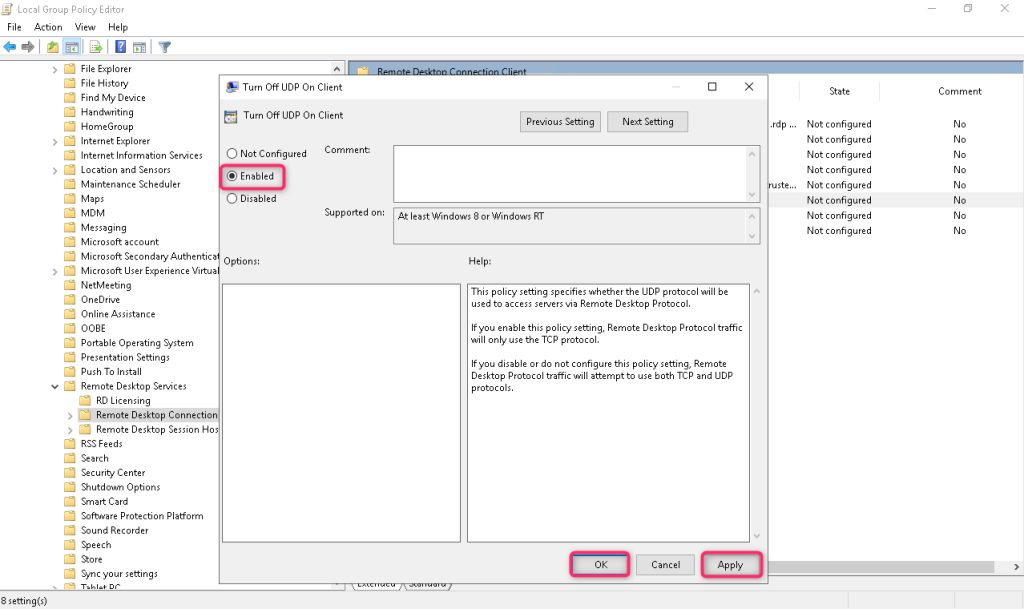
Find the Turn Off UDP On Client option and set it to Enabled if you want to disable UDP or set it to Disable if you want to enable UDP.
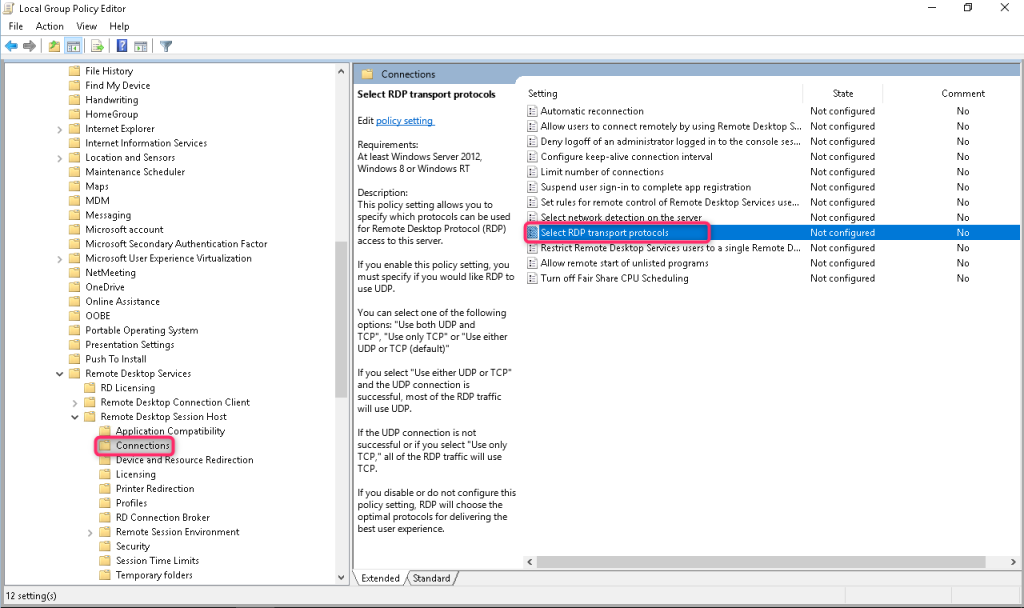
3. Go to “Computer Configuration” -> “Administrative Templates” -> “Windows Components” -> “Remote Desktop Services” -> “Remote Desktop Session Host” -> “Connections”
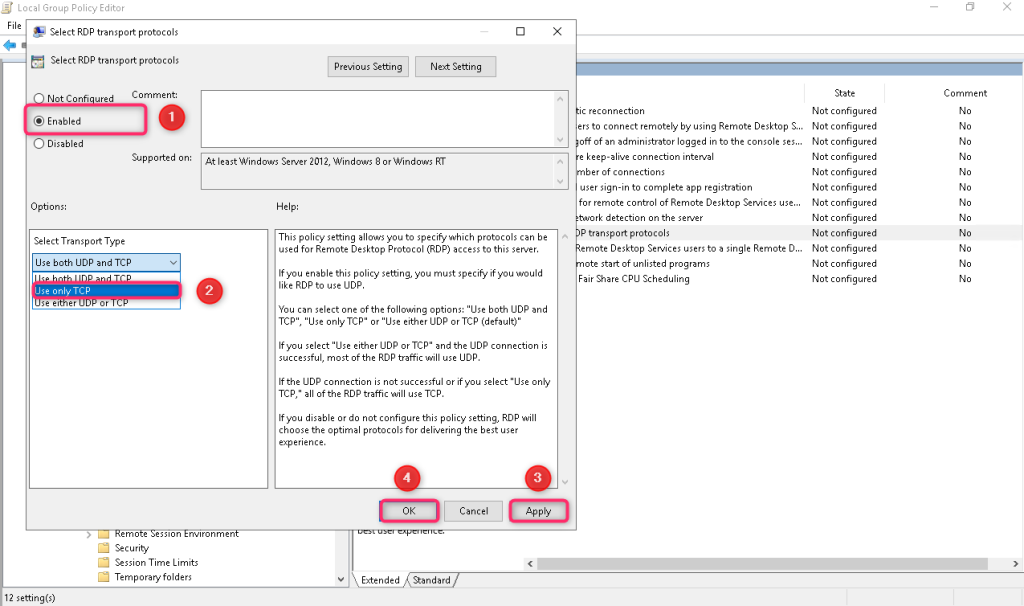
Find the Select RDP Transport Protocols option and set it to Enabled, and in the options select Use only TCP if you want to disable UDP or select Use both UDP and TCP if you want to enable UDP
4. Restart your server and reconnect to your server for the change to take effect