Discover the step-by-step guide on How to Create Zip Archives in Windows. Zip is a powerful tool that allows you to compress multiple files into a single file, making it easier to share, store, and transport. The compressed files can be later unzipped and used normally. With this guide, you will learn how to use the built-in Windows tools and third-party tools to create Zip archives and manage your compressed files, including how to add and extract files, and more.
Method 1 – By Using Windows Archives
In this section, we will go over how to compress (zip) files by using the Windows Archives feature.
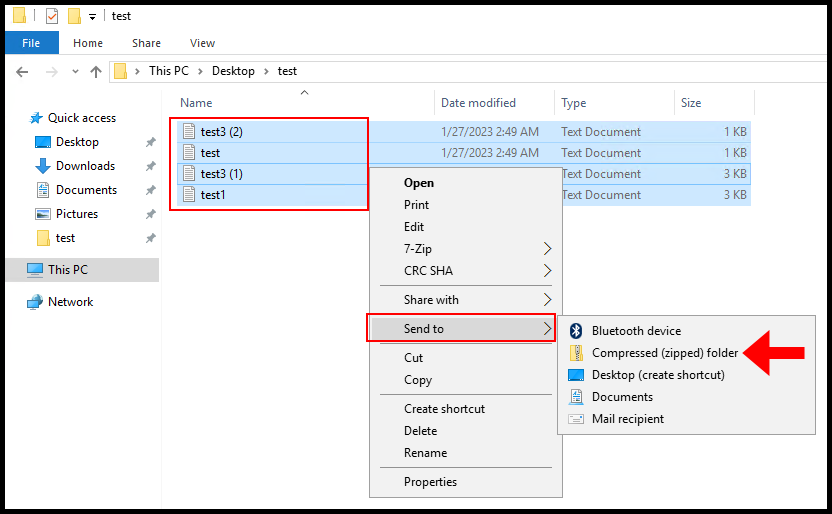
1. To start off, log in to your Windows Server and navigate to the files you want to zip. Then highlight the files and right-click them and hover over Send to, then click Compressed (zipped) folder.
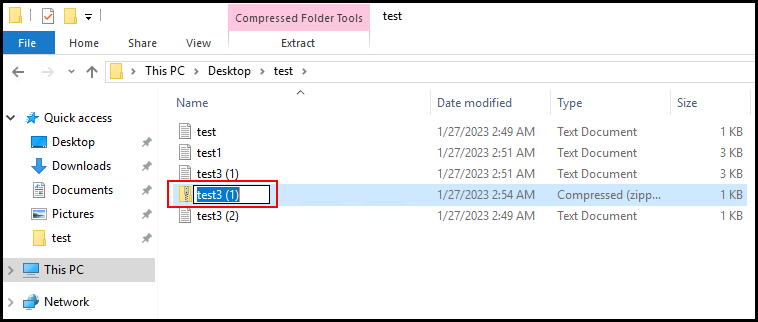
2. You can then name your zipped folder.
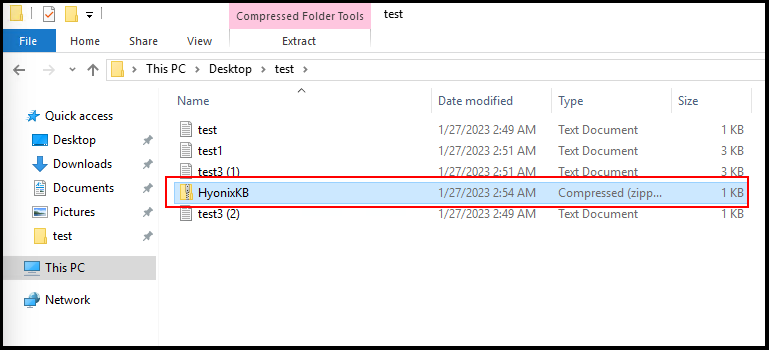
3. Congratulations, you have created the Zip Archive using the built-in Windows archives feature.
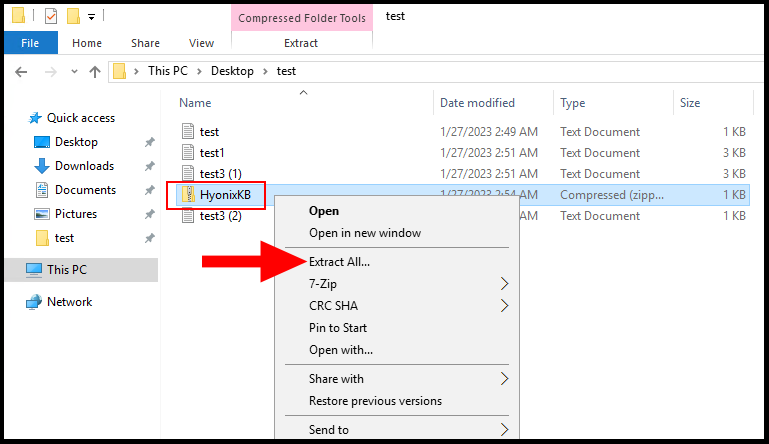
4. To unzip a zipped folder, right-click the zipped folder and then select Extract All.
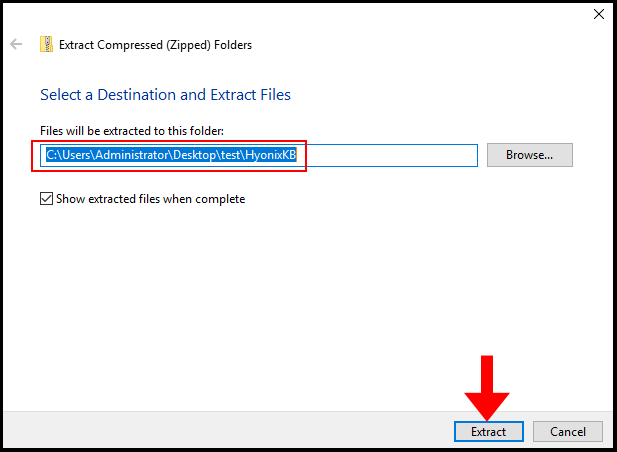
5. In the next window, you can specify a location where the files from the unzipped folder will go, click Extract to extract the files.
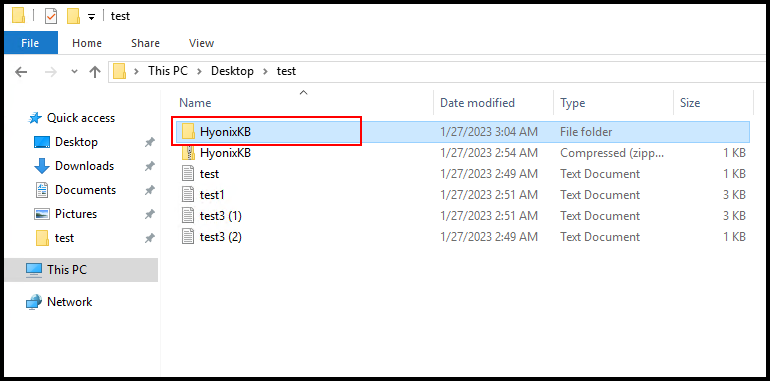
6. Lastly, you will see the unzipped folder, and now we have successfully zipped and unzipped a folder using the Windows Archives feature.
Method 2 – By Using 7-Zip.
In this section, we will go over how to compress (zip) files by using 7-Zip.
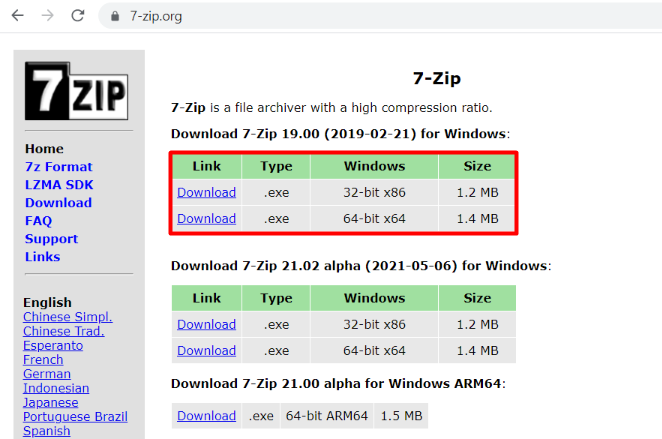
1. To start off, log in to your Windows Server and download and install 7-Zip from https://www.7-zip.org/.
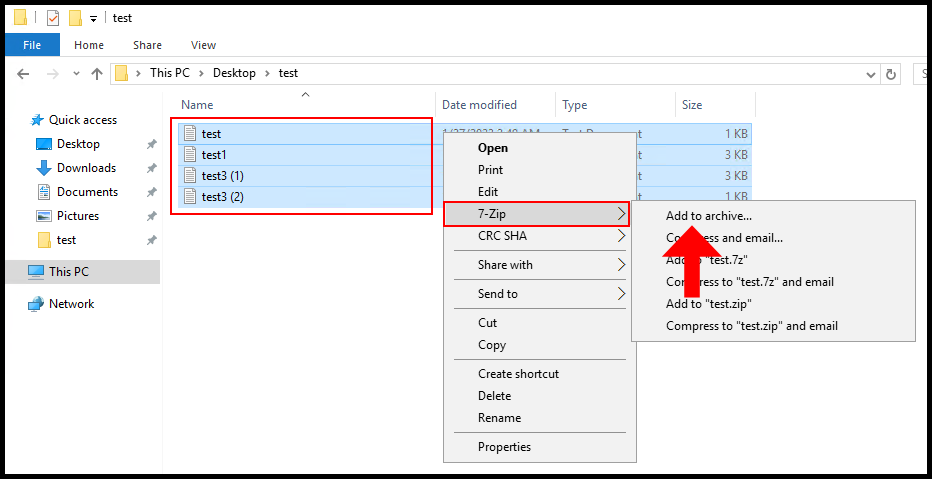
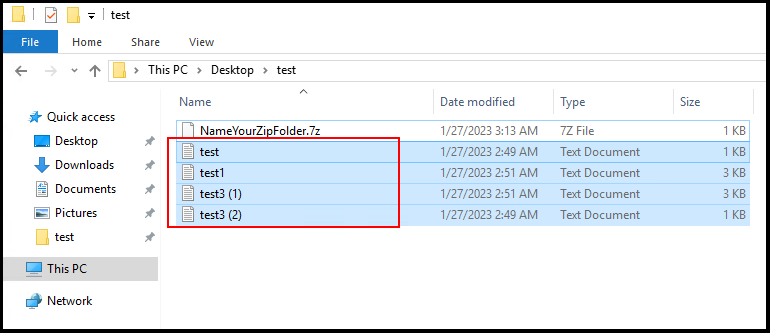
2. Next, navigate to the files you want to zip. Then highlight the files and right-click them and hover over 7-Zip, then click Add to archive.
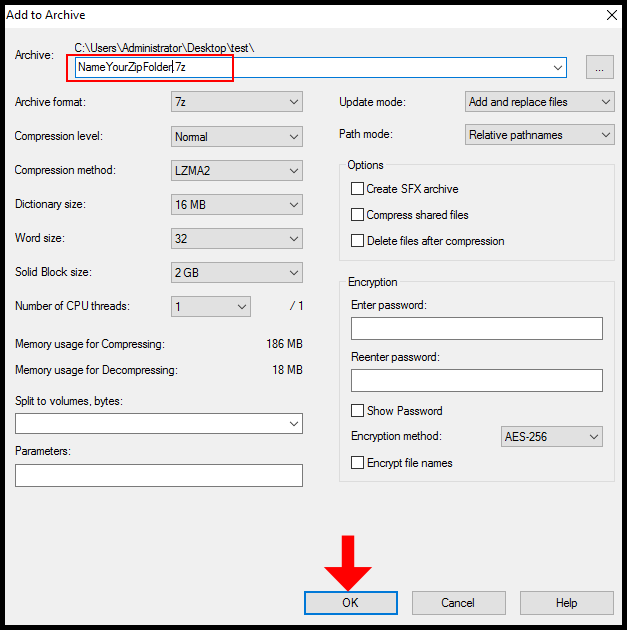
3. On the Add to Archive window, you can name your zipped folder in the highlighted text field. We will be leaving everything as default. Click OK to create the zipped folder.
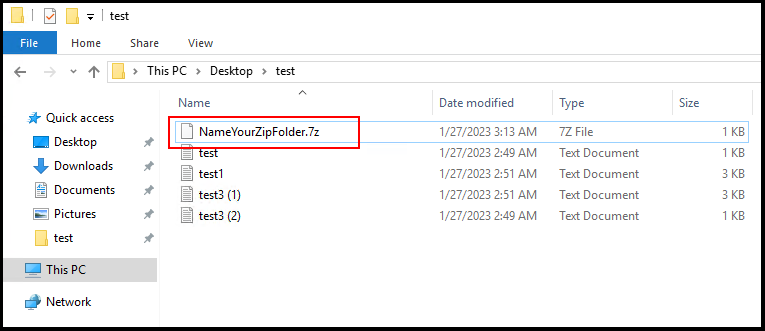
4. Congratulations, you have created the Zip Archive using 7-Zip.
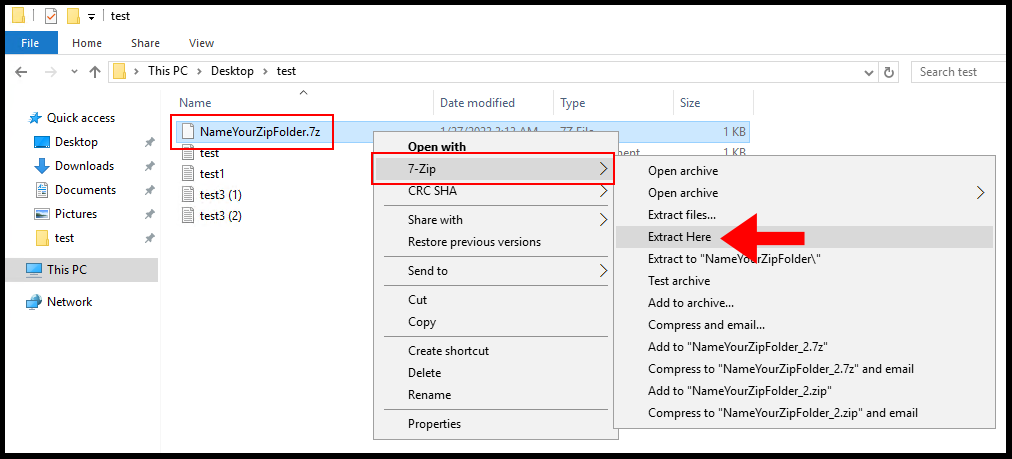
5. To unzip the folder, right-click it and hover over 7-Zip, and then click Extract Here.
6. The contents of the zipped folder will unzip to the location of the zipped folder. We have successfully zipped and unzipped a folder using 7-Zip.
Method 3 – By Using WinRAR
In this section, we will go over how to compress (zip) files by using WinRAR.
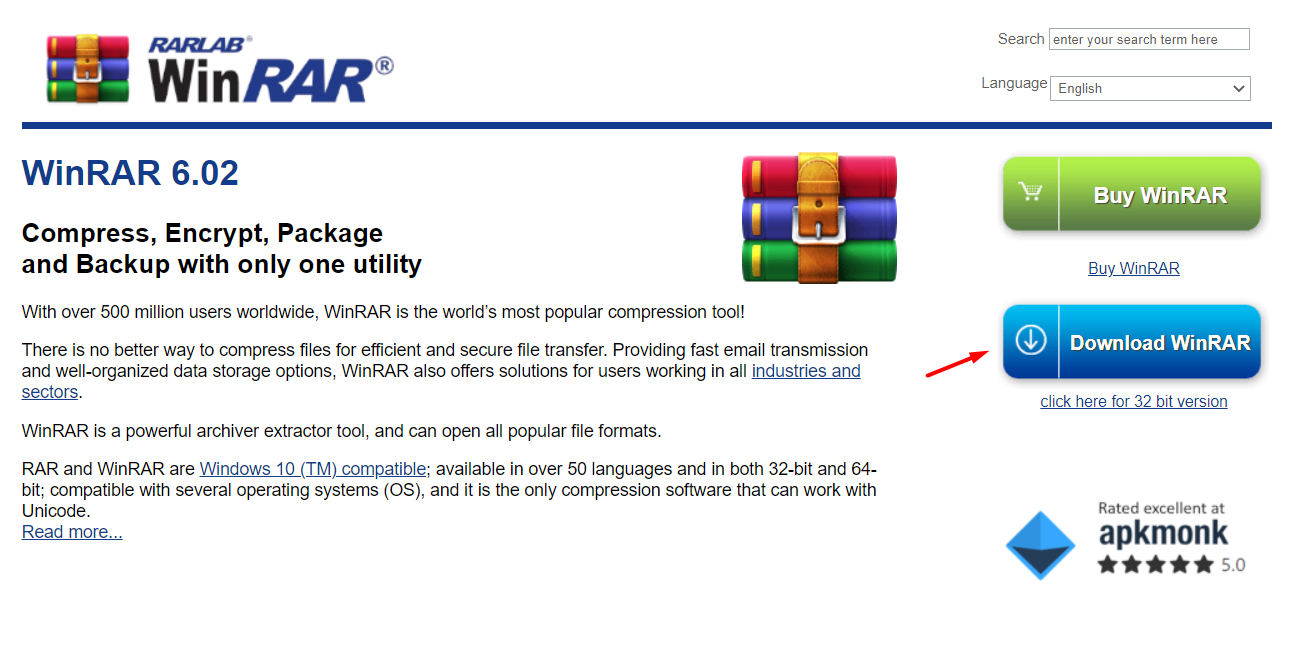
1. To start off, log in to your Windows Server and download and install WinRAR from https://www.win-rar.com/postdownload.html?&L=0.
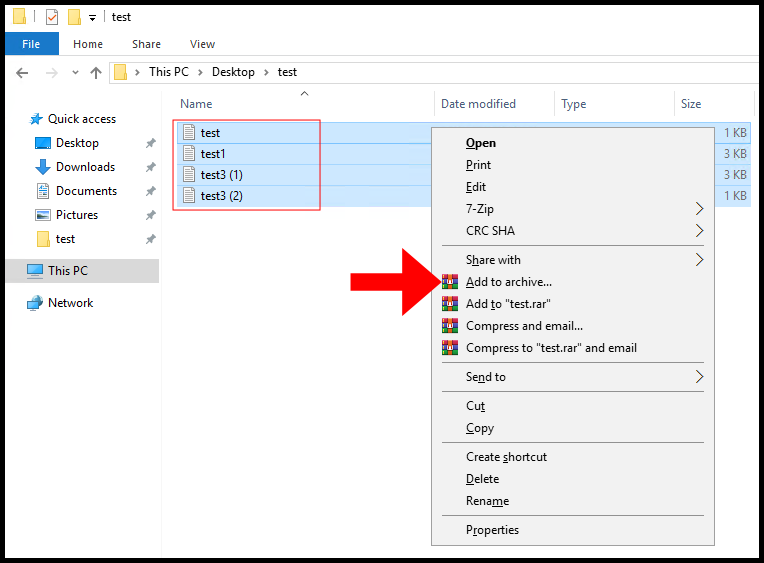
2. Next, navigate to the files you want to zip. Then highlight the files and right-click them and click Add to archive.
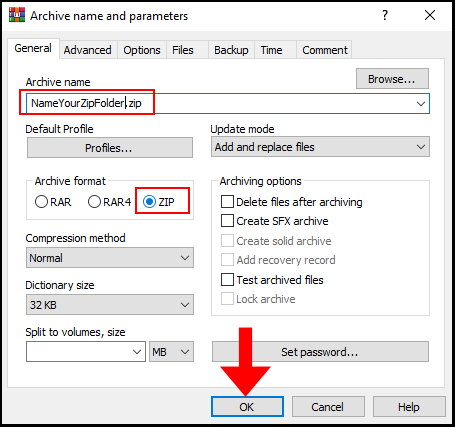
3. In the Archive name and parameters you can name the zipped folder under the Archive name section and under the Archive format section check the button next to ZIP. Then, click OK to finish.
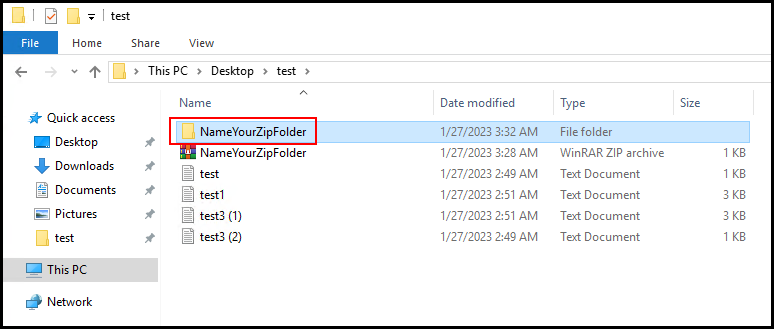
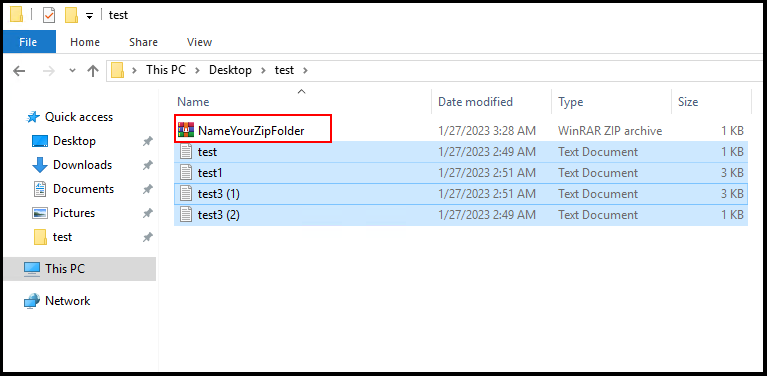
3. Congratulations, you have created the Zip Archive using WinRAR.
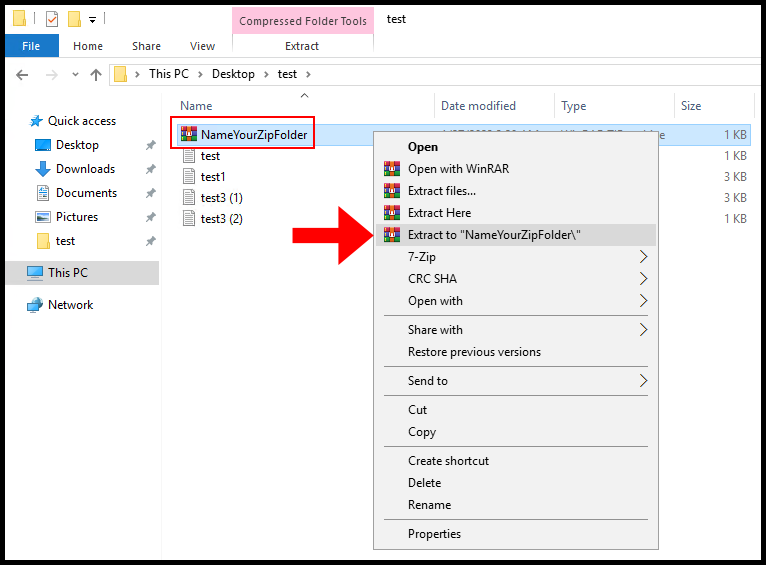
4. To unzip your zipped folder, right-click the zipped folder and click Extract to “NameYourZipFolder”.
5. Your unzipped folder will now appear with the contents of the zipped folder. We have successfully zipped and unzipped a folder using WinRAR.