Redirection is the best solution for remote desktop services, which helps you use the locally connected specific devices/services on a remote desktop server. In the same way, you can configure the remote desktop webcam redirection to use locally available webcam devices on remote Windows servers. Learn, How to configure Remote Desktop Webcam Redirection?
Regular Webcam Redirection
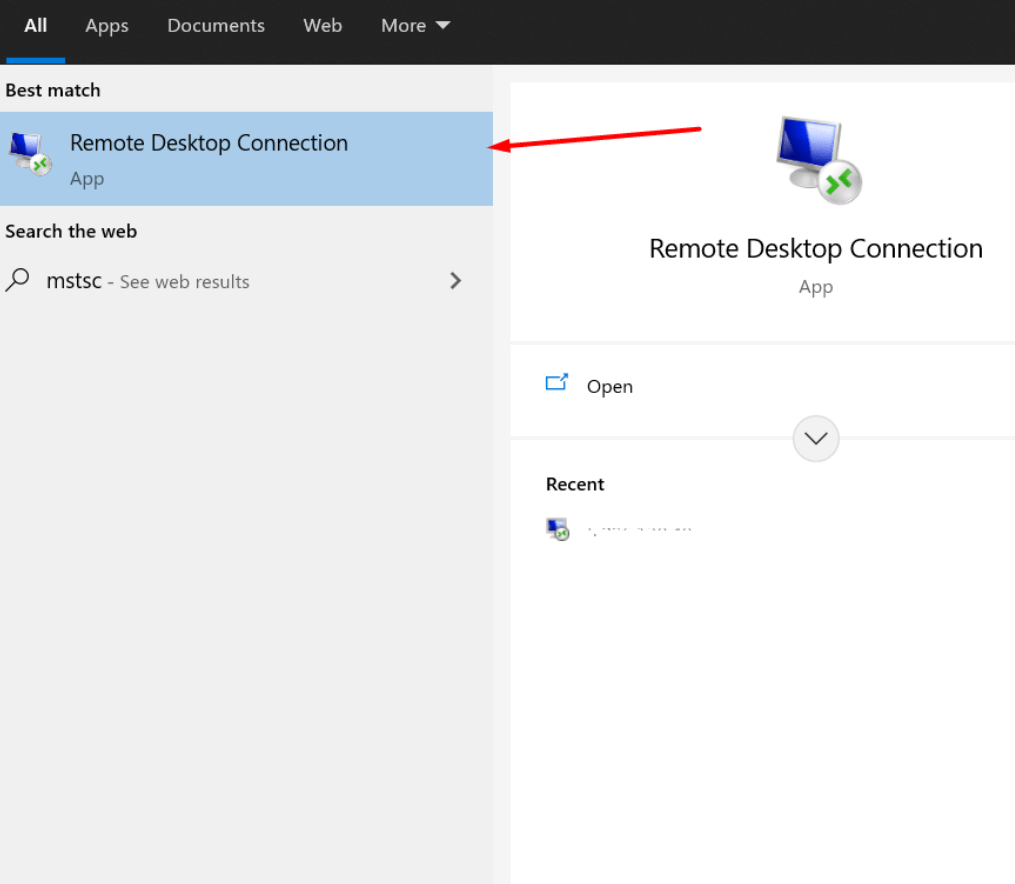
1. Get started by searching “Remote Desktop Connection” or “mstsc” in the search box in your local computer.
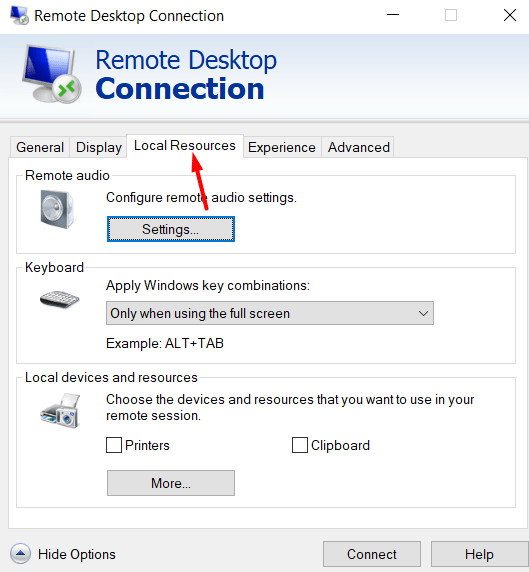
2. Click on “Show Options” → “Local Resources“.
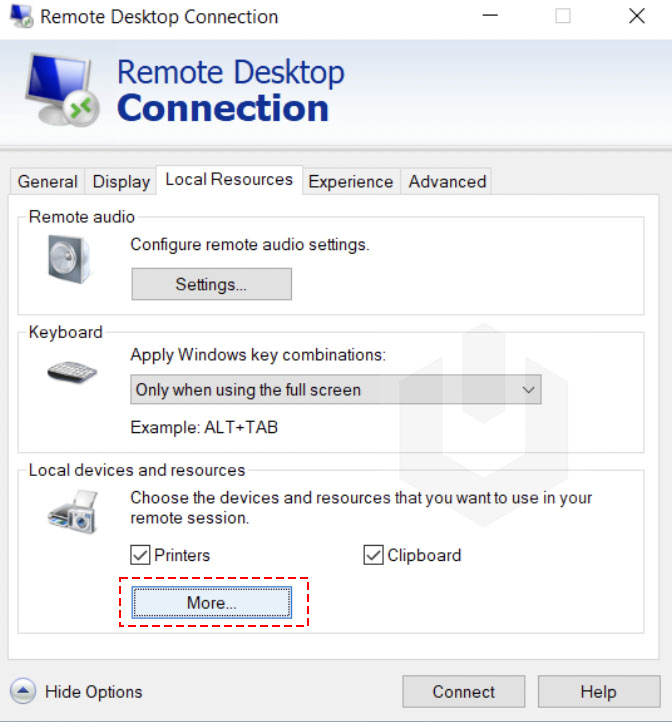
3. Now, click on More.
4. Select the Video capture devices → Click on OK.
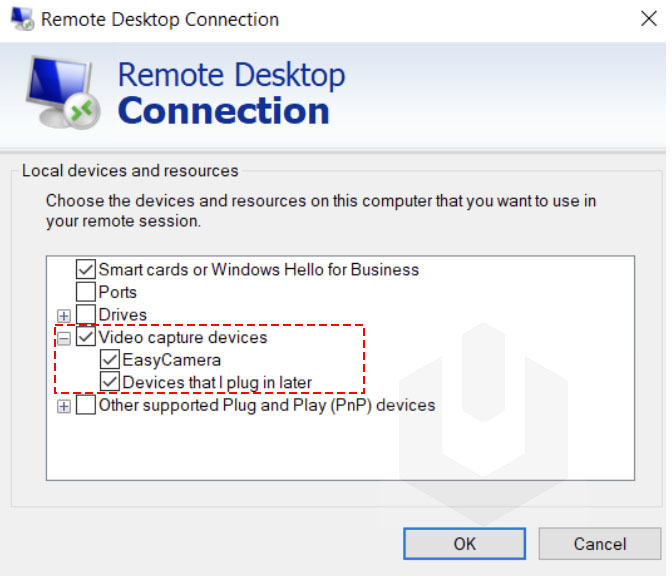
Finally, you can enter the server credentials and continue with the RDP connection.
5. Login to your server and open Server Manager
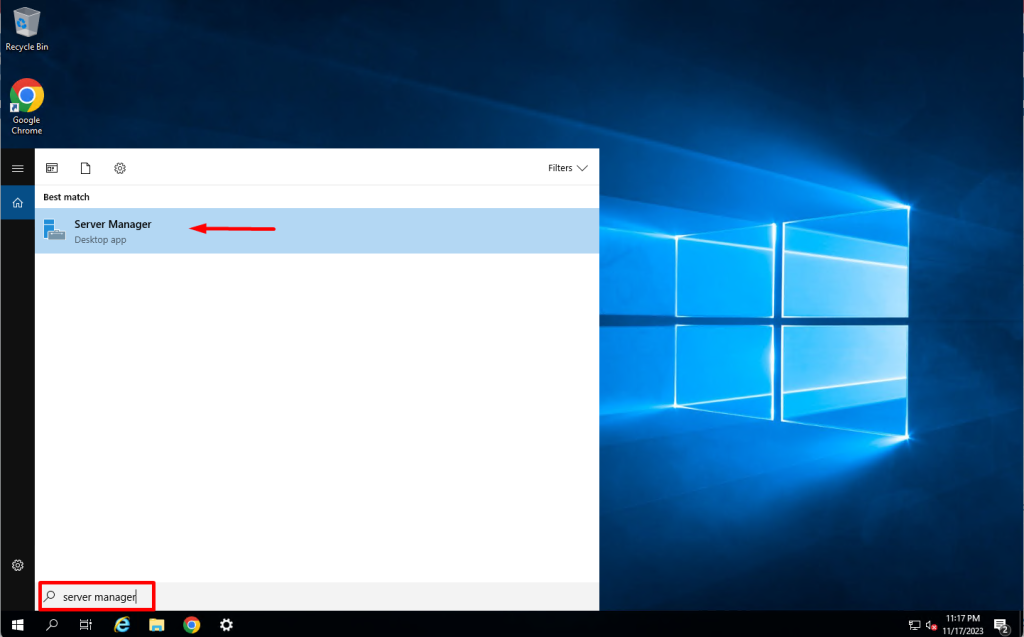
6. Follow the following steps
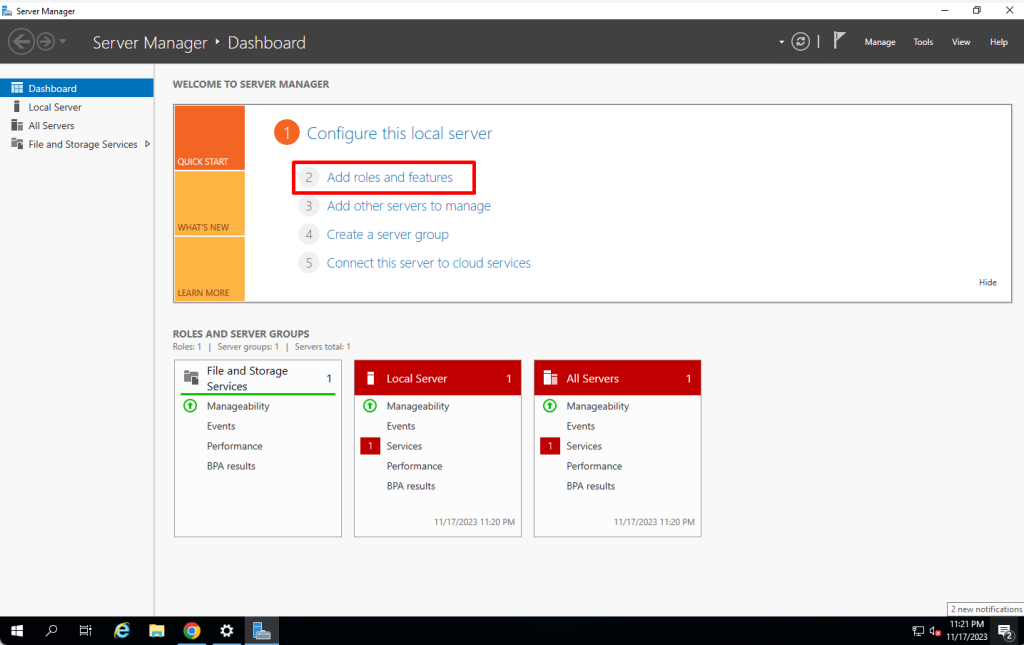
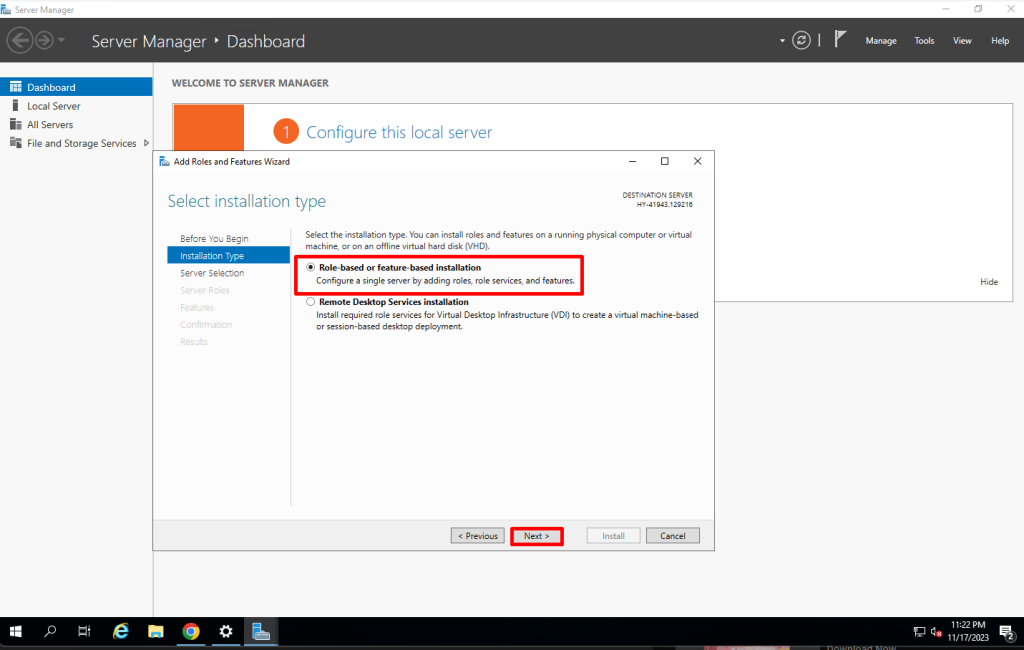
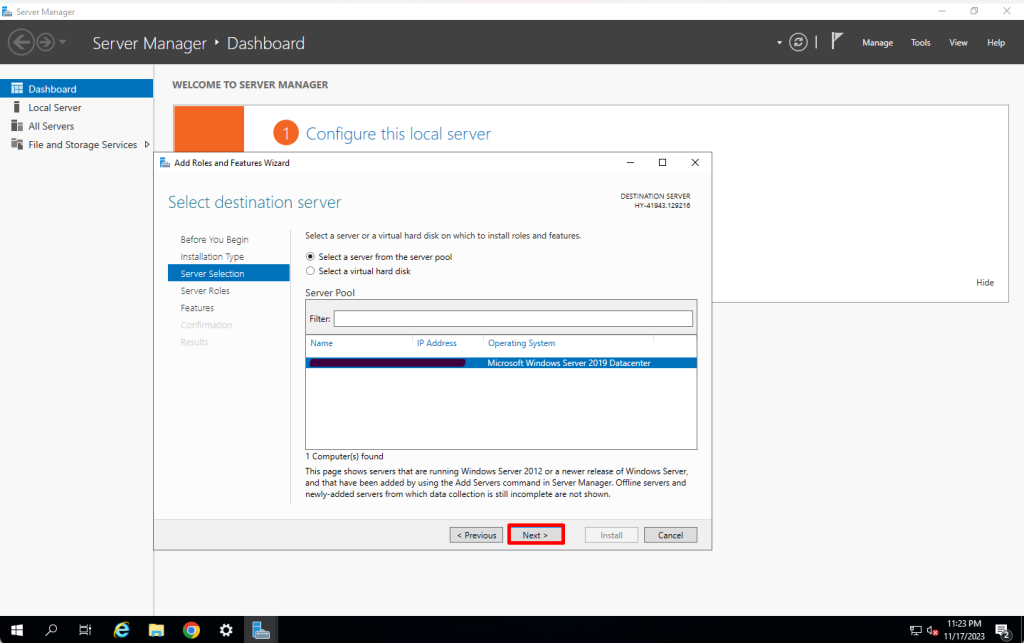
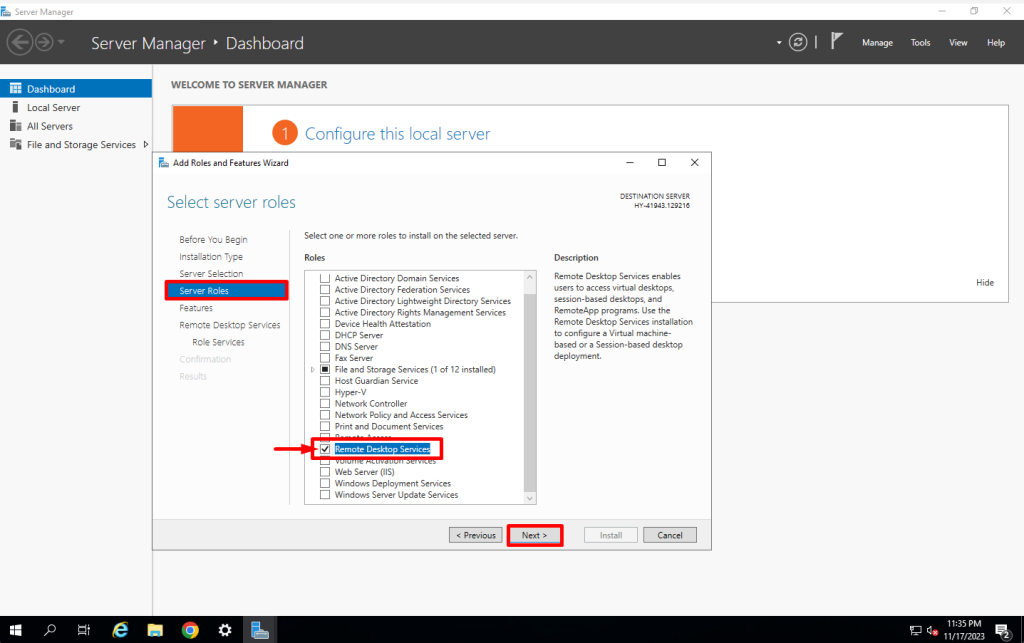
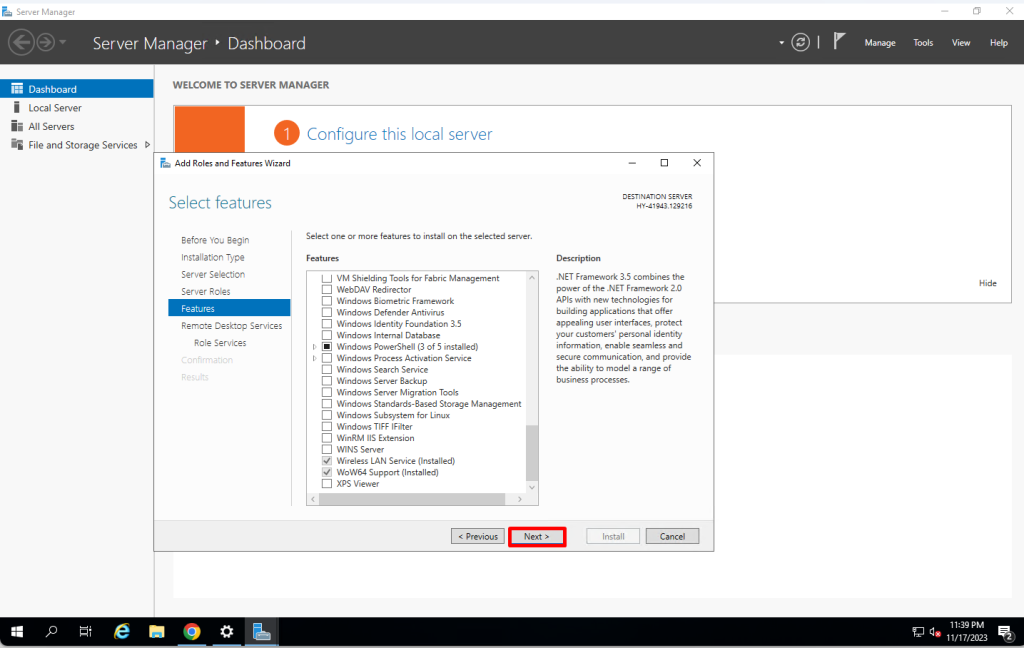
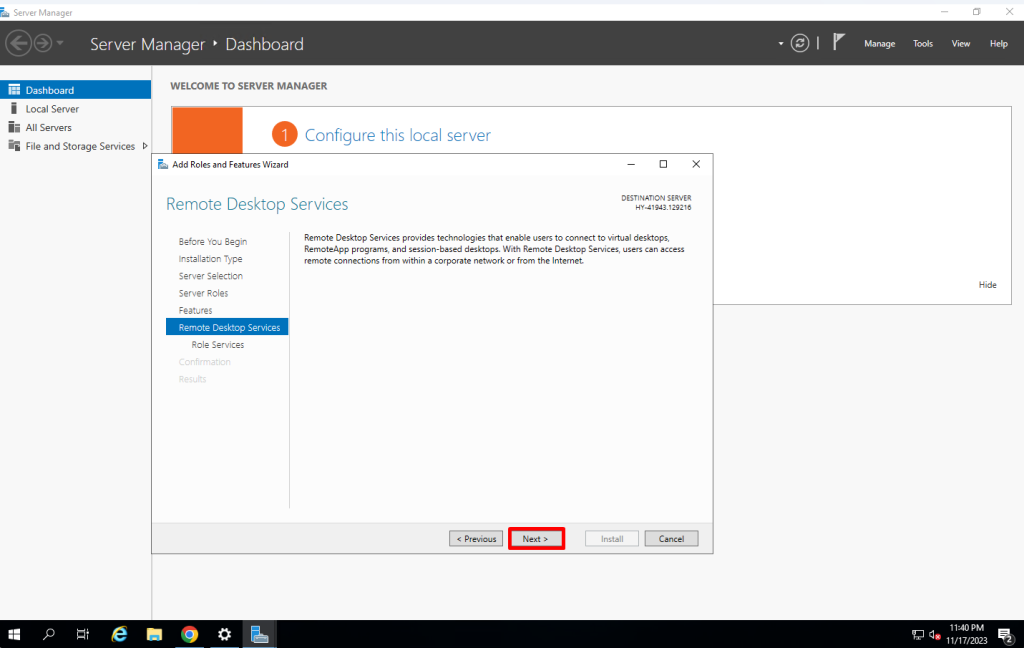
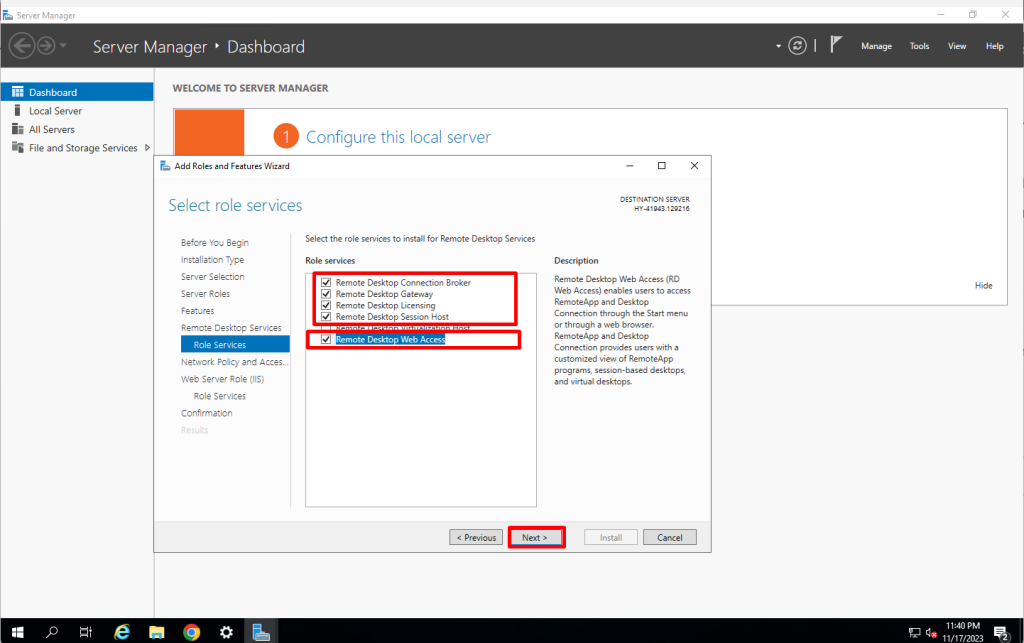
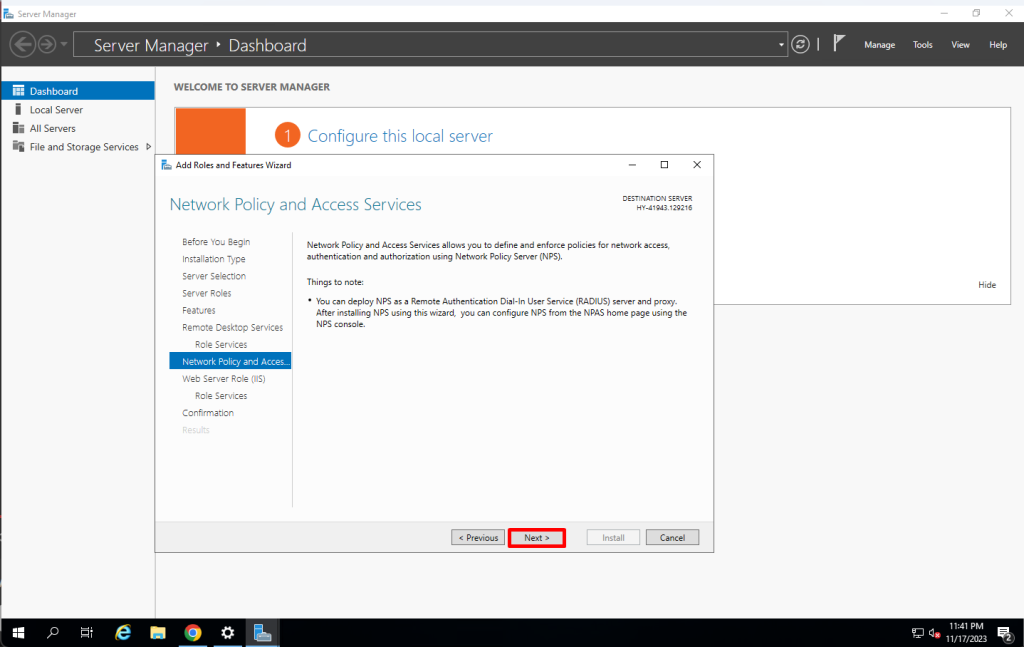
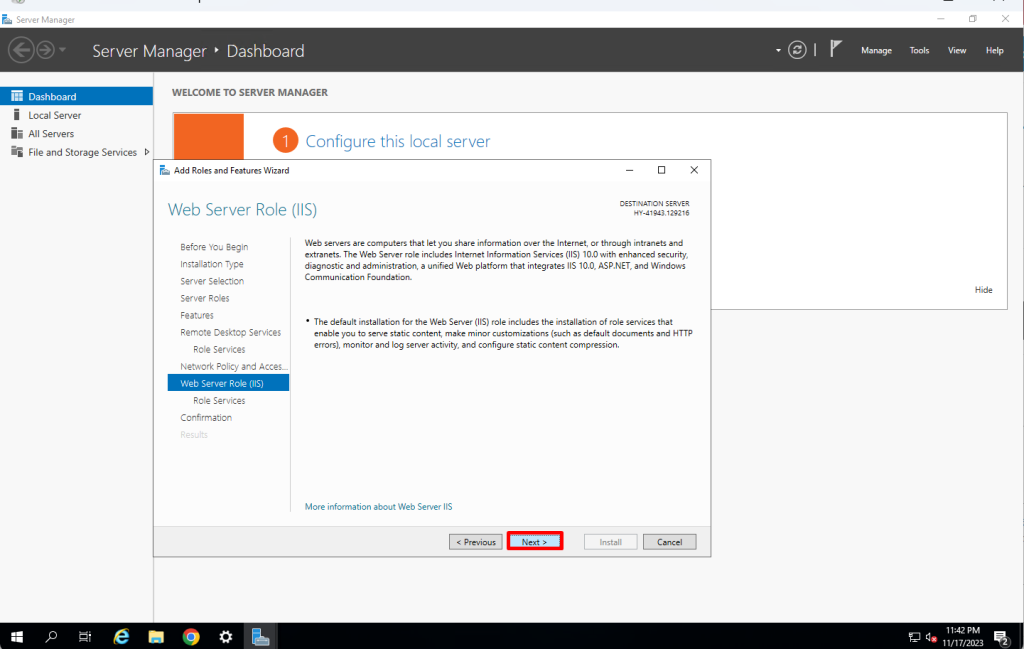
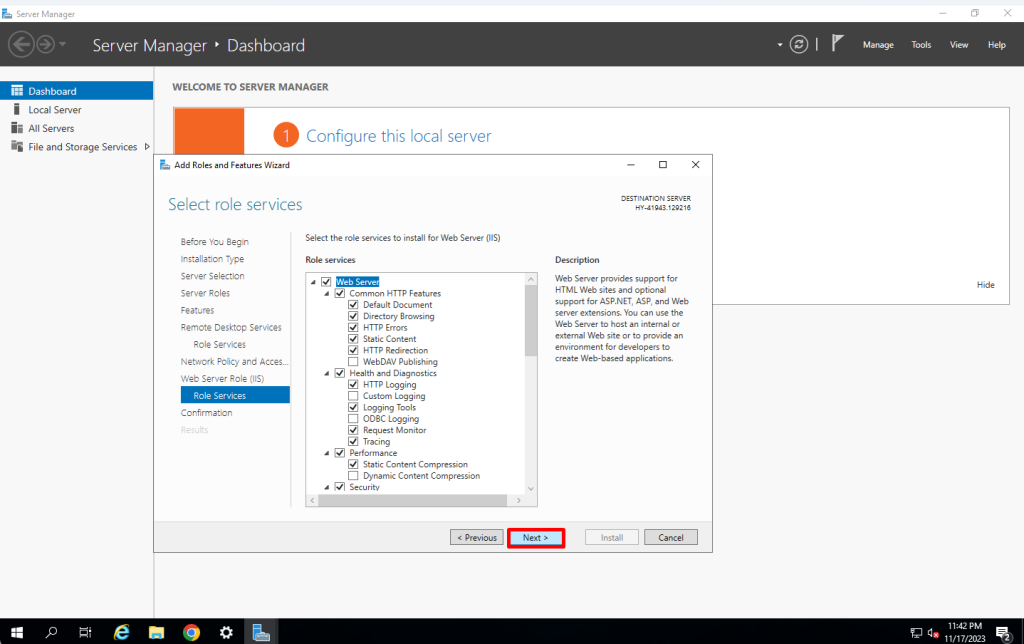
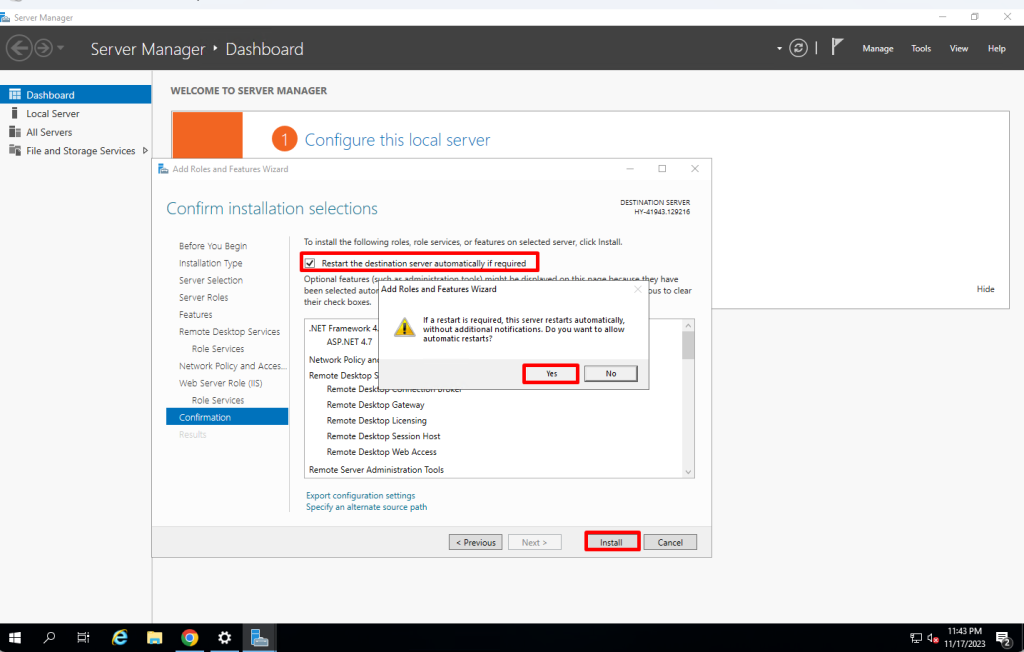
After installing and restarting, please re-login to your server and follow the following steps
RemoteFX USB Webcam Redirection
Generally, USB-connected Webcams don’t run as smoothly as expected on a remote desktop machine. Better solve the reliability issue of USB Webcam problems, we can enable the RemoteFX on the local system to redirect RemoteFX USB Webcam on the remote desktop server.
Allow RemoteFX USB Redirection
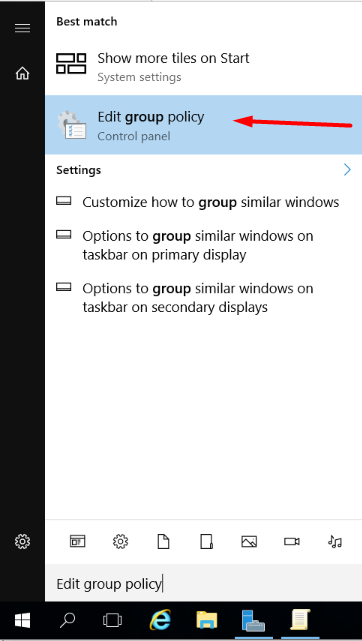
1. Login to Windows Server → Search and Open “Edit Group Policy“.
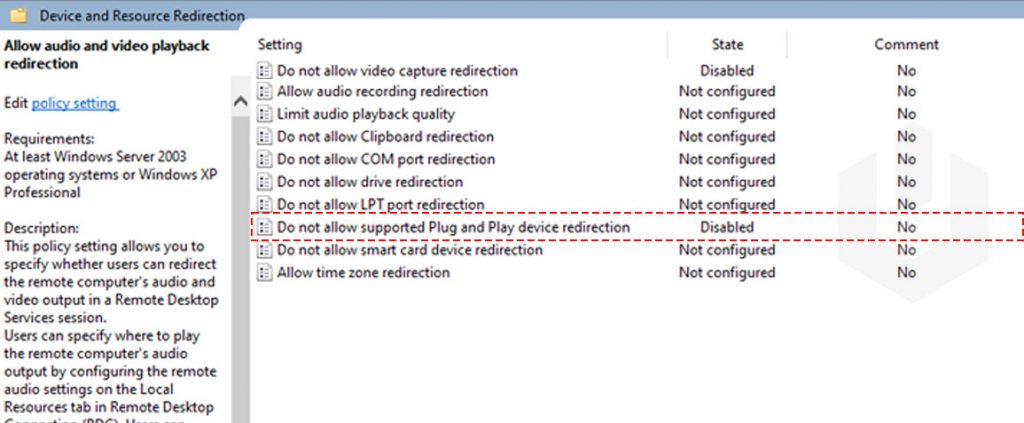
2. Navigate to Computer Configuration → Administrative Templates → Windows Components → Remote Desktop Services → Remote Desktop Session Host → Device and Resource Redirection → Disable the “Do Not Allow Supported Plug And Play Device Redirection”.
3. Navigate to Computer Configuration → Administrative Templates → Windows Components → Remote Desktop Services → Remote Desktop Session Host → Remote Session Environment → RemoteFX for Windows Server 2008 R2 → Enable “Configure RemoteFX”.

Make sure to Disable, Computer Configuration → Administrative Templates → Windows Components → Remote Desktop Services → Remote Desktop Connection Client → “Allow RDP Redirection Of Other Supported RemoteFX USB Devices From This Computer“.

Enable RemoteFX USB Redirection
1. Login to Local Windows System (Client) → Search and Open “Edit Group Policy“.

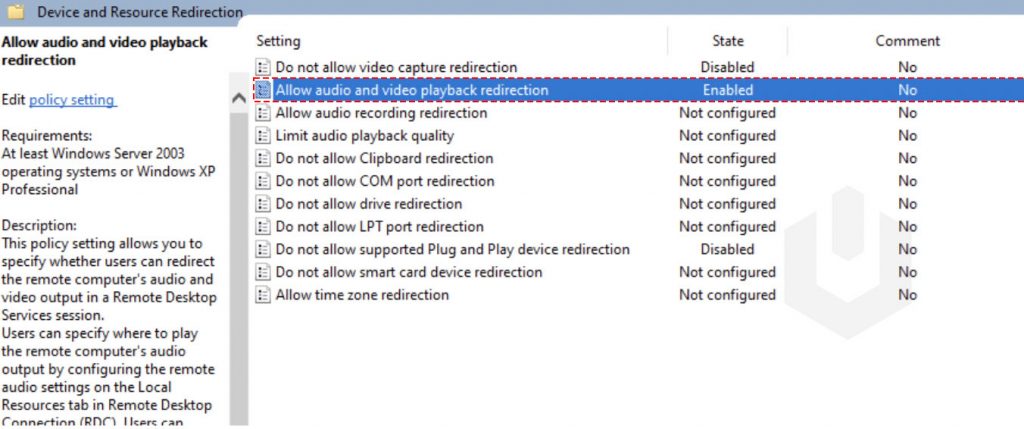
2. Navigate to Computer Configuration → Administrative Templates → Windows Components → Remote Desktop Services → Remote Desktop Session Host → Device and Resource Redirection → Enable the “Allow audio and video playback redirection”.
3. Next, Navigate to Computer Configuration → Administrative Templates → Windows Components → Remote Desktop Services → Remote Desktop Connection Client → Enable “Allow RDP Redirection Of Other Supported RemoteFX USB Devices From This Computer“.

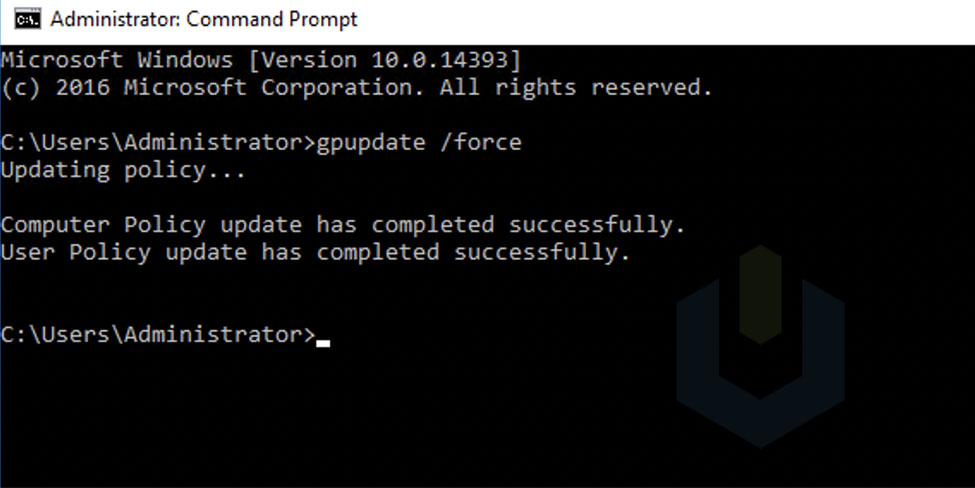
4. Now open CMD (Command Prompt) and run “gpupdate /force“.
1. Next, Get started by searching “Remote Desktop Connection” or “mstsc” in the search box.

2. Click on “Show Options” → “Local Resources“.

3. Now, click on More.

4. Select all the options available under Local devices and resources,
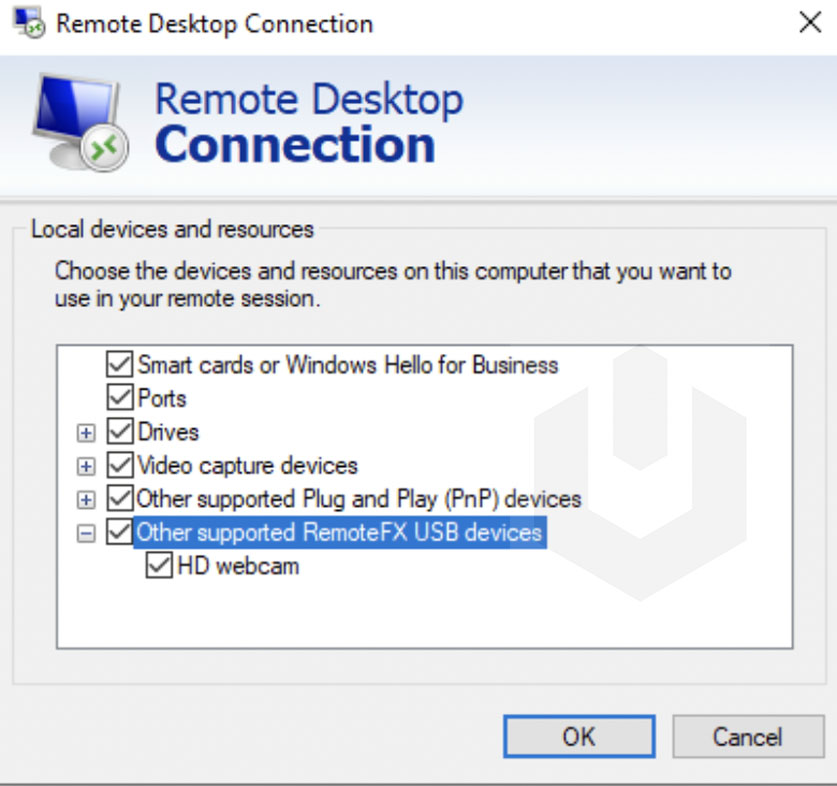
Finally, you can enter the server credentials and continue with the RDP connection.
Verifying Privacy Settings
Still, if you can’t access the webcam on the Remote Desktop, that might be because of the privacy settings on the windows system. Follow the below steps to verify the privacy settings on the windows system,
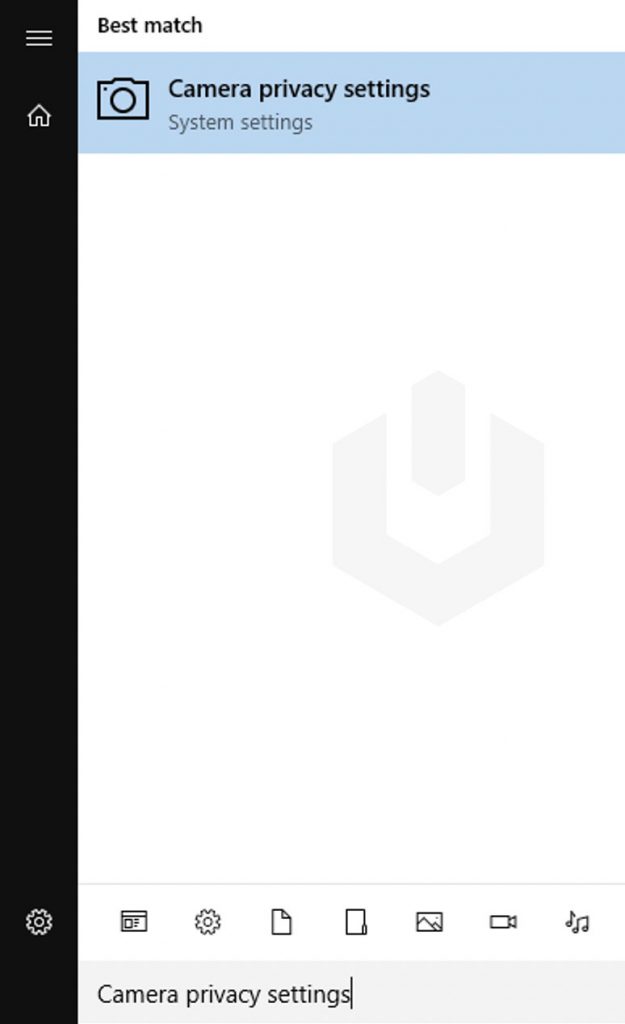
1. Search and open Camera privacy settings.
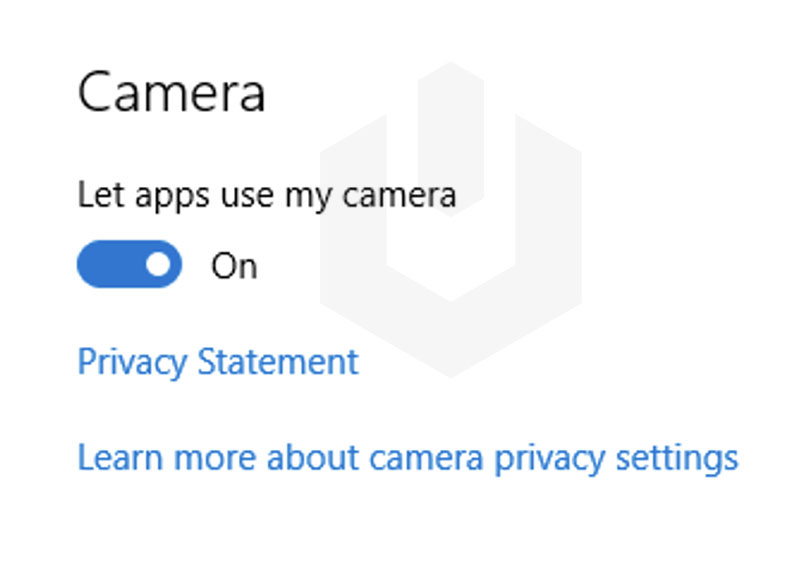
2. Enable the option/toggle Allow apps to access your camera / Let apps use my camera.
Conclusion
In the article, we went through how to configure Remote Desktop webcam redirection. We have covered the regular HD webcam method and saw RemoteFX USB webcam redirection. Using any mentioned method, you can use the webcam on the remote desktop machine.
Hyonix was founded in early 2018, as we believed the current pricing of Windows VPS was far too overpriced for most consumers. This makes it nonuser and budget-friendly for many people around the world. Our main goal is to change that – providing powerful licensed Windows VPS at a reasonable price so that everyone can grab one without thinking twice about the performance/price that you will get. Get yourself fully optimized Windows VPS starting @ $6.5/mo from Hyonix.com.
