A DHCP scope is a range of IP addresses that a DHCP server can assign to clients. Once you’ve installed the DHCP role on your Windows Server, the next step is to configure your DHCP scopes. This guide will provide simple instructions on how to do this.
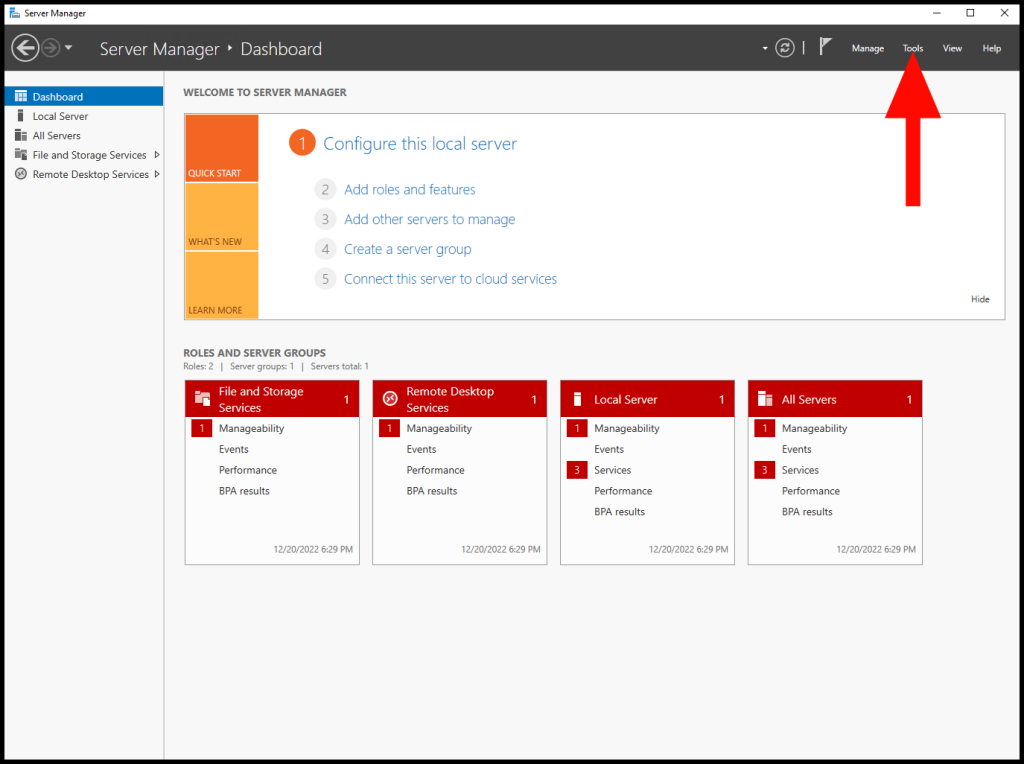
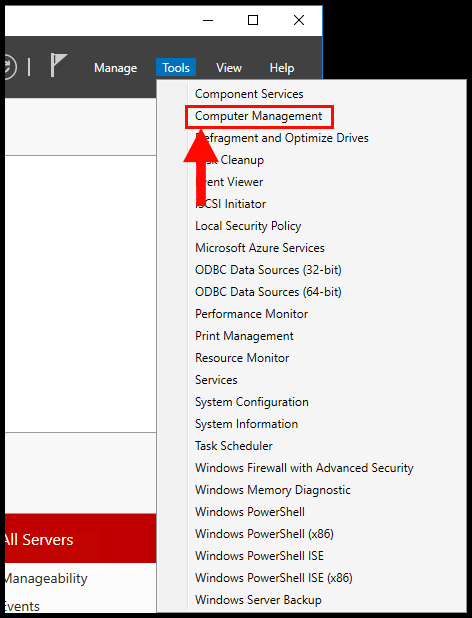
1. First, you need to open the DHCP Manager. You can do this by clicking on the Start Menu, typing Server Manager into the search box, and clicking on Tools then clicking on Computer Management.
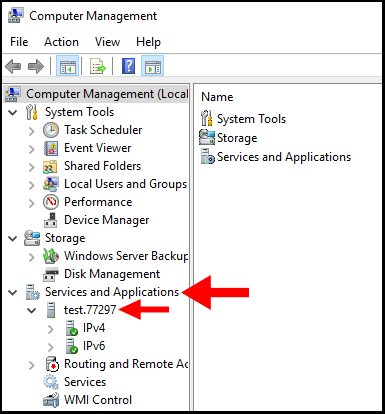
2. On the left panel of the Computer Management window, you have many options. Click on the drop-down arrow next to Services and Applications. Then you will see your server, proceed to click the drop-down arrow next to it.
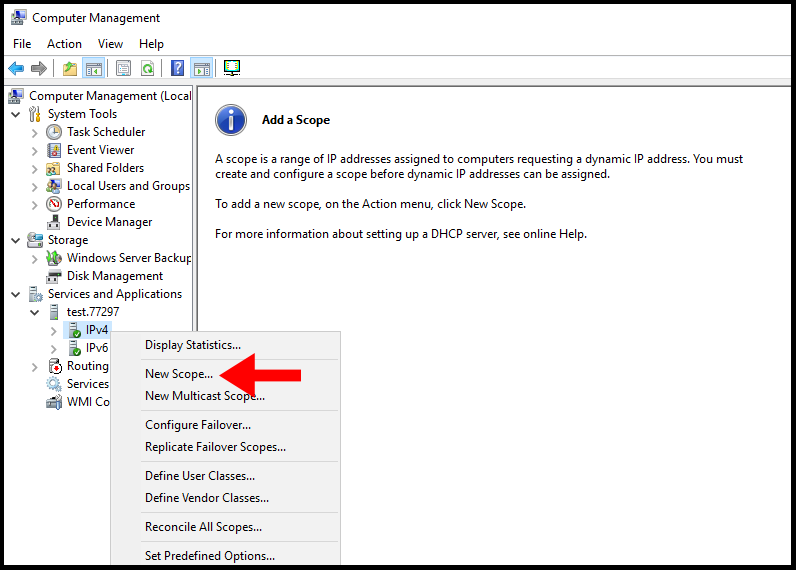
3. Right-click on IPv4 and then click on New Scope… from the drop-down menu. This will open the New Scope Wizard to guide you through the process.
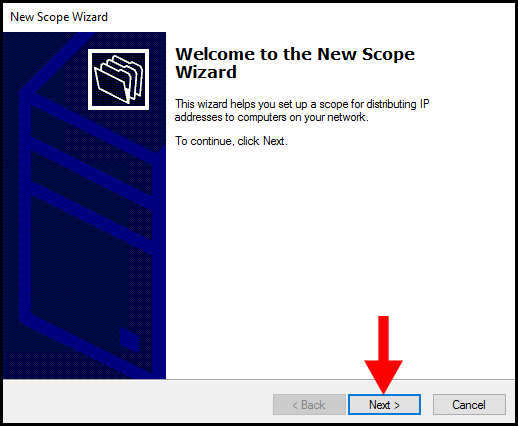
4. Once the New Scope Wizard opens, click Next on the welcome page.
5. On the next page, you’ll be asked to give your new scope a name and an optional description. Choose a name that easily identifies the scope, then click Next.

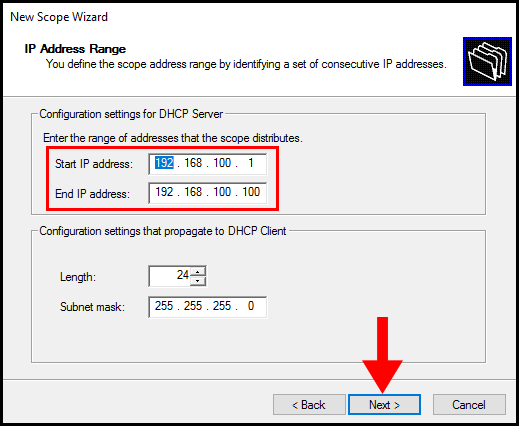
6. Here, you’ll need to enter the range of IP addresses you want the DHCP server to assign. You’ll need to input the Start IP address, End IP address, and Subnet mask. After filling out these fields, click Next.
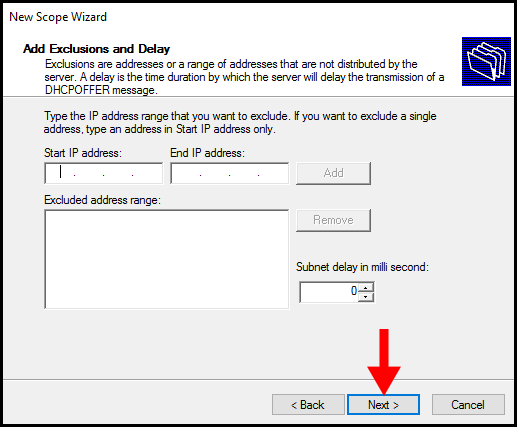
7. If there are any IP addresses in the range you specified that you don’t want the DHCP server to assign, you can exclude them here. You can also set a delay for the DHCP server. Once you’ve done this, click Next.
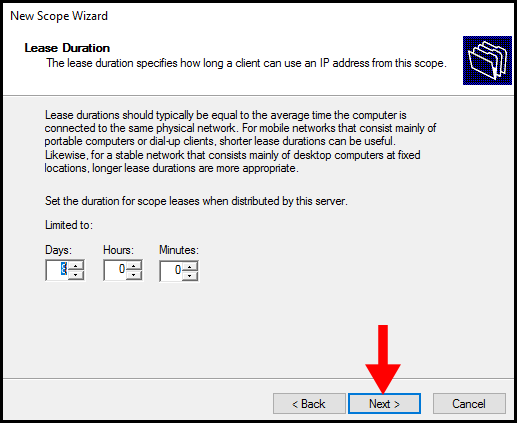
8. On the Lease Duration page, you can set how long a client can use an IP address before it’s returned to the pool. The default setting is 8 days, but you can change this according to your needs. Click Next when you’re ready.
9. The next few pages will ask you to configure DHCP options like default gateway, DNS server, and WINS server. If you’re not sure what to input here, you can just click Next to accept the default options. For the purposes of this guide, we will skip these steps and leave them as default.
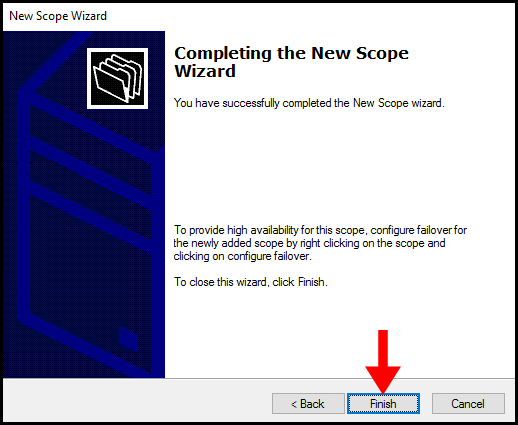
10. Finally, review the summary of your new scope. If everything is correct, click Finish to complete the wizard.
Congratulations! You have successfully configured a DHCP scope on your Windows Server. You can now assign IP addresses to clients in your network. If you have different networks, you can repeat the process to create more scopes.