DNS Server is a critical service that resolves IP addresses and domains on the internet. Learn how to change your DNS server on Windows. Our guide covers troubleshooting steps for when the pre-configured DNS is not working as expected, and you need to configure custom DNS records on your Windows system.
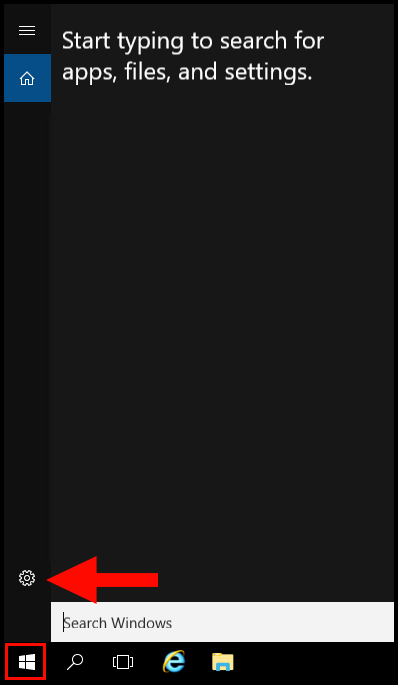
1. To start off, log into your Windows server and open Settings.
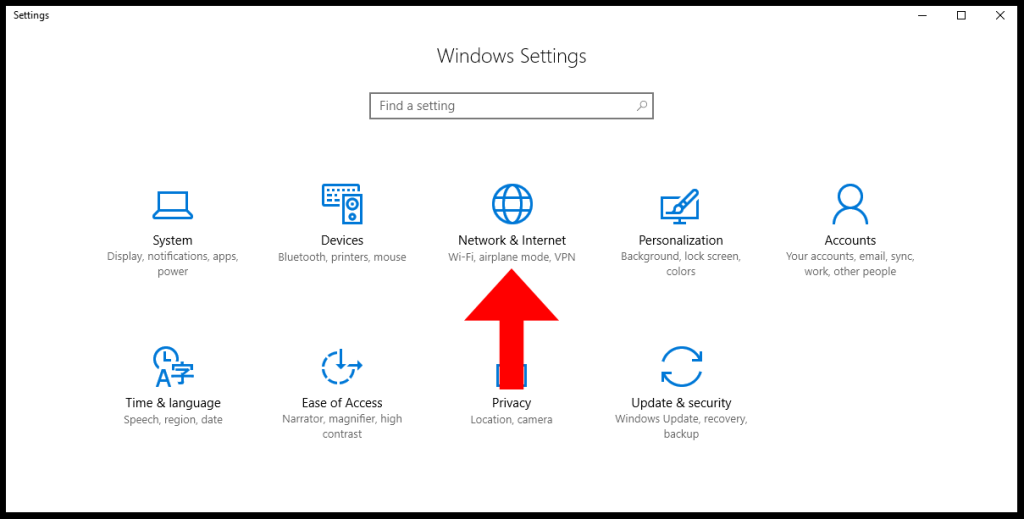
2. Then on the Windows Settings window navigate to Network & Internet.
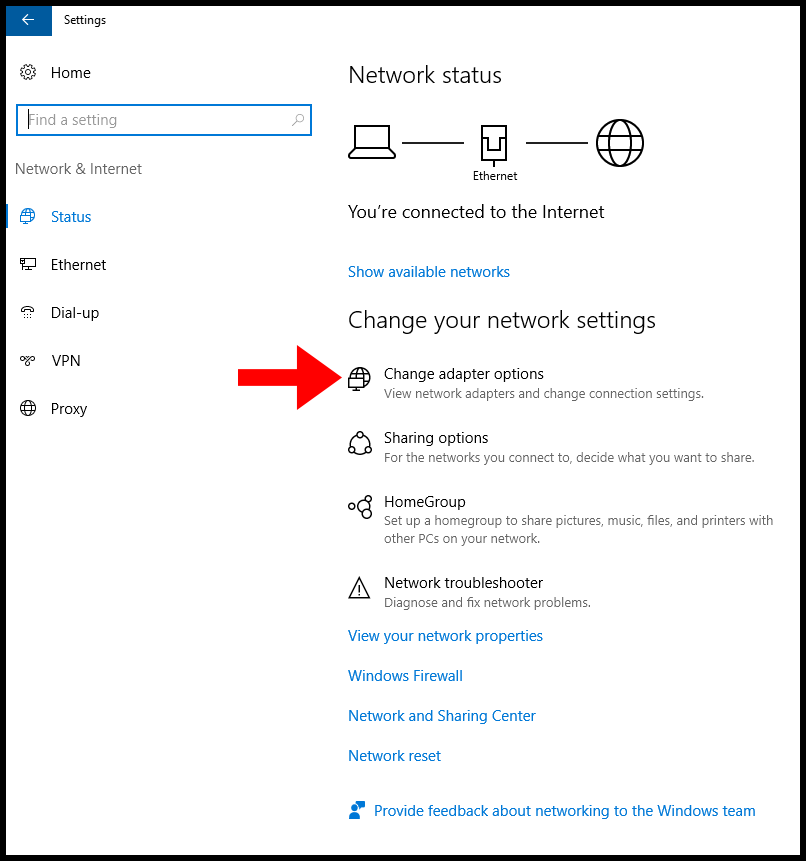
3. Now click on Change Adapter Settings.
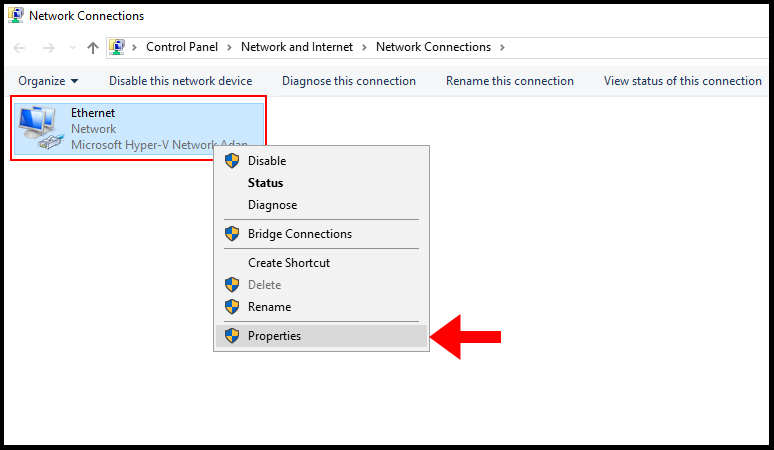
4. Then on the next window, right-click your adapter and click Properties.
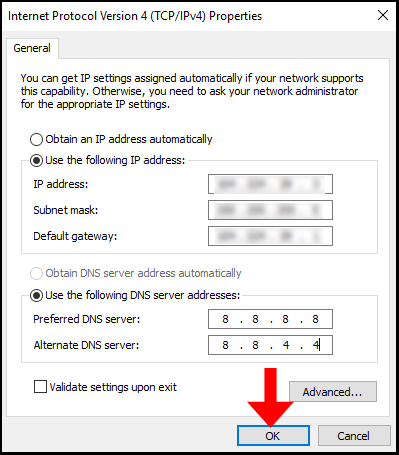
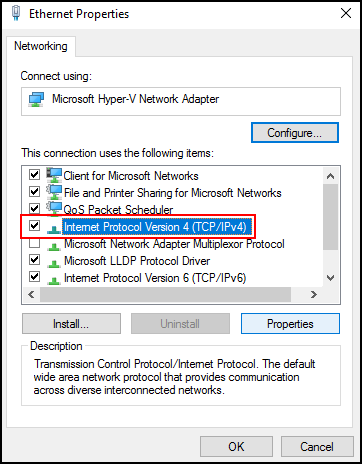
5. To change IPv4 DNS Server, double-click on Internet Protocol Version 4 (TCP/IPv4). If you want to change IPv6 DNS Server, double-click on Internet Protocol Version 6 (TCP/IPv6). For the purposes of this guide, we will only be changing the DNS for IPv4.
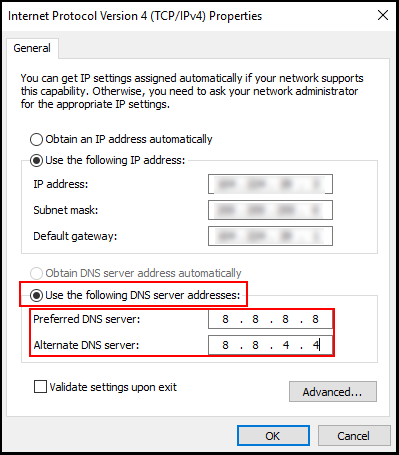
6. Next, click the button by Use the following DNS server addresses and then enter your preferred DNS addresses in the Preferred DNS server and Alternate DNS server text fields. In this guide, we will be using Google’s DNS IP addresses 8.8.8.8 and 8.8.4.4. If you’d like to use a different one you can check out this website for more DNS servers.
7. Then, to save the changes you’ve made click OK. Congratulations we have now successfully learned how to change your DNS server on Windows.