Auto-deployed Windows servers most likely come with random hostnames configured by the deployment system. If you’d like to change it, then you’ll need to change it manually. Learn how to change Windows Hostname for Windows Server 2019, 2016, and 2012 with our comprehensive guide in this article.
Windows Server 2019
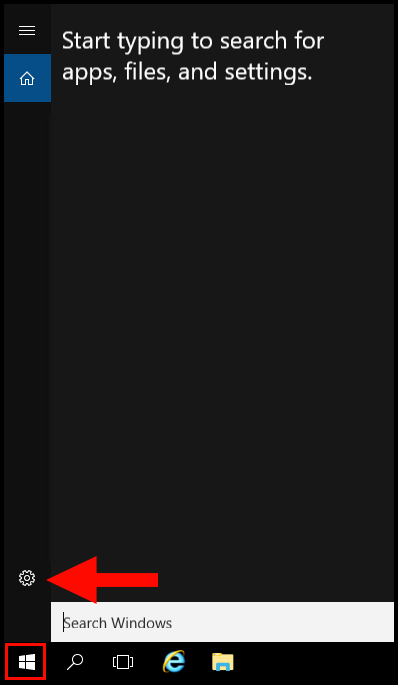
1. To start, log in to your Windows server 2019 and open Windows Settings.
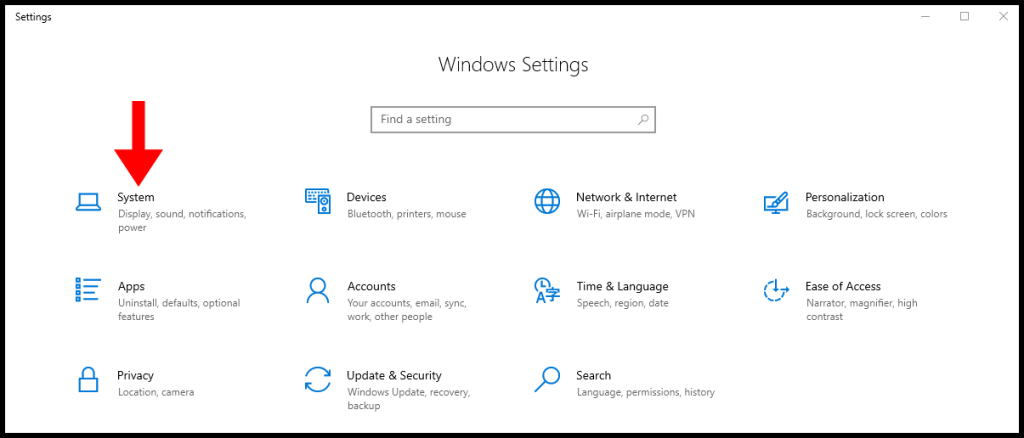
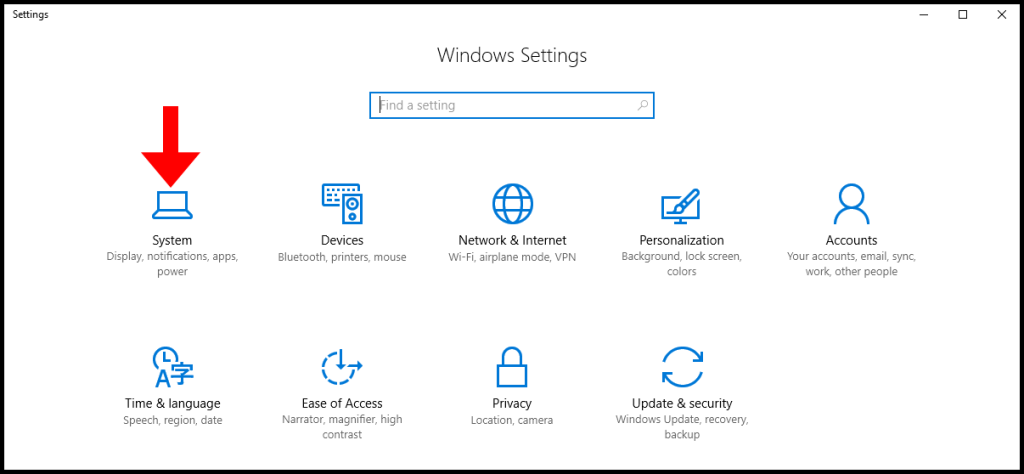
2. Then on the Windows Settings page, click on System.
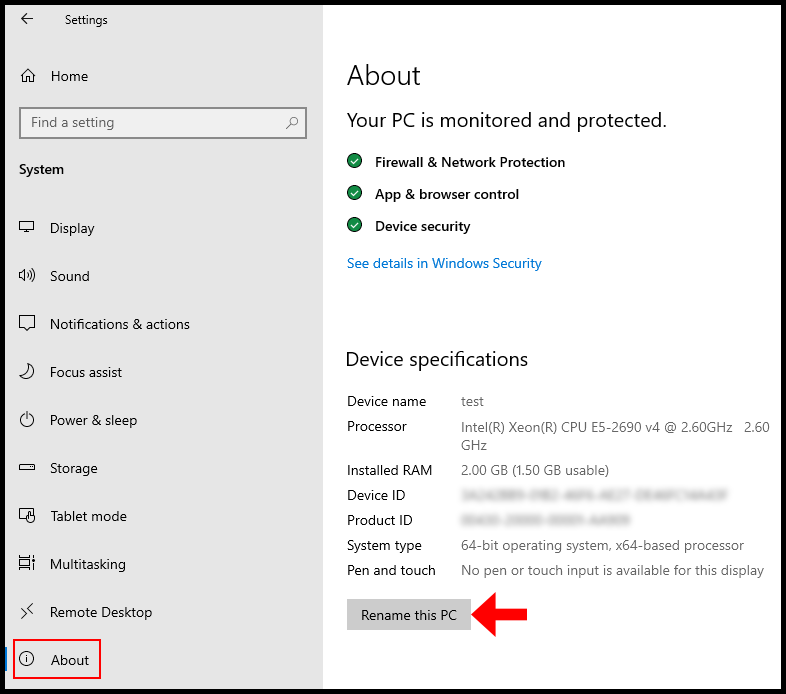
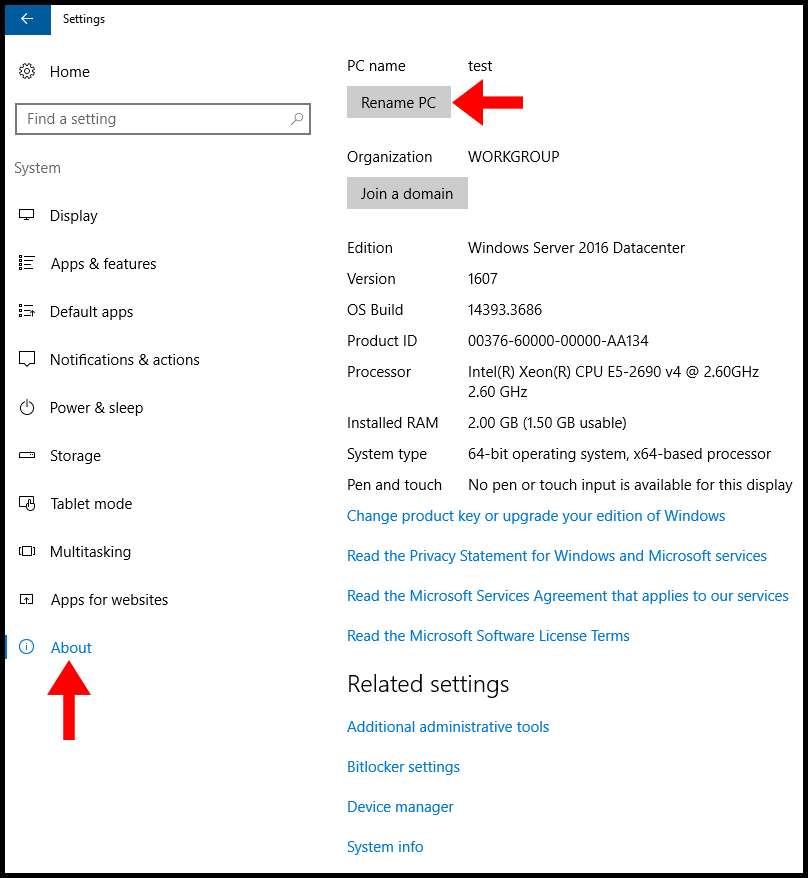
3. Then on the System page, navigate to the About tab on the left menu and click Rename this PC.
4. Then in the pop-up, enter the new PC name in the text field and then click Next.
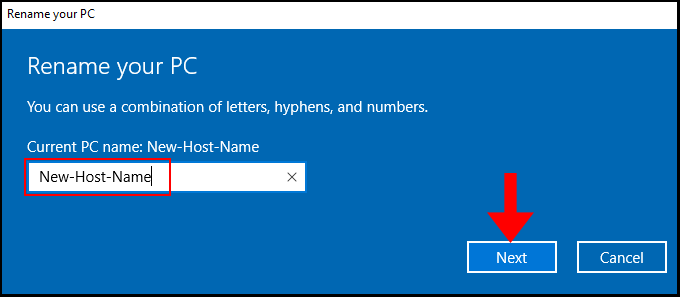
5. To save the changes, click Restart now on the next screen. We have successfully changed the Hostname on Windows Server 2019.

Windows Server 2016
1. To start, log in to your Windows server 2016 and open Windows Settings.

2. Then on the Windows Settings page, click System.
3. Next, navigate to the About tab from the left menu and click Rename PC.
4. Then in the pop-up, enter the new PC name in the text field and then click Next.

5. To save the changes, click Restart now on the next screen. We have successfully changed the Hostname on Windows Server 2016.

Windows Server 2012 R2
1. To start, log in to your Windows server 2012 and open Windows Settings.
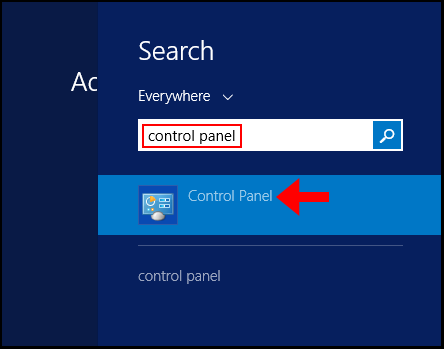
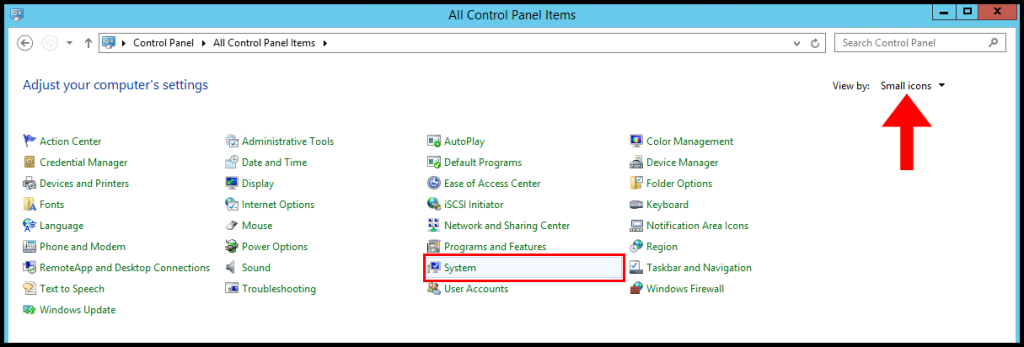
2. Then change the View by option to Small icons and then click System as seen below.
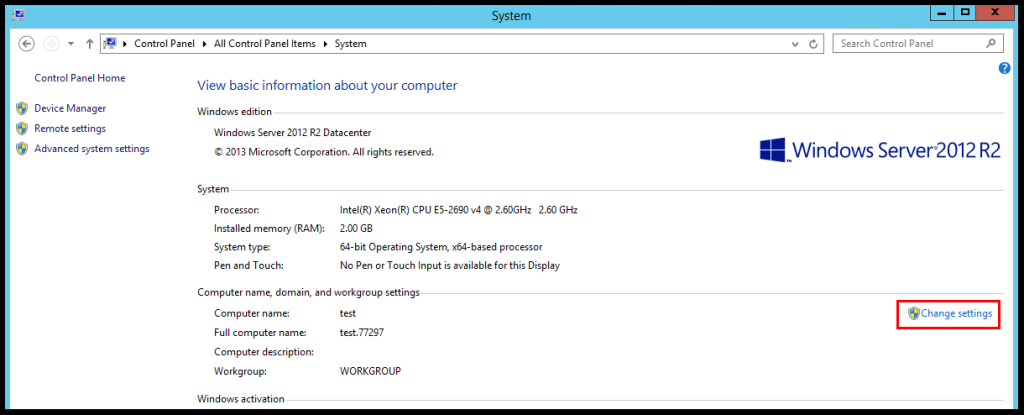
3. Next on the System page, click Change settings as seen in the image below.
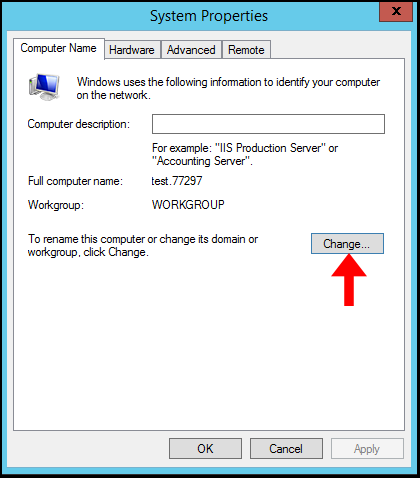
4. Then on the System Properties window, click Change to configure the Hostname.
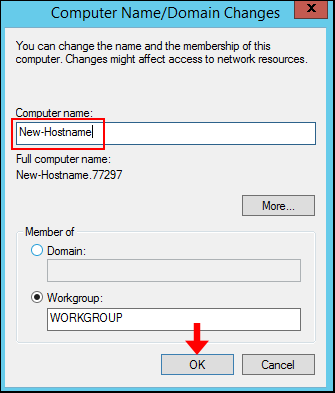
5. Enter the new hostname in the text field under Computer Name and click OK.
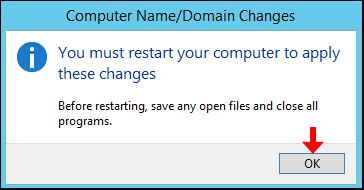
6. A pop-up will appear asking you to restart and then click OK.
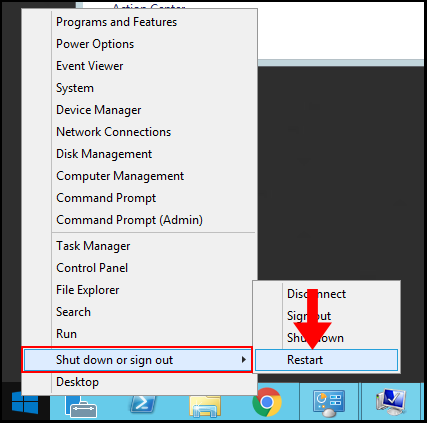
7. Lastly, right-click the Windows button at the bottom left and hover over Shut down or sign out and click Restart to complete the changes. We have successfully changed the Hostname on Windows Server 2012.
