To change language of your Chrome brower, please follow the following steps
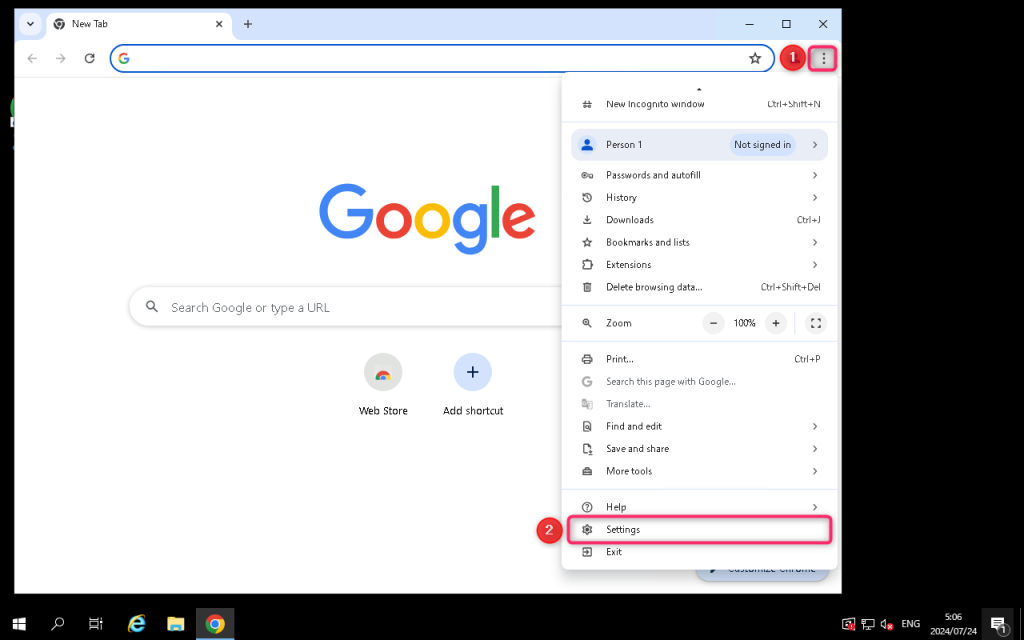
Step 1: Login to your server, then open Chrome browser -> click on 3 dot icon -> click Settings
![](https://howto.hyonix.com/wp-content/uploads/2024/07/image-2-1024x640.png)
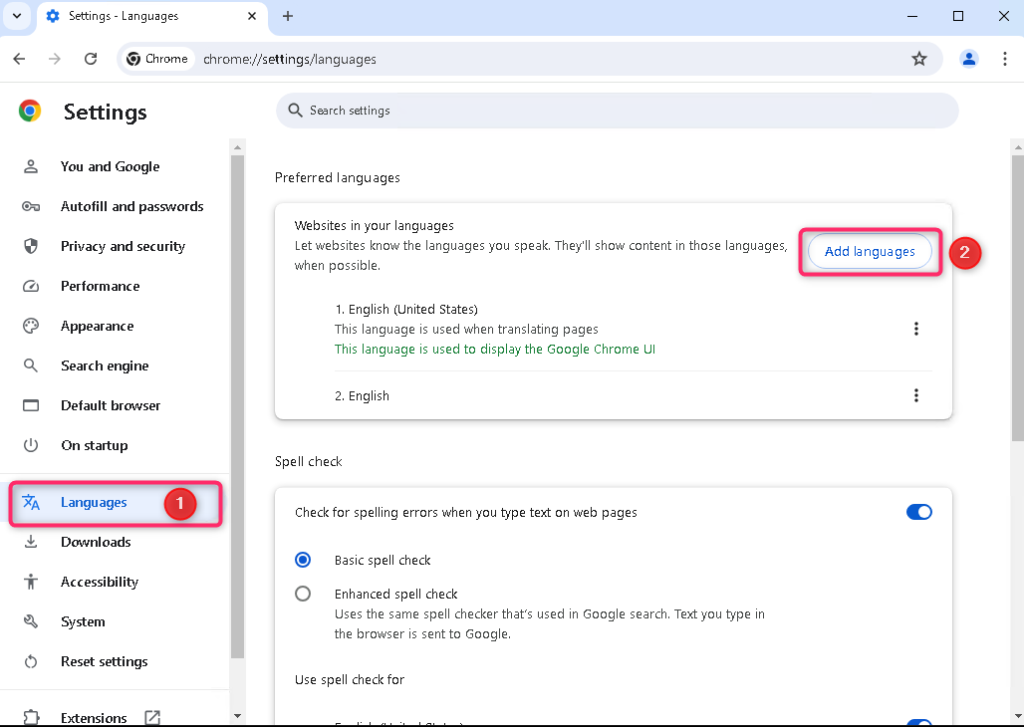
Step 2: Select Languages, then click on Add languages
![](https://howto.hyonix.com/wp-content/uploads/2024/07/image-3-1024x727.png)
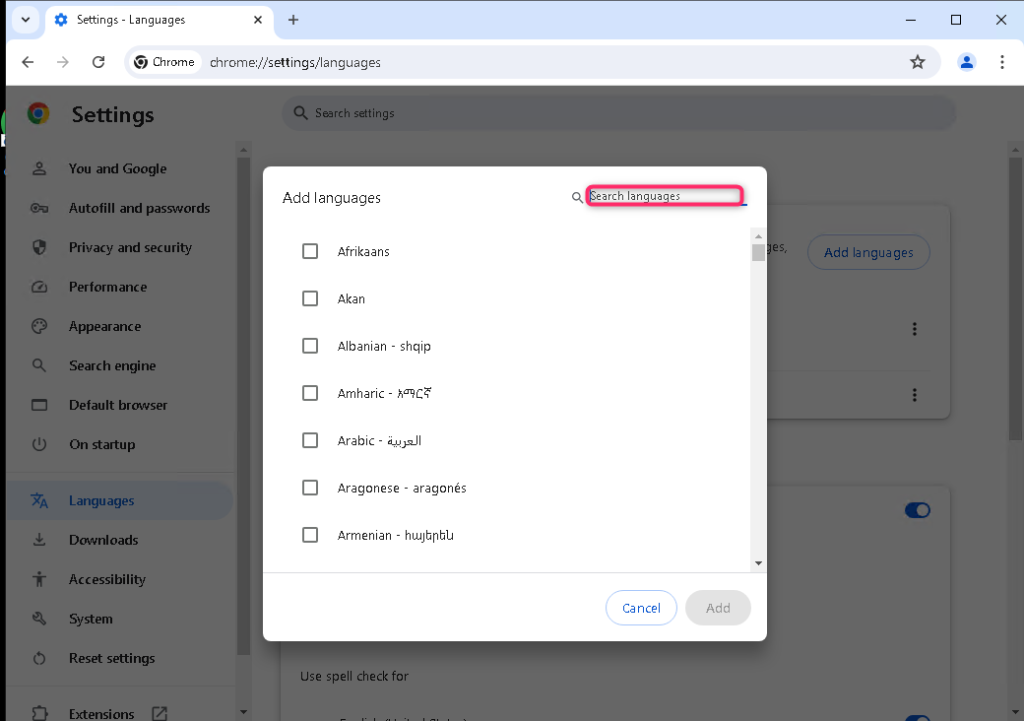
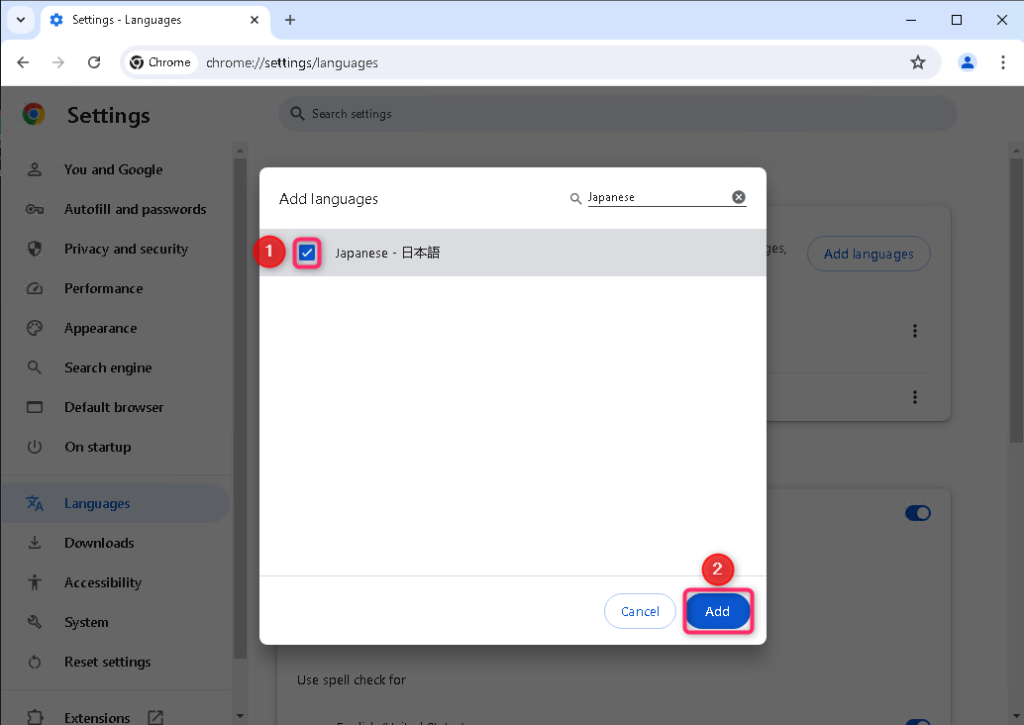
Step 3: Find your preferred language on the search box
![](https://howto.hyonix.com/wp-content/uploads/2024/07/image-4-1024x721.png)
Step 4: For this demonstration, I will choose Japanese. Tick on the language you want to add and click Add
![](https://howto.hyonix.com/wp-content/uploads/2024/07/image-5-1024x725.png)
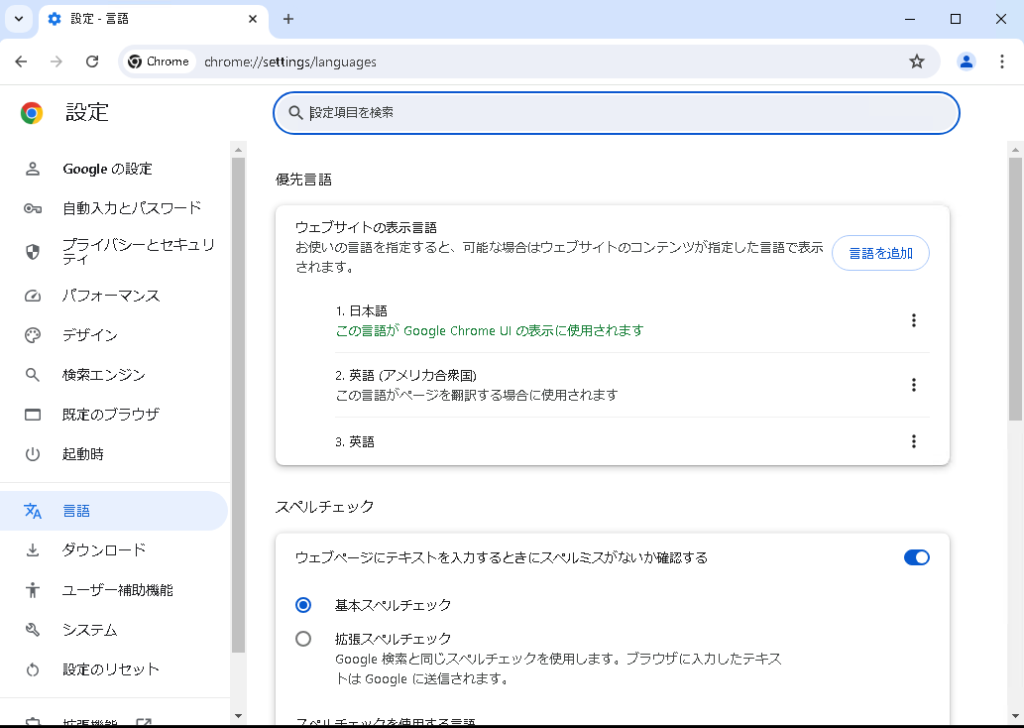
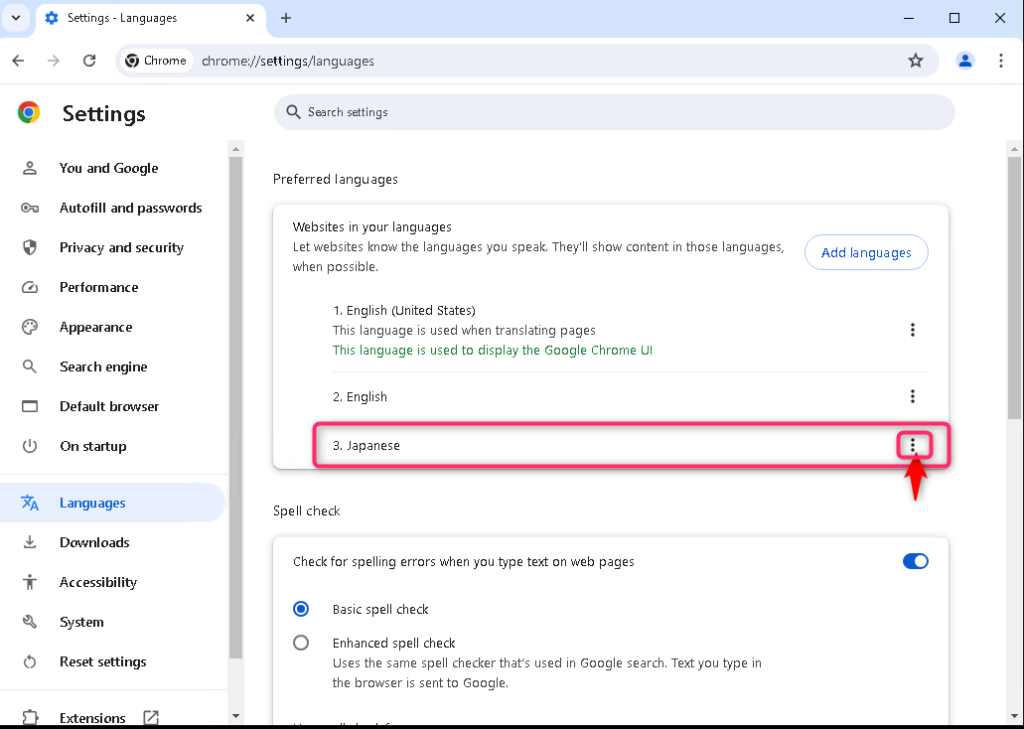
Step 5: Click on your preferred language
![](https://howto.hyonix.com/wp-content/uploads/2024/07/image-6-1024x729.png)
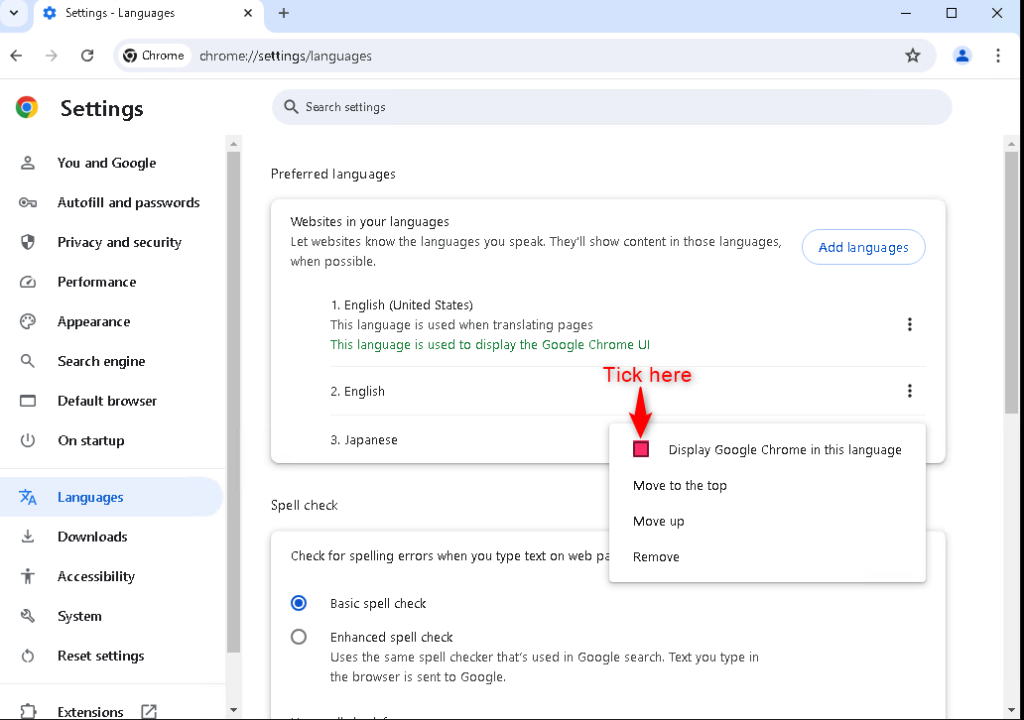
Step 6: Then tick on “Display Google Chrome in this language”
![](https://howto.hyonix.com/wp-content/uploads/2024/07/image-7-1024x720.png)
Step 7: Click Relaunch on your preferred language
![](https://howto.hyonix.com/wp-content/uploads/2024/07/image-8-1024x723.png)
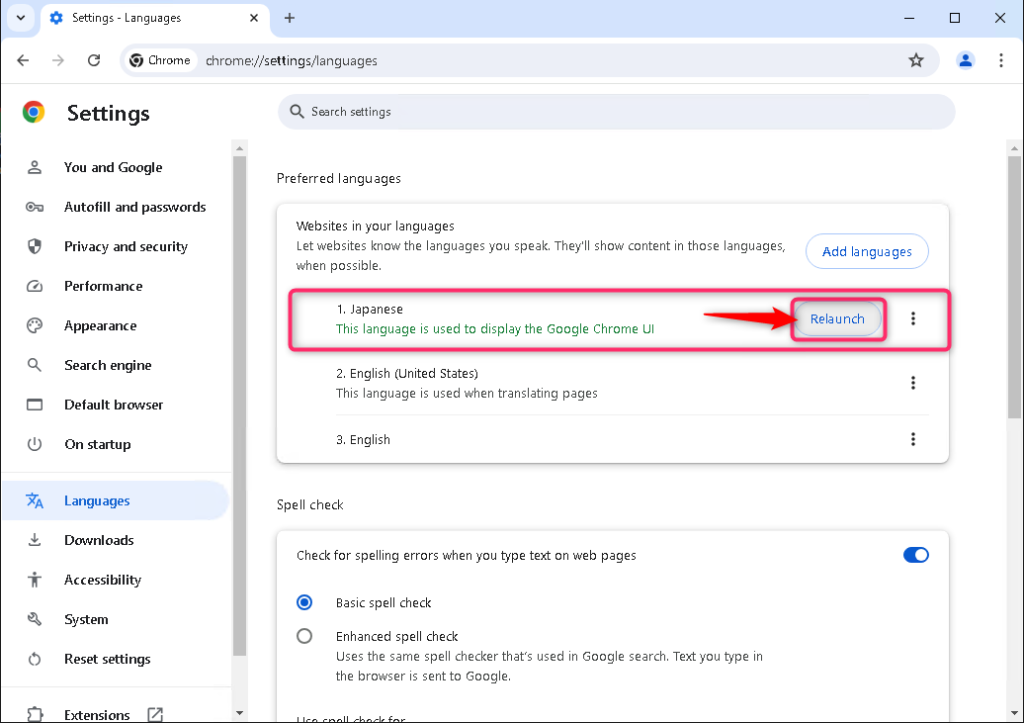
Your preferred language is now displayed on Chrome browser
![](https://howto.hyonix.com/wp-content/uploads/2024/07/image-9-1024x728.png)