Windows VPS takes the timezone of the server automatically as per the Server Location. If you want to perform any automatic task at a different timezone or if you want to configure the timezone of the server to the same as the local timezone then you might find this article very useful.
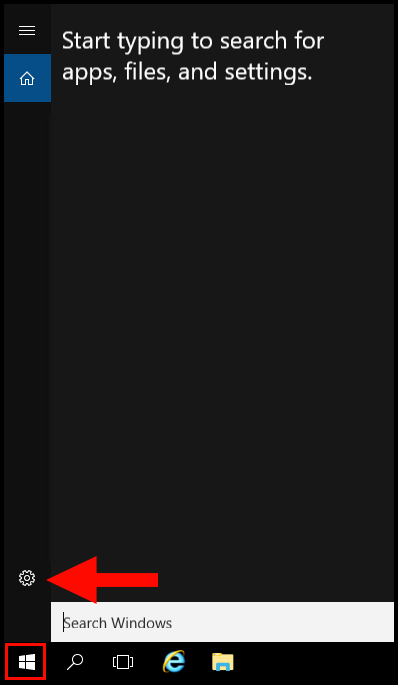
1. To start off, log in to your Windows VPS then open Settings.

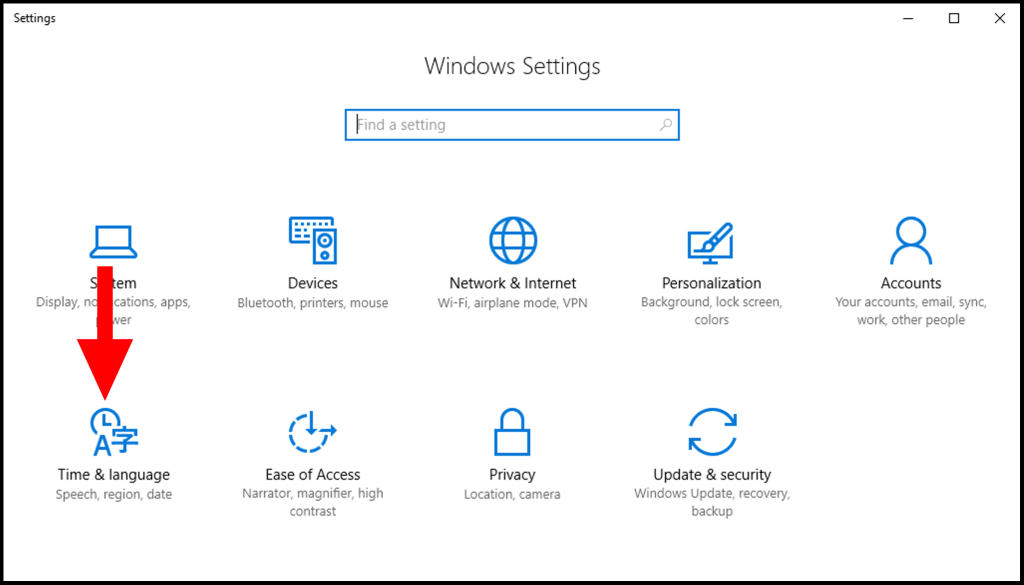
2. Then navigate to Time & language.

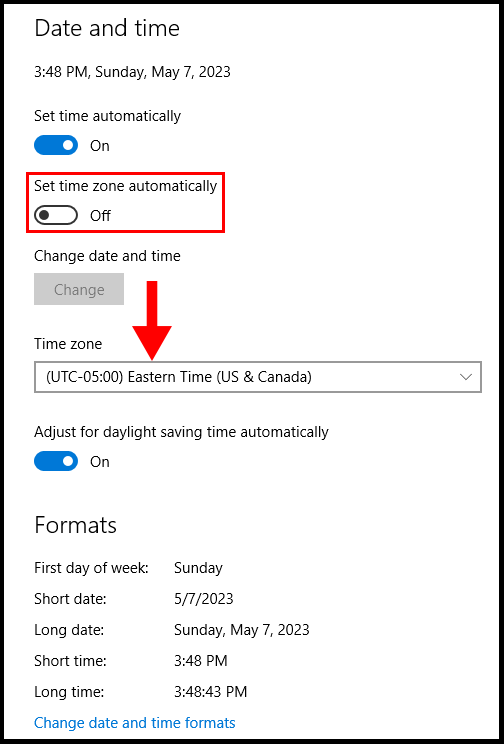
3. Then uncheck Set time zone automatically and then from the Time zone drop-down.

Disabling Hyper-V Time Synchronization Service Windows VPS
In Hyper-V virtualization, you need to disable Hyper-V Time Synchronization Service to prevent making custom changes in the server, or else in the next reboot timezone of the clock will be reset as per the server location. To do that follow the below steps,
1. To start off, log in to your Windows Server then search and open services.msc.

2. Then search and navigate to Hyper-V Time Synchronization Service.

3. Right-click on the service → Click on Properties.

4. In the pop-up, you will see the Service status shown as Running. Click Stop to stop the service.

5. Now we need to permanently disable the service, to do that select Disabled from the Startup type dropdown.

6. Lastly, click Apply to save the changes and then click OK to close out of the window.
