If you’re running a Windows Virtual Private Server (VPS), you know how important it is to keep your server secure. One of the most effective ways to do this is by setting up a firewall to regulate incoming and outgoing traffic. However, sometimes you may need to allow a particular program or application to communicate through the firewall, which can be a bit tricky. In this article, we’ll guide you through the steps to allow a program within your Windows VPS Server Firewall.
Allow Incoming Connections Of Program From Windows VPS / Server Firewall.
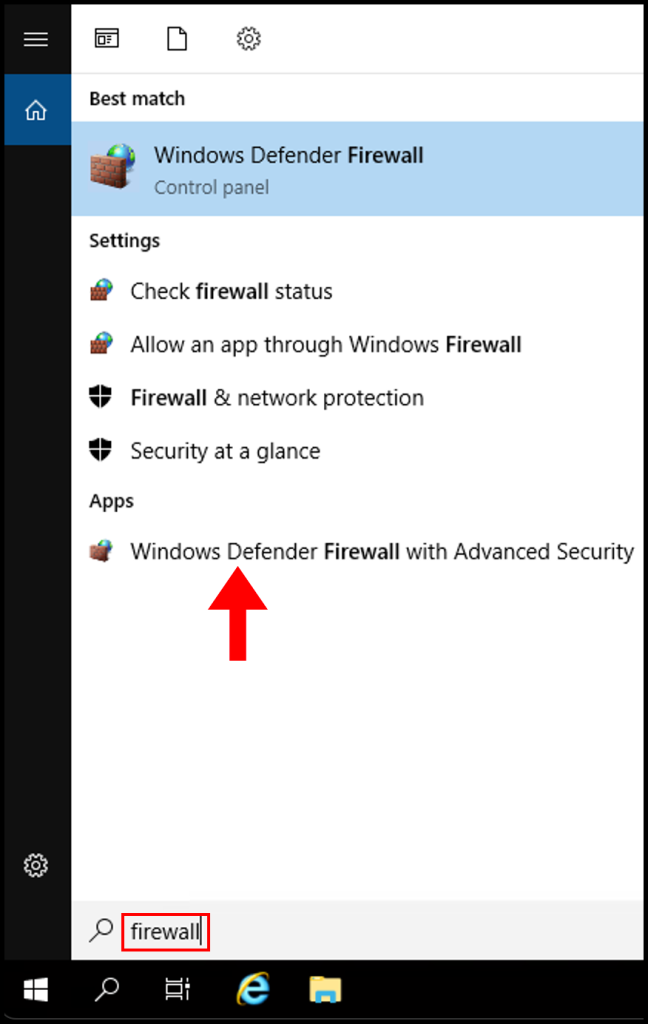
1. To start off, log in to your Windows server then search an open Windows Firewall with Advanced Security.
2. Then navigate to Inbound Rules on the left-hand side.
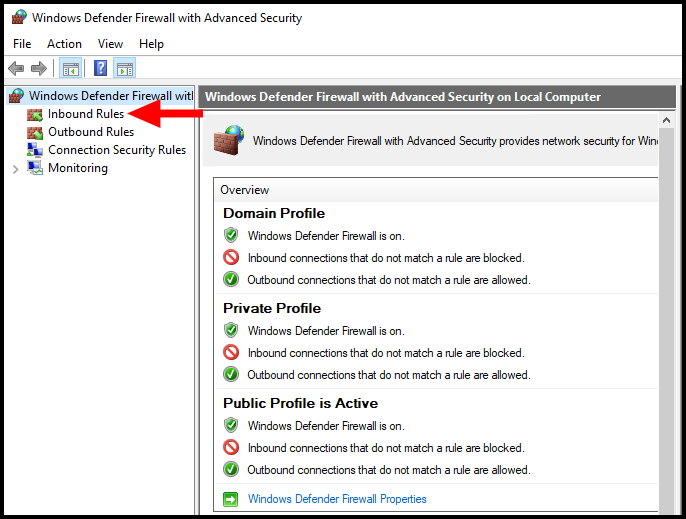
3. Next, click New Rule on the right-hand side.

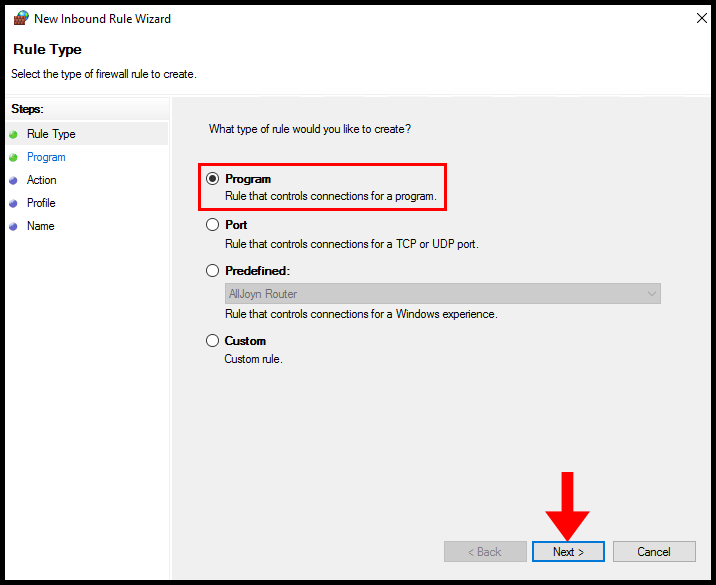
4. In the Rule Type section, select Program and click Next to move on.
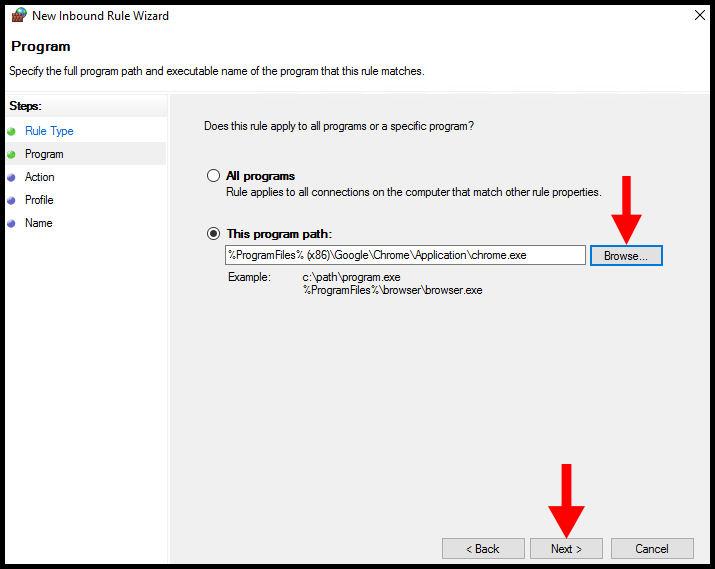
5. In the Program section, under This program path specify the path of the program you would like to allow.
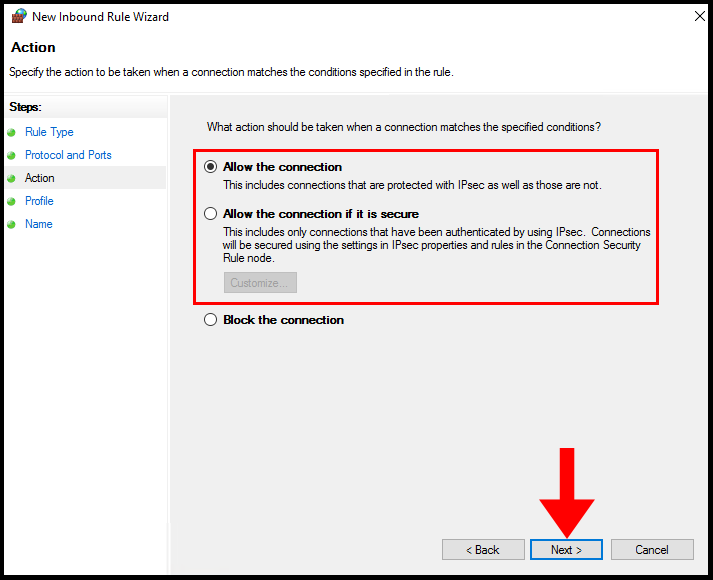
6. In the Action section, select Allow the connection or Allow the connection if it is secured then click Next.
Allow the connection: This includes connections that are protected with IPsec as well as those that are not.
Allow the connection if it is secure: This includes only connections that have been authenticated by using IPsec. Connections will e secured using the settings in IPsec properties and rules in the Connection Security Rule node.
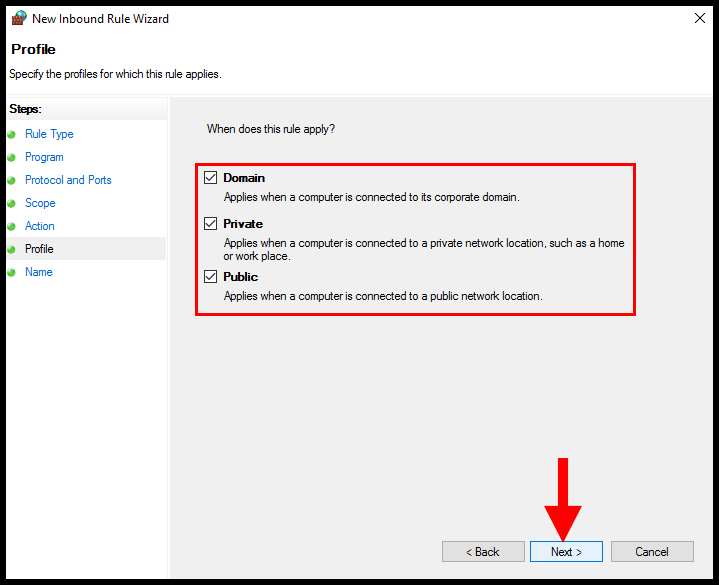
7. In the Profile section, you need to select the below options and click Next.
Domain: This applies to when the computer is connected to the corporate domain.
Private: This applies when the computer is connected to the private network.
Public: This applies to when the computer is connected to the public network.
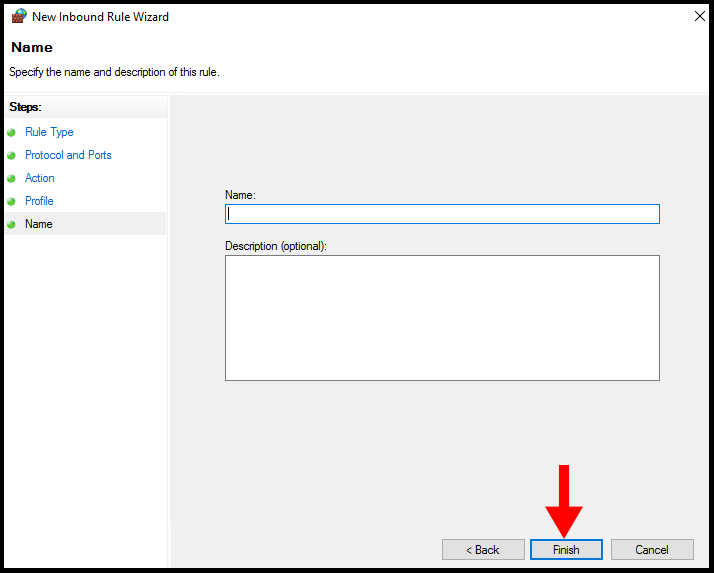
8. In the last step, you need to define the name for your custom Inbound Rule and click Next.
Allow Outbound Connections Of Program From Windows VPS / Server Firewall.
1. To start off, log in to your Windows server then search an open Windows Firewall with Advanced Security.
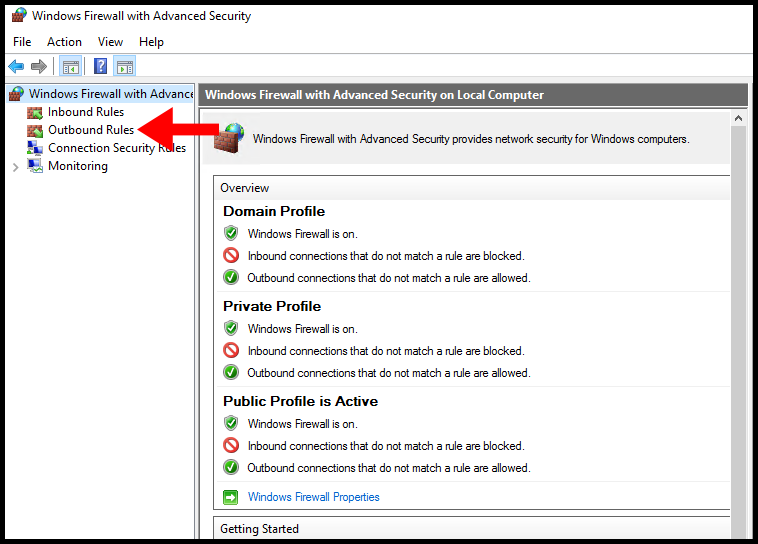
2. Navigate to Windows Firewall with Advanced Security → Outbound Rules.
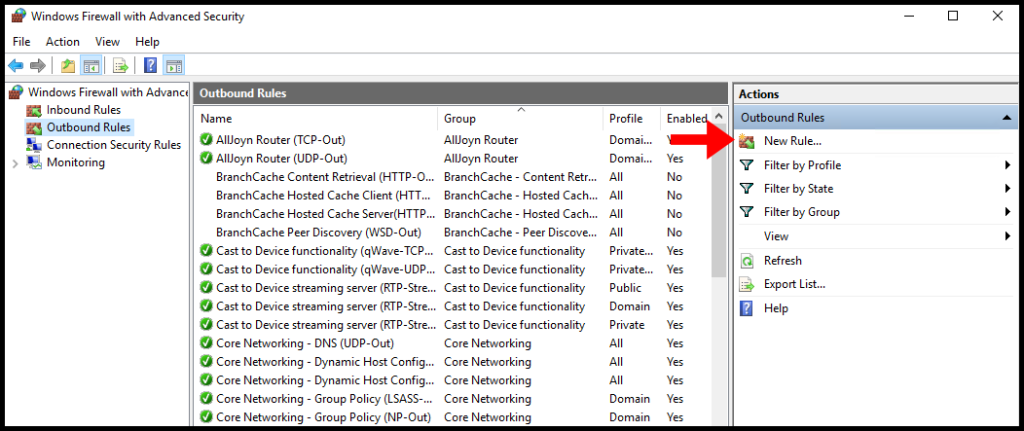
3. In the Rule Type section, select Program and click Next.
4. In the Program section, under This program path specify the path of the program you would like to allow.
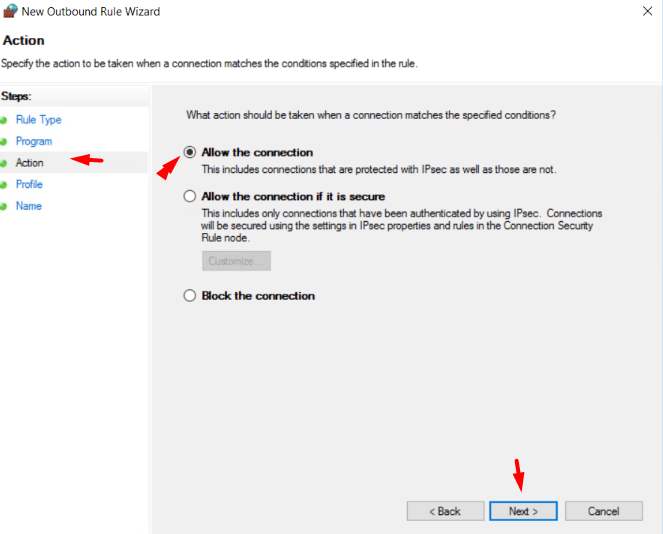
5. In the Action section, select Allow the connection or Allow the connection if it is secured then click Next.
Allow the connection: This includes connections that are protected with IPsec as well as those that are not.
Allow the connection if it is secure: This includes only connections that have been authenticated by using IPsec. Connections will e secured using the settings in IPsec properties and rules in the Connection Security Rule node.
6. In the Profile section, you need to select the below options and click Next.
Domain: This applies to when the computer is connected to the corporate domain.
Private: This applies when the computer is connected to the private network.
Public: This applies to when the computer is connected to the public network.
7. In the last step, you need to define the name for your custom Inbound Rule and click Next.