In this article, you will learn how to add funds to your Hyonix account.
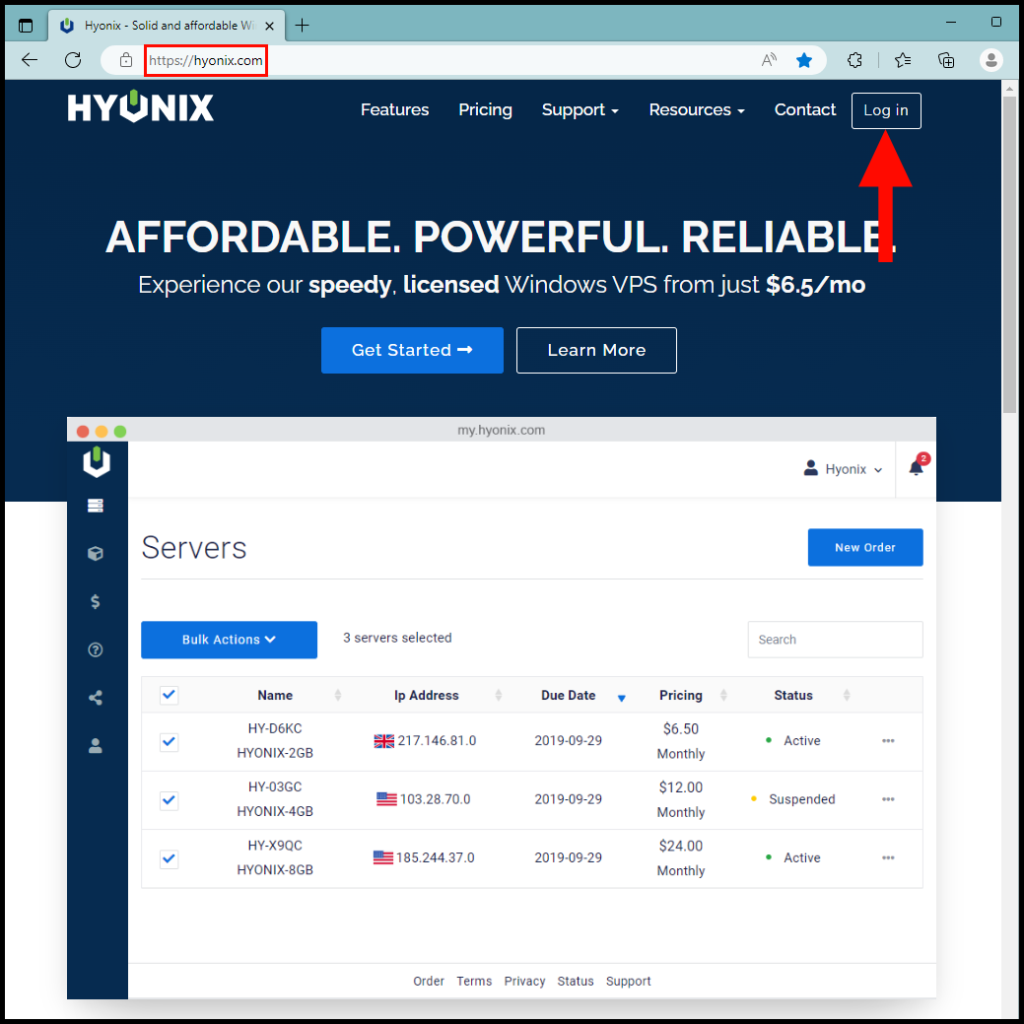
1. First, navigate to the Hyonix website and log in to your account.
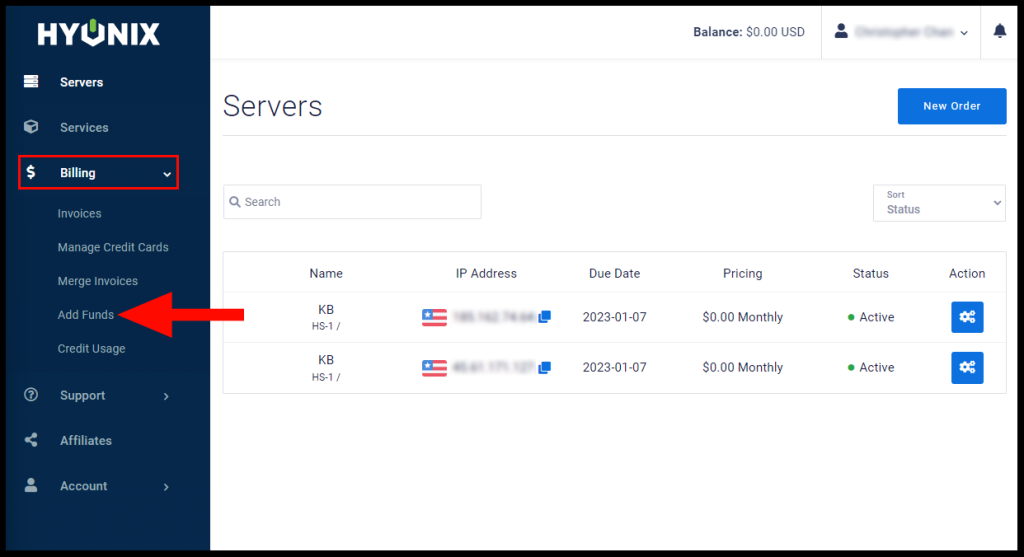
2. Once you’re logged in, click the Billing drop-down menu and select Add Funds.
3. Next, you can input the number of funds you would like to add in the text box under Amount to Add and select the payment method in the drop-down menu under Payment Method.
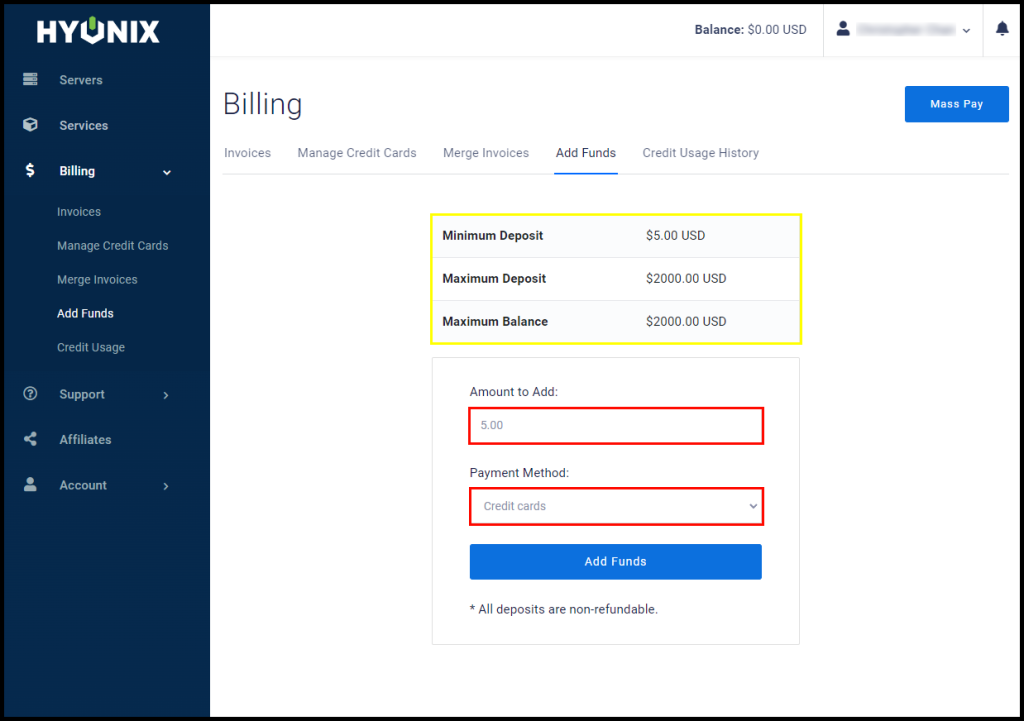
4. Finally, click on the Add Funds button to add the funds to your Hyonix account.
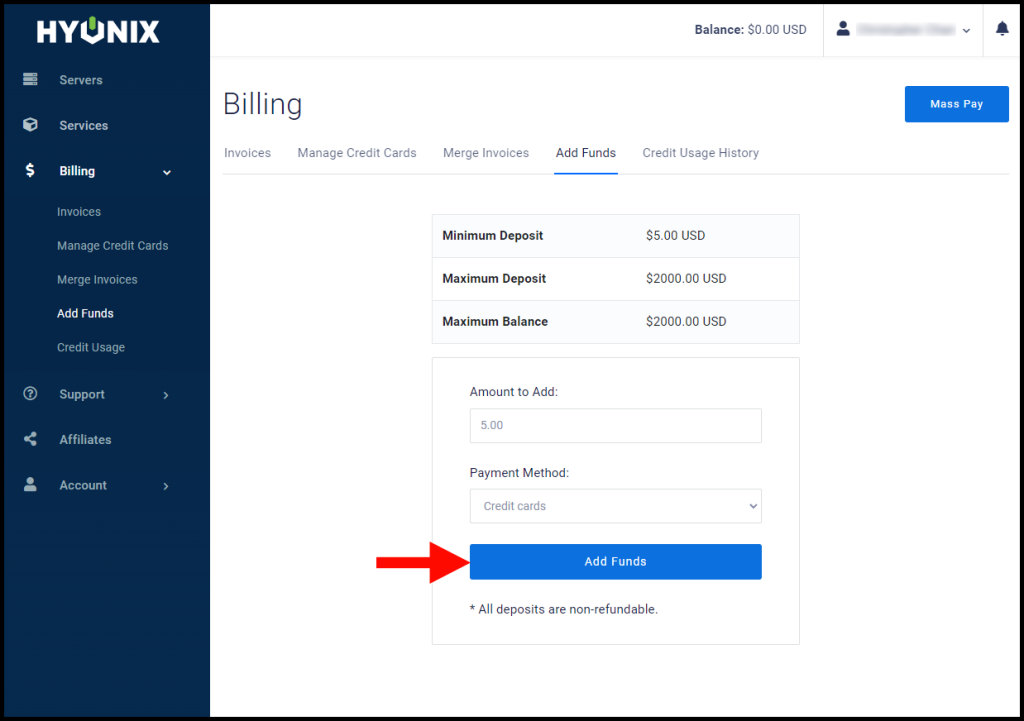
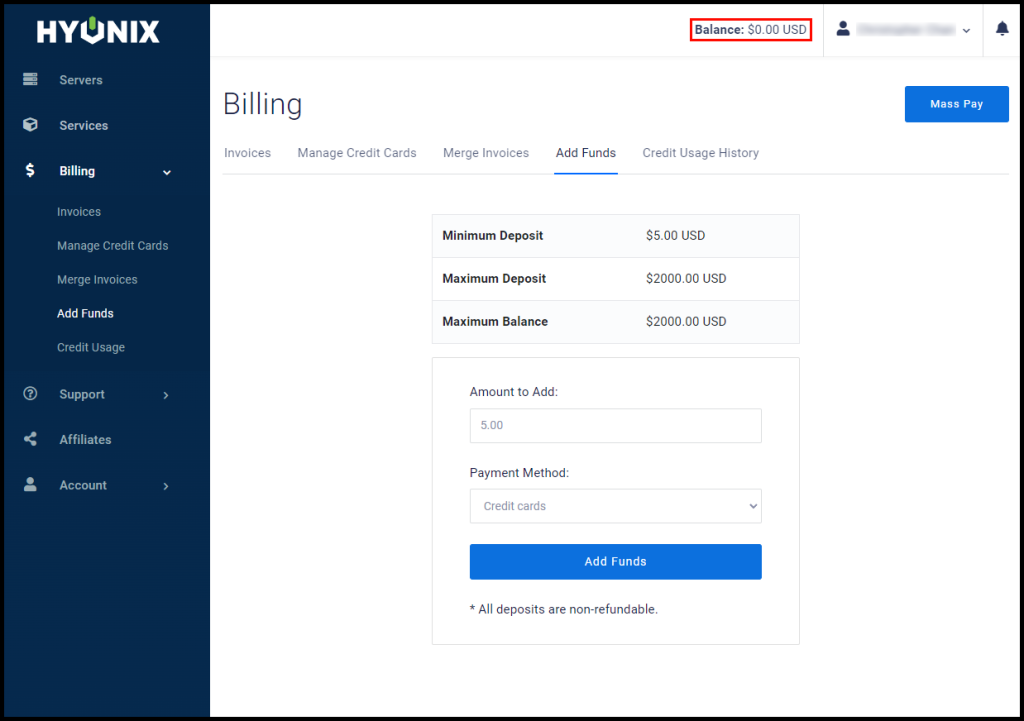
5. You can verify that you have successfully added funds to your account by checking the top right, next to Balance.